Install vGateway on Windows Server - example of implementation
Overview
In this article, you’ll learn how to run Acreto vGateway on a Windows Server machine. This process involves the following steps:
Before You Start
Case study
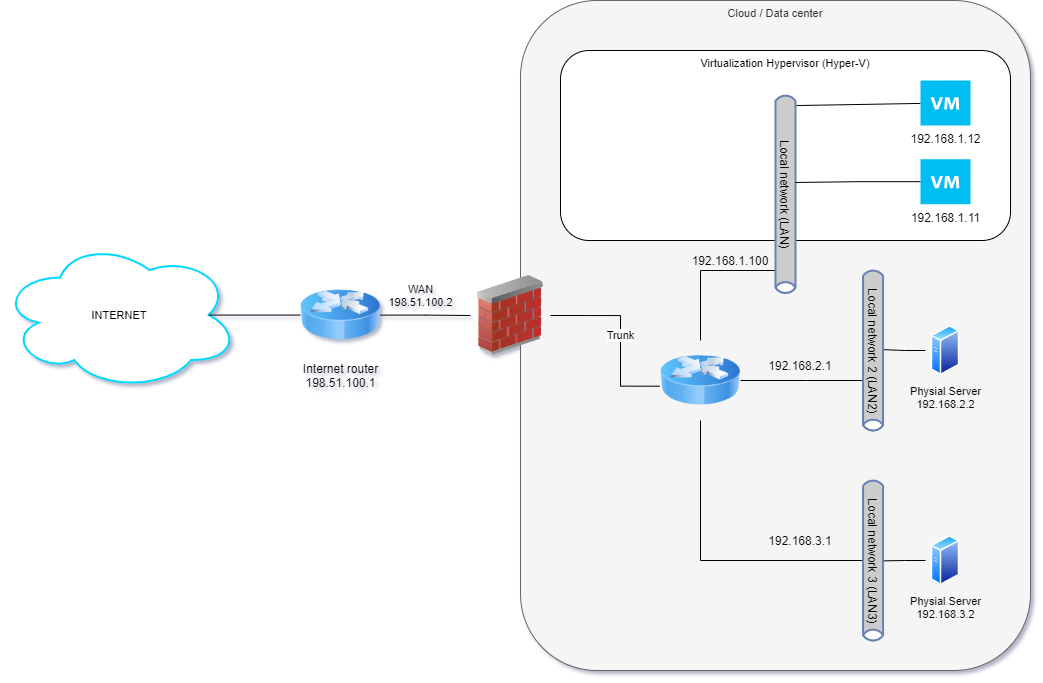
In this example, our target is to connect the existing virtual server to Acreto Ecosystem. The selected server works as a Virtual Machine based on Windows Server 2019 Hyper-V. In the same data center/cloud exist also other servers connected to different internal LANs but using the same Internet Router. The existing configuration was presented in the below diagram.
To connect the selected server to Acreto Ecosystem we will use the vGateway - a small virtual machine-generated by Acreto Wedge. This machine will be installed on the same host that other virtual machines in Data Center and connected to the same internal network. Also, network routing will be changed to redirect “external traffic” from/to the selected server thru Acreto vGateway.
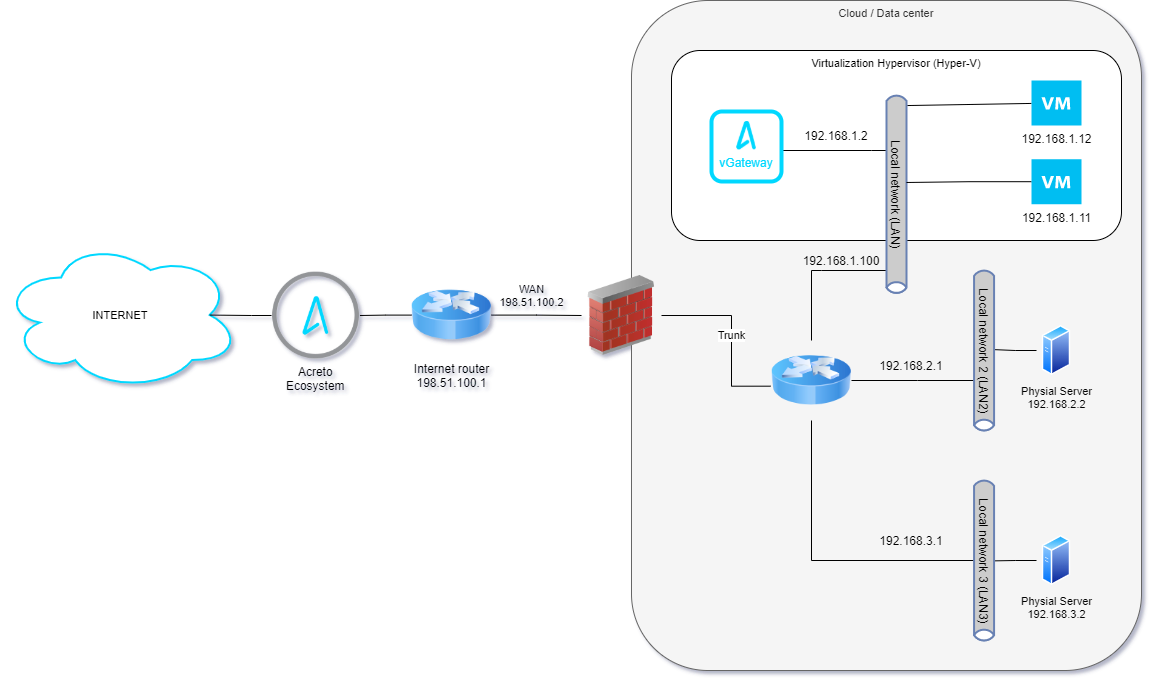
The step-by-step procedure will be described in the below article.
Prerequisities
To run vGatway on Hyper-V, you will need:
- Active Acreto Ecosystem.
- Windows Server machine.
- Get familiar with Introduction to vGateway.
- Knowledge of network infrastructure and routing rules.
Configuration of Acreto Ecosystem
Create and configure vGateway
- Log in to an Acreto platform at wedge.acreto.net
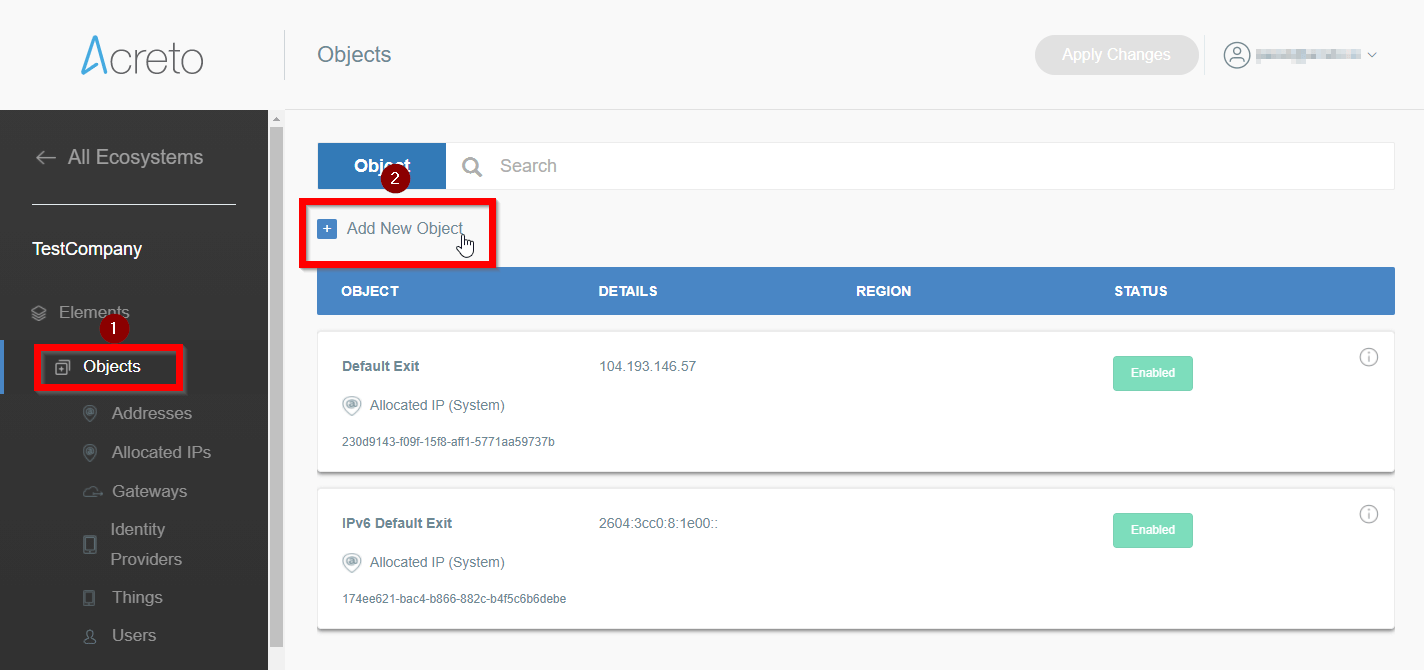
- Select your ecosystem and go to Objects (1) using the left menu.
- Click Add new Object(2) and select the Gateway Option.
- Fill at least:
- Name: - the name of the created gateway. Needs to be compatible with Strongswan connection name requirements (basically, only letters and numbers). In this example- s01gateway
- Category: IoT
- Switch Gateway type to vGateway and set the specific setting for vGateway:
- DHCP/Static: - select the method of assigning addresses on the network> In this example - Static
- vGateway Internet IP - IP address with a netmask of internet-facing (WAN) interface. In this example: 198.51.100.2/24
- vGateway Default Route - IP address of your Internet gateway/router that allows access to the Internet, for example 1.2.3.1. In this example 198.51.100.1
- vGateway Local IP: - address of local (LAN) interface of your device. In this example 192.168.1.2/32
- Local Networks: - your local network addresses that should be routed through this gateway.
In this example fill only the left field in the row: 192.168.1.12/32.
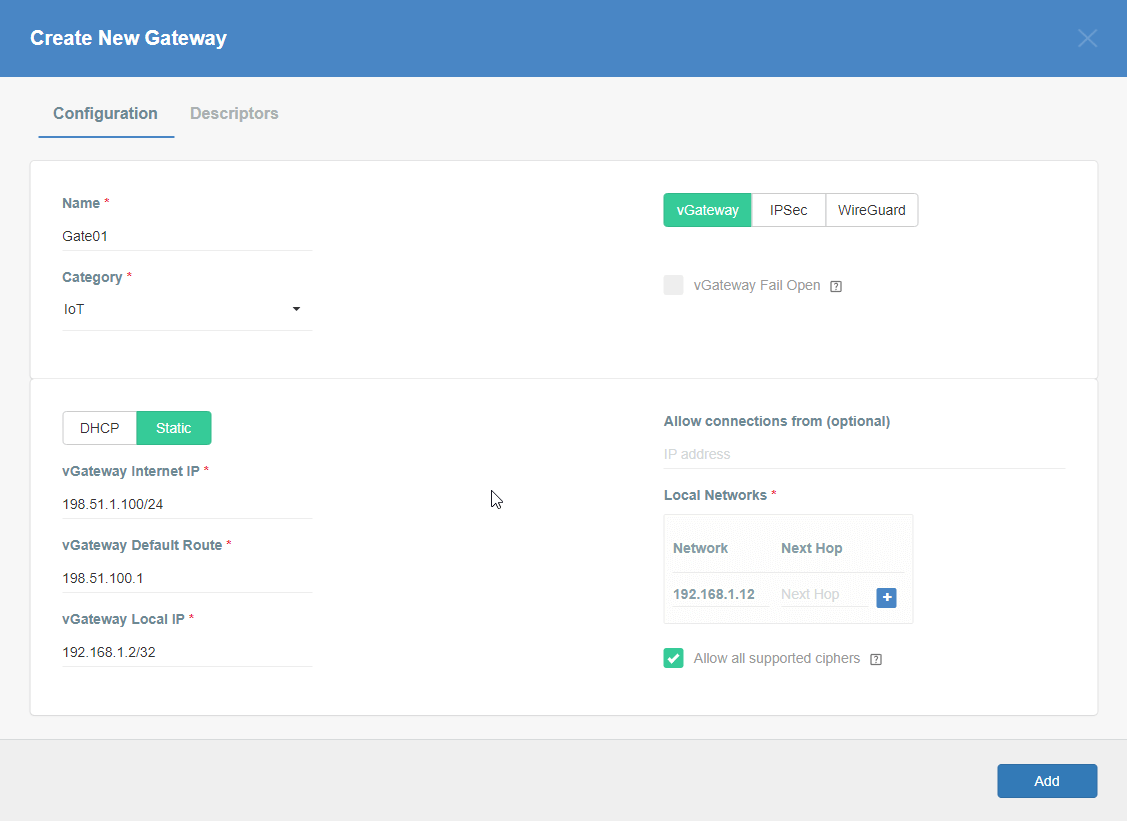
- Save the created Gateway by pressing Add.
- Add security policy that will allow communication from the Gateway device to the Internet:
- From the left menu choose the Policies option (1), then click on the + Add New Policy button (2).
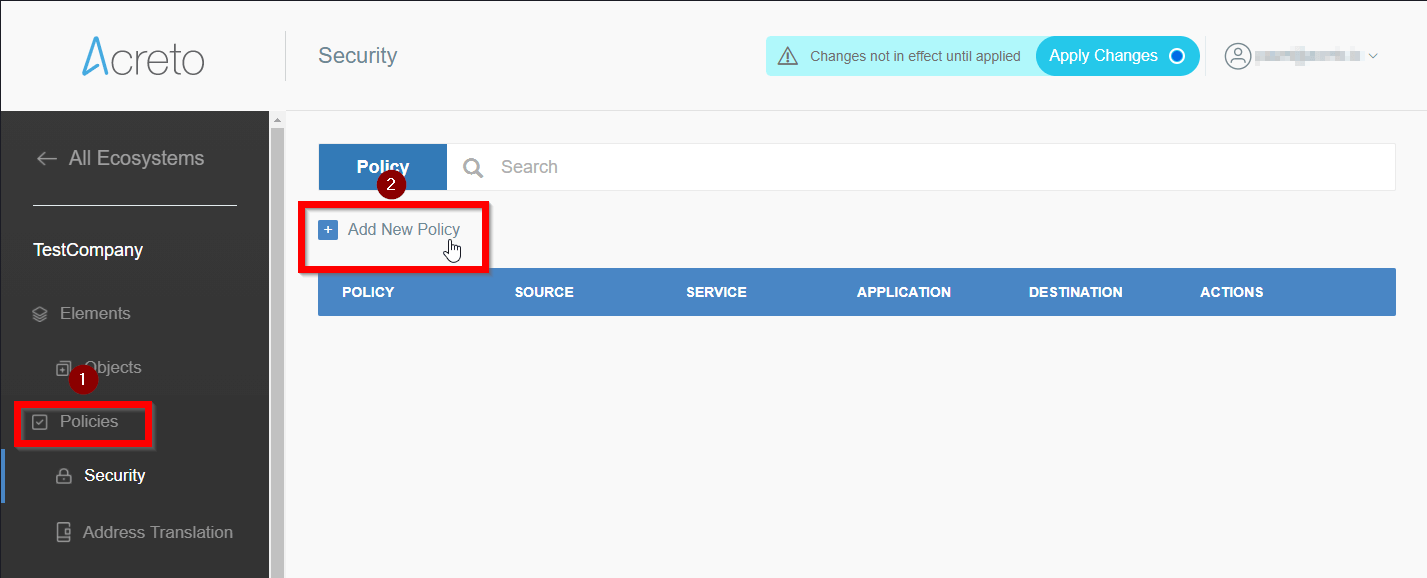
- Fill the form with values similar to that from the screen.
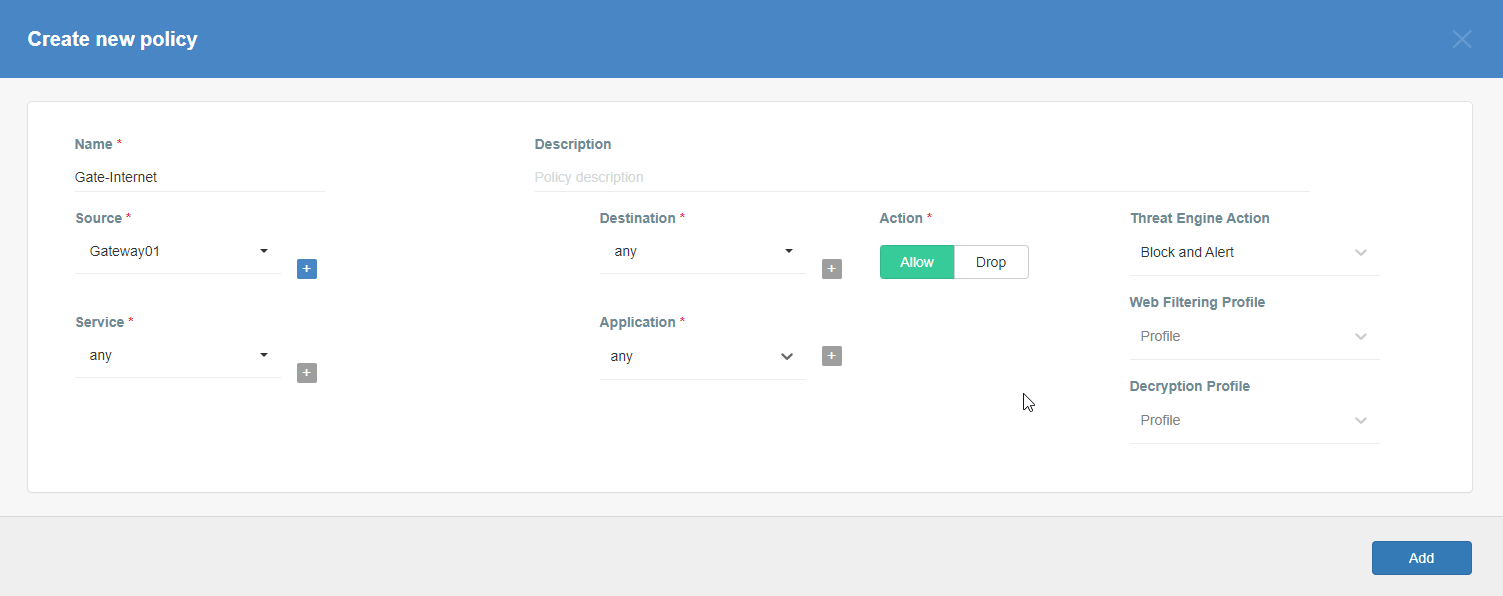
- Save the new policy by clicking on the Add button.
- From the left menu choose the Policies option (1), then click on the + Add New Policy button (2).
- Commit pending changes (top of the screen)
- Go to Elements > Objects > Gateways menu position.
- On the list of existing gateways choose this created in the previous step, click on its name.
- Choose VM and Cloud Images to expand the available option for download virtual images.
- Click on Play for Microsoft Hyper-V .vhdx vGateway Image option. Generation of image for you Gateway may take a while, please be patient.
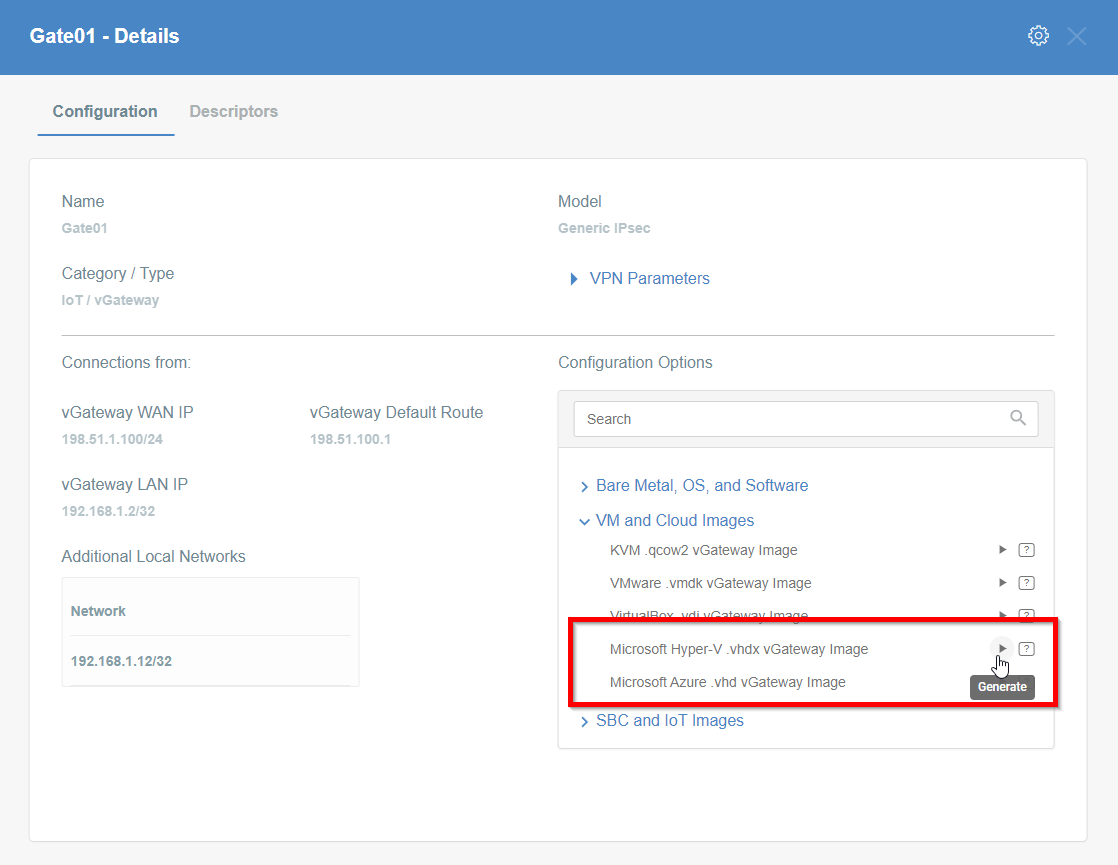
- When the image will be ready you may download it or copy the URL - save it on your Windows Server machine.

vGateway image installation
Adding the Hyper-V role to your Windows Server
Hyper-V feature is disabled by default in Windows Server. If you are sure that this option is already turned on on your machine you may skip this step.
To turn on Hyper-V on Windows Server:
- Log in to your Windows Server.
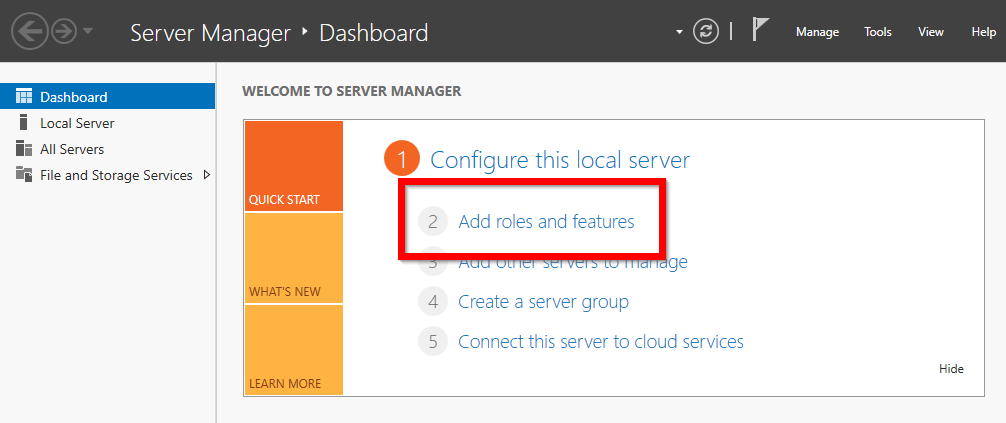
- Open the Server Manager Panel.
- Choose Add roles and features
- Choose Role-based or feature-based installation and click on the Next button.

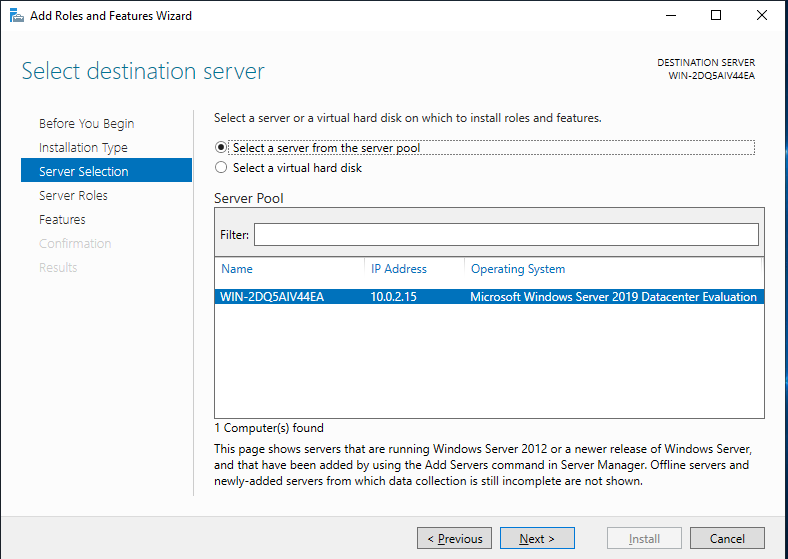
- Choose Select a server from the server pool and mark one on the list of available servers.
- On the list of the available roles search for Hyper-V, check this option and click on the Next button. If this option is already checked there’s no need to activate the Hyper-V option.

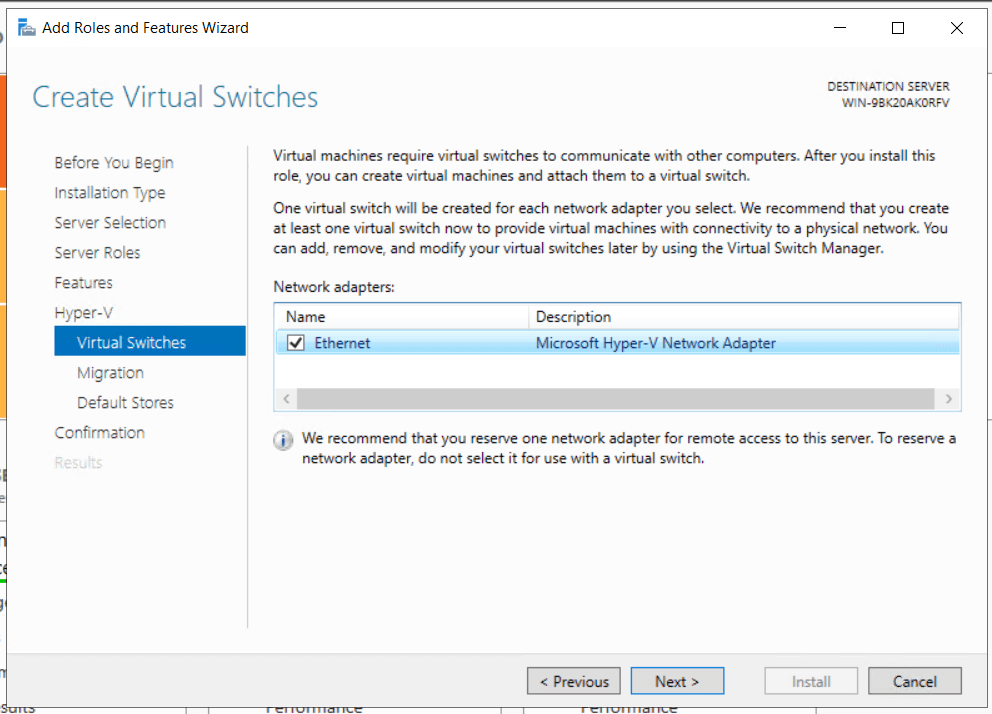
- On Hyper-V Virtual Switches screen choose the proper switch for your network configuration.
- Go thru the rest of the configuration screens.
- Restart the machine to finish Hyper-V Installation.
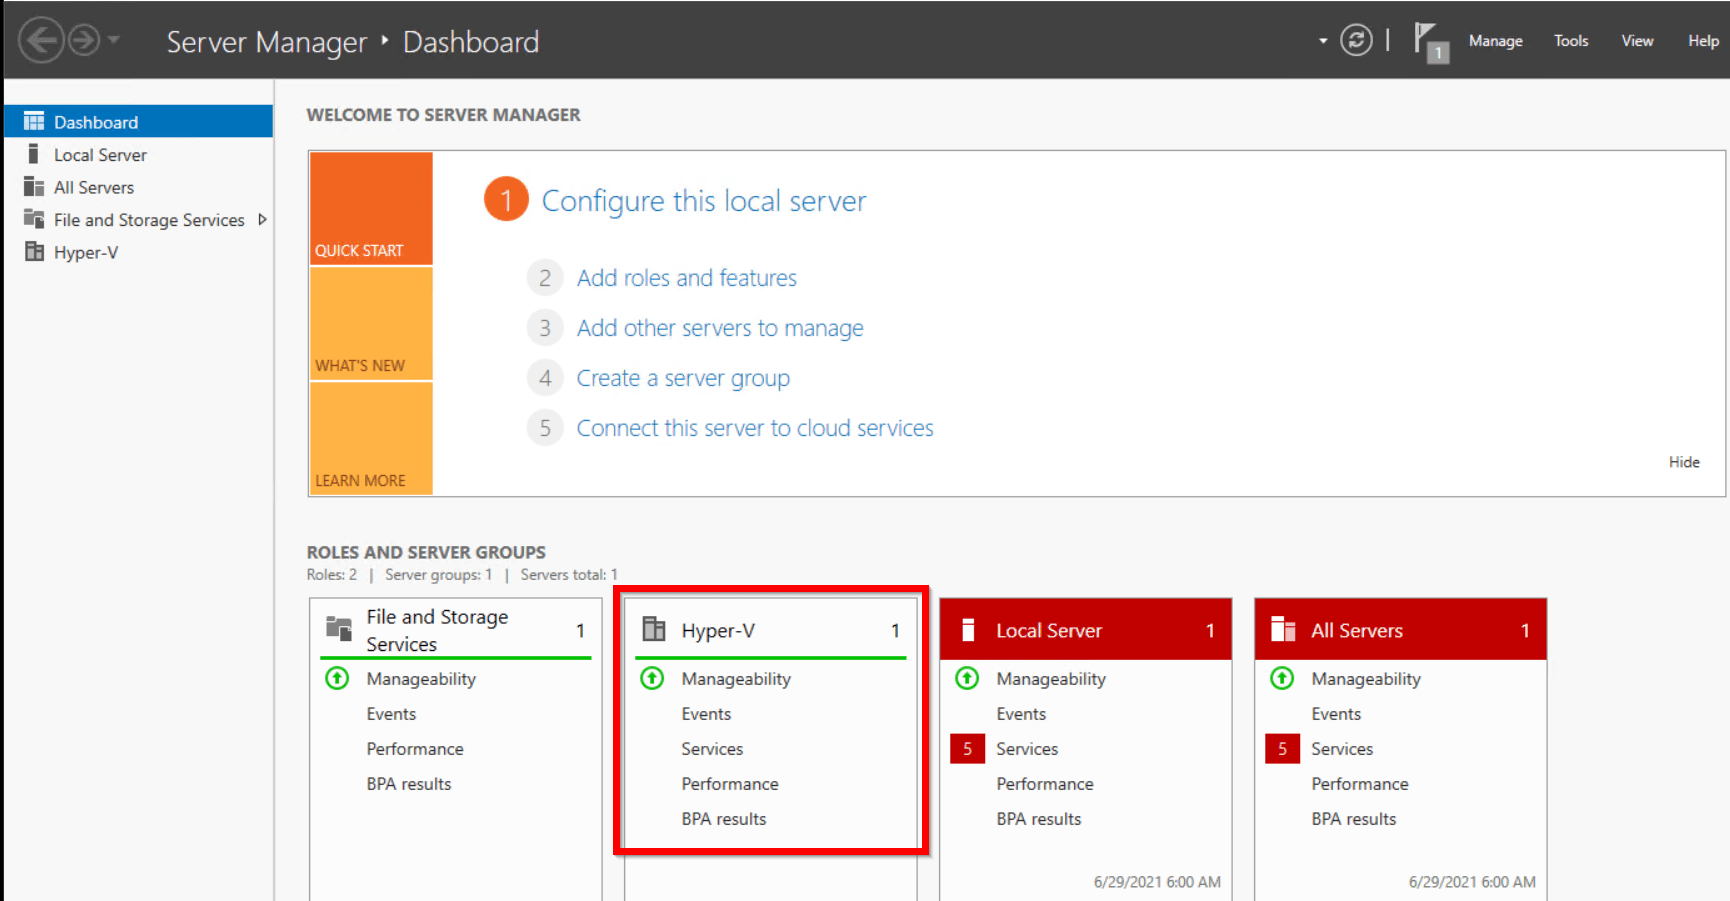
- After reset you should see Hyper-V in Roles and server groups.
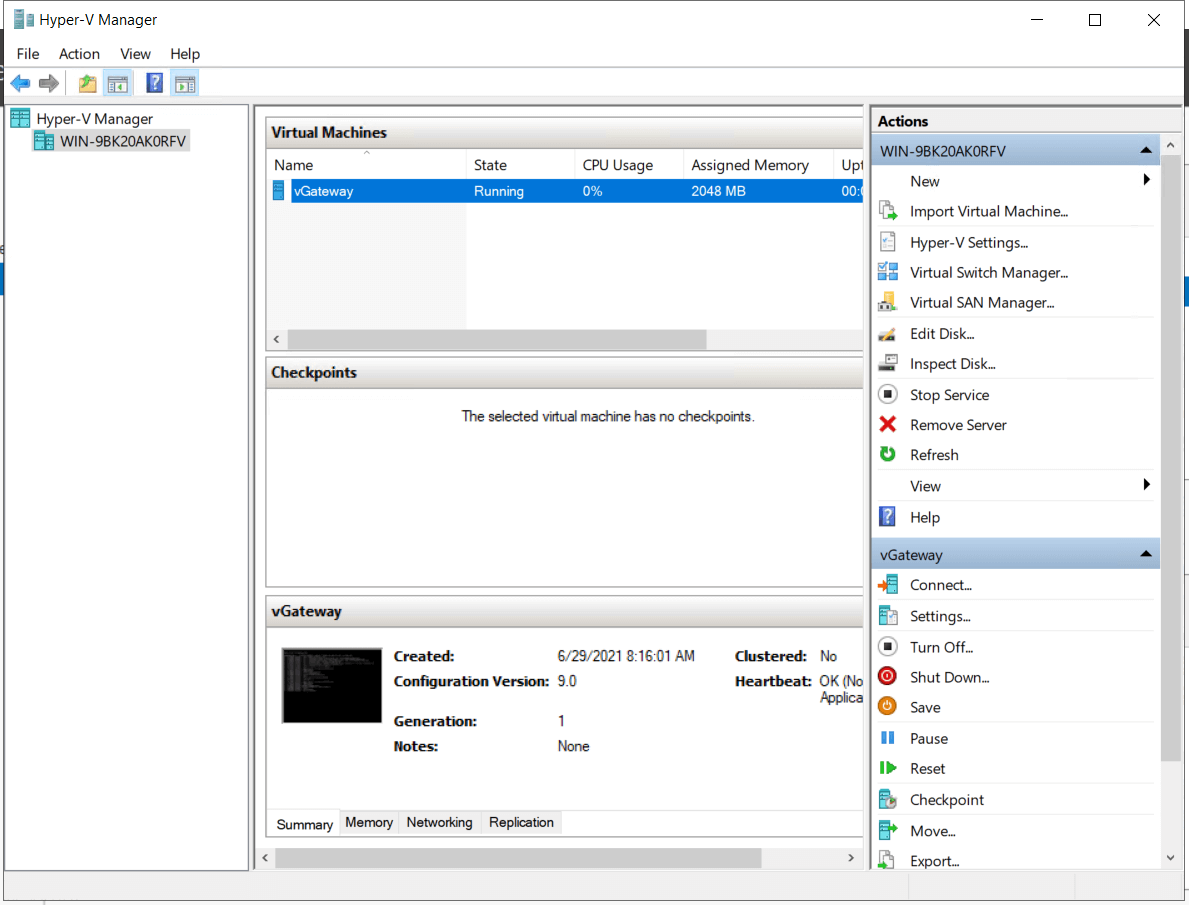
Install vGateway image
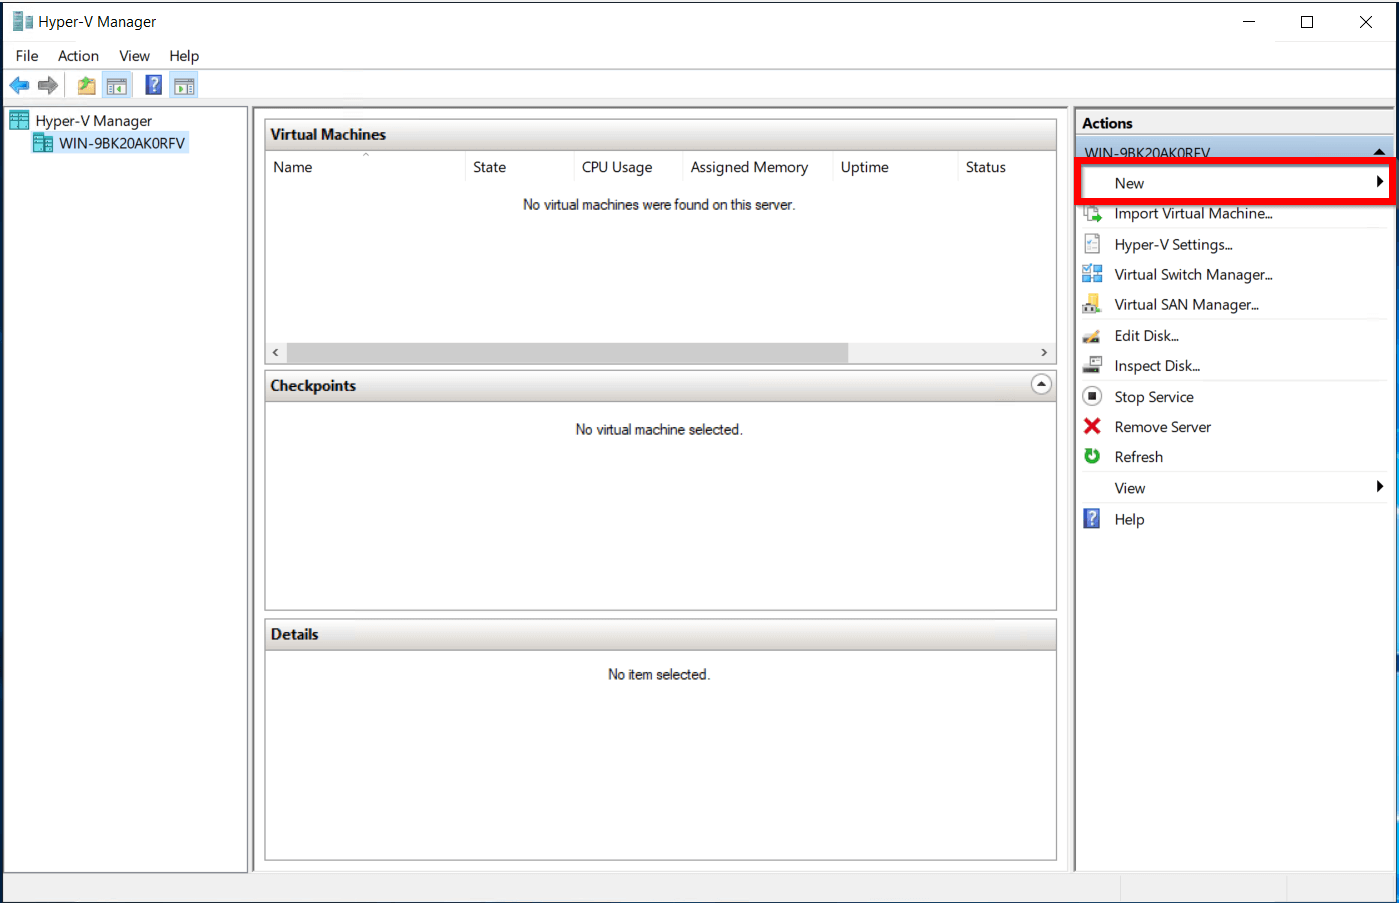
- Open Hyper-V Manager and select the New option to create a new virtual machine.
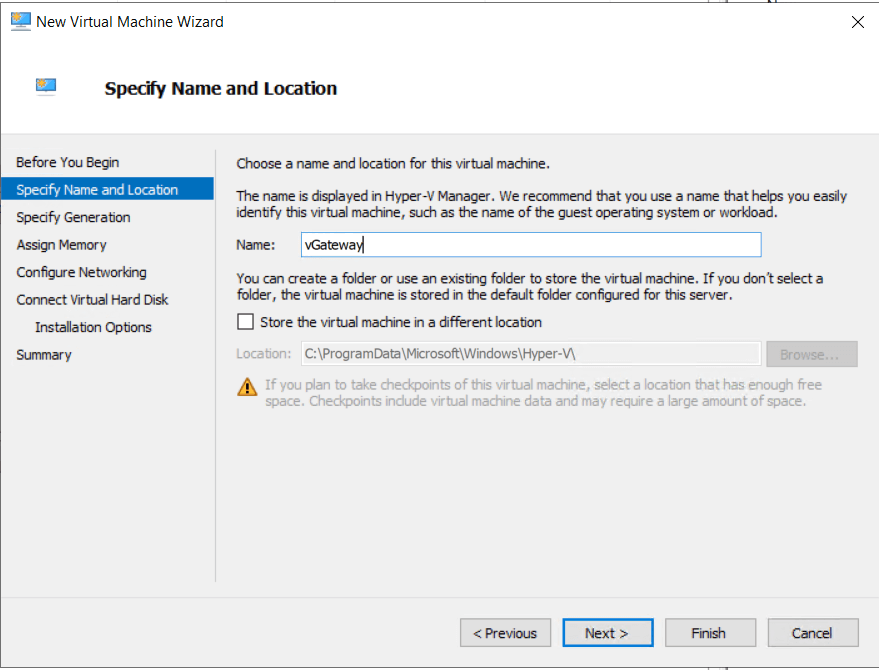
- On the Specify name and location screen call your new VM vGateway.
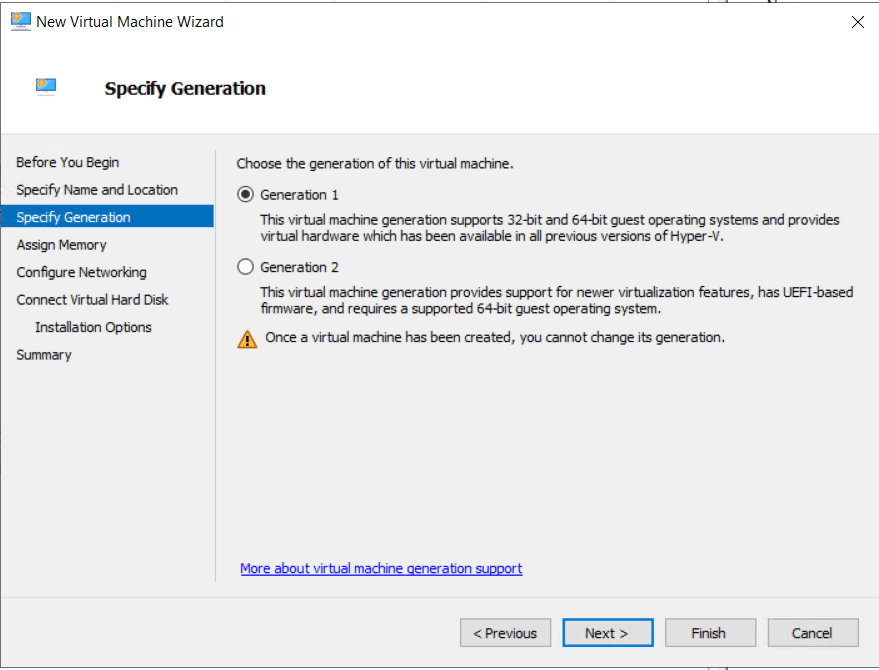
- On the Specify generation screen choose Generation 1
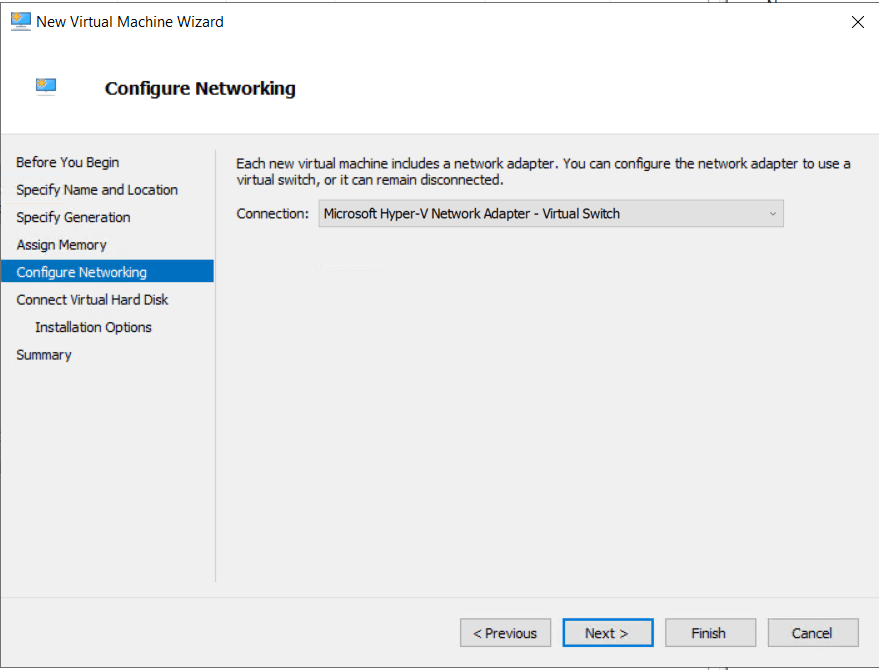
- On the Configure network screen connect VM to the proper interface.
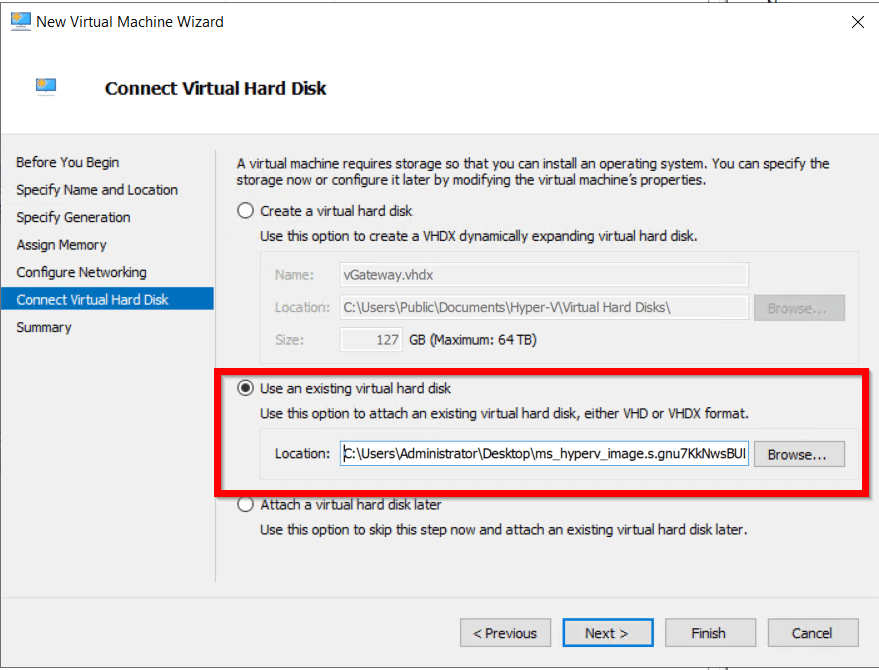
- On the Connect Virtual Hard Disc screen choose Use an existing hard disk and select downloaded vGatway image.
- Go thru the rest of the configuration steps and run the VM.
- Once the VM is up and running, you should be able to SSH to it with password authentication as:
- login: acreto
- password: acreto.io
- Change your password after the first login
Connectivity check
- Test the network connectivity
- IPsec status showing the tunnel status
ipsec statusall - Traceroute to check if the traffic goes through Acreto Ecosystem
traceroute 8.8.8.8 - More information about checking the connectivity can be found under Connectivity Check the article where a dedicated tool is available.
Summary
Thanks to the Hyper-v technology you were able to install Acreto vGateway in just a few steps. Users can connect to an Acreto Ecosystem with the same credentials utilized for other internal resources on their network domain.
Also, Acreto Ecosystem Admin(s) can re-use any existing password and security policies that are already in place. For example, the Active Directory may already have account lockout and password expiration policies.