vGateway image installation on VMware ESXi
Overview
This article shows how to set up vGateway on ESXi to connect your network to Acreto Ecosystem.
Task 1: Create a new Gateway
To set up the vGateway on ESXi first it needed to configure the Gateway object. Please follow the steps in the Gateway creation guide with the vGateway as a gateway type.
Task 2: Generate VMware .vmdk type vGateway Image
To generate a VMware Gateway image, you need to:
- In the Elements > Objects > Gateways menu, click on the specified vGateway name - the details panel will appear.
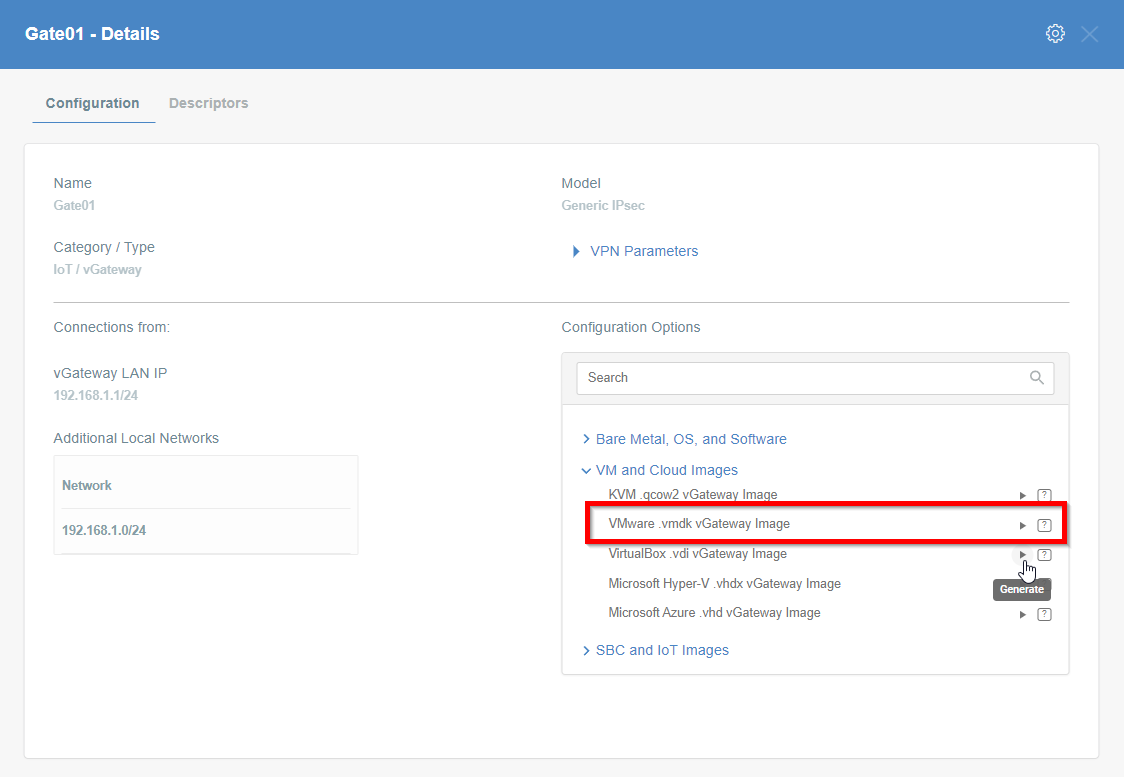

- On the right side of th, click on VM and Cloud Images images to show a list of options to generate images.
- Click the play icon next to the VMware.vmdk vGateway Image entry.
- The generation of the image may take a while; please be patient.
- When the image is ready, download it and rename it to Acreto-vgw.vmdk.


Task 3: Installation of Virtual gateway in ESXi
To install the generated .vmdk image on VMware, we need to proceed with uploading the image to VMware.
1. Upload .vmdk file in ESXi
Once we have the .vmdk configuration image file downloaded from Wedge. Now we will upload this file to ESXi Database by following the steps below:
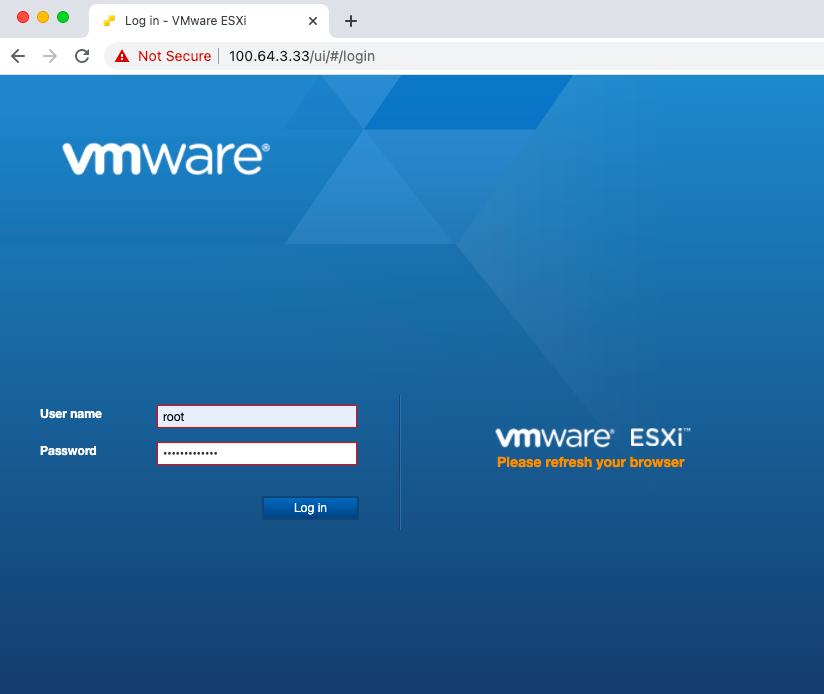
- Log in to VMware ESXi in the browser using your username and password.

- Goto Storage from the left Navigator panel.
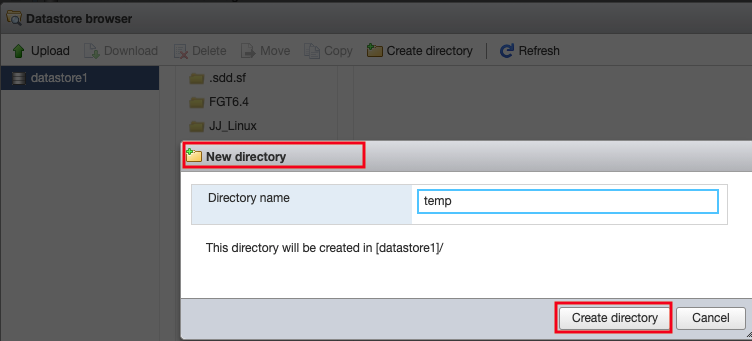
- Click the Datastore browser.


- Click Create directory and create a temp directory.

- Upload the downloaded vmdk file.
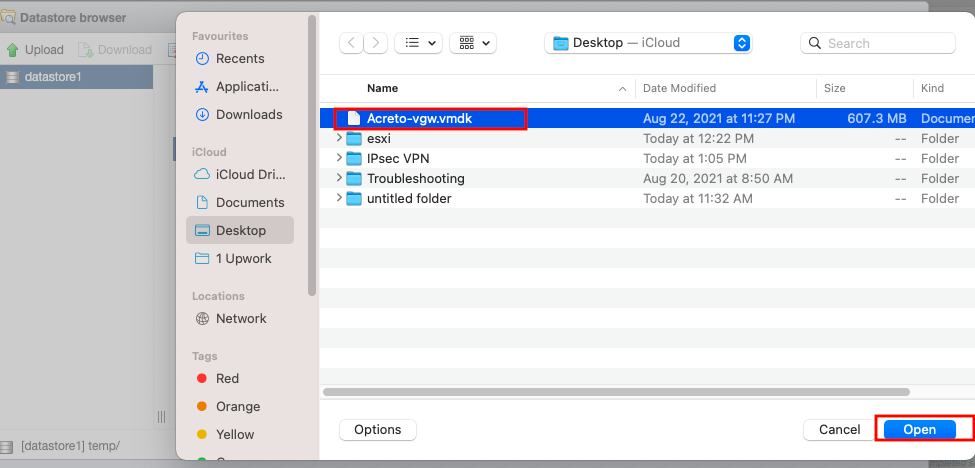

- Once the file is uploaded, Close the screen.
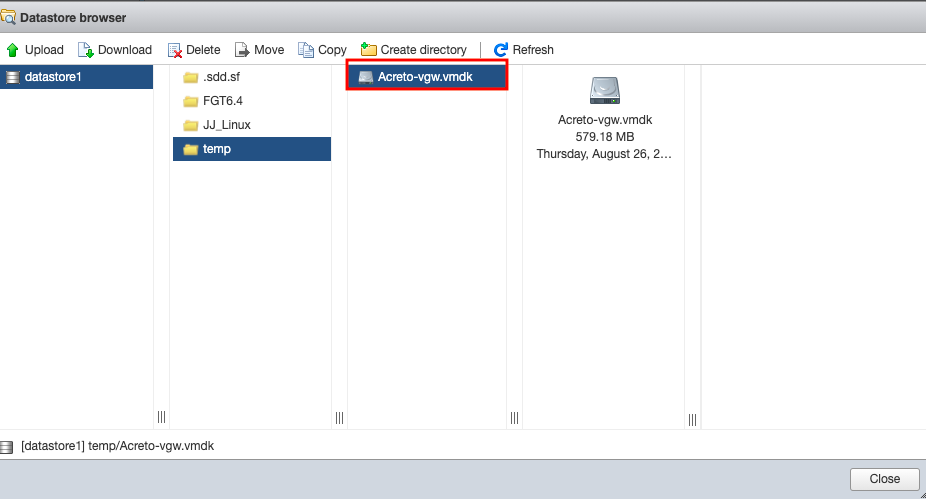

2. Create a new Virtual Machine
We will create a new virtual machine and add two network interfaces connecting it with the inside and outside network.
- Click Virtual Machine from the left Navigator panel.
- Click Create / Register VM.


- Select Create a new Virtual machine in the Select creation type page on the wizard.
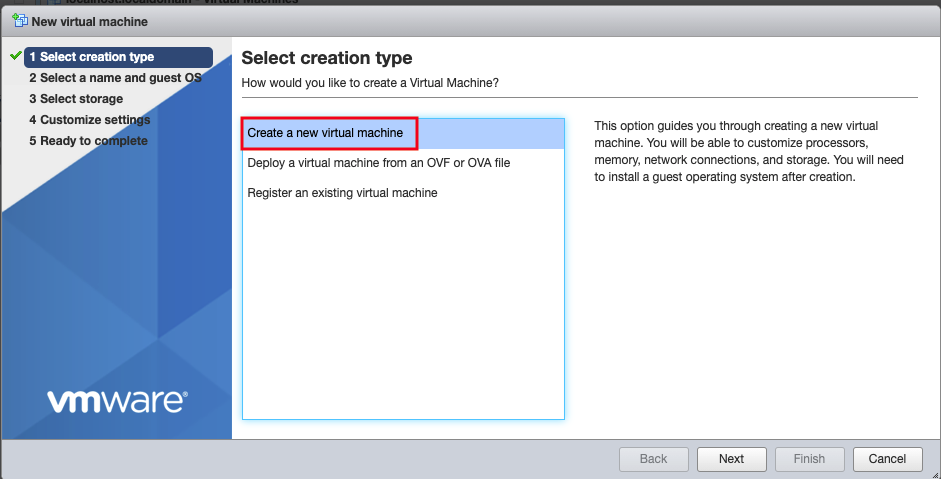

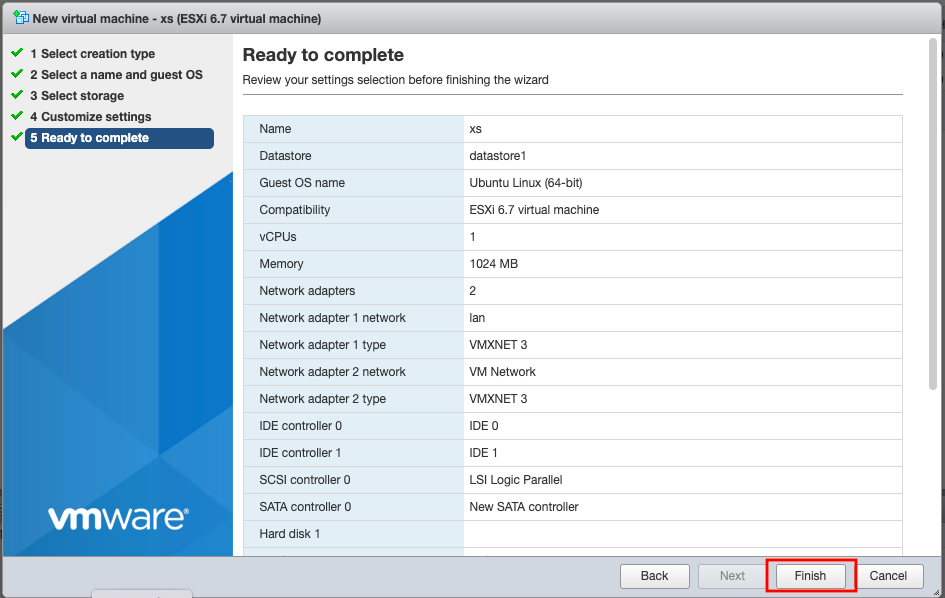
- On the Select a name and guest OS, specify the VM values for ESXi and click Next.
- Name: Acreto gateway
- Compatibility: ESXi 6.7 virtual machine
- Guest OS family: Linux
- Guest OS version: Ubuntu Linux (64-bit)
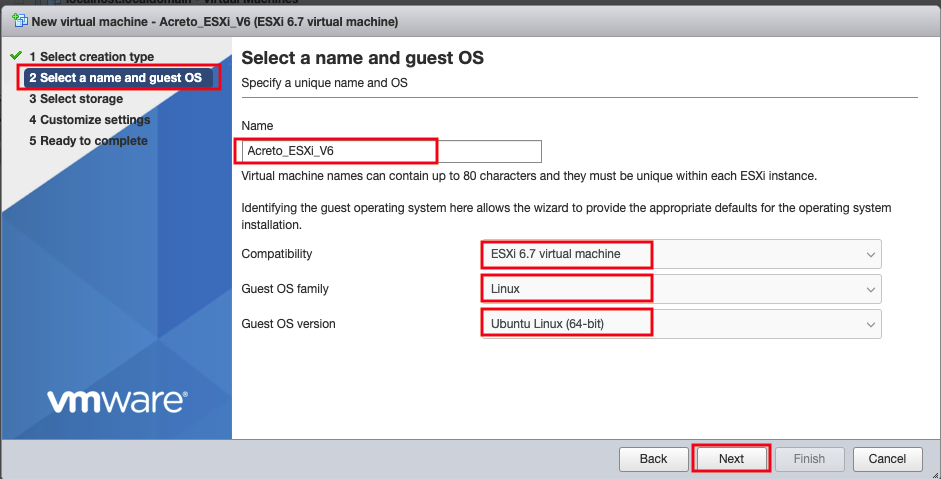

- Click Next on Select Storage page.

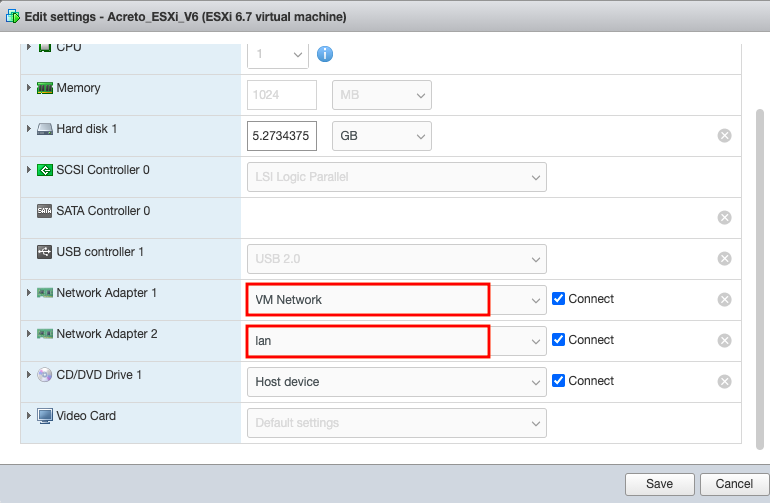
- Review the hardware setting. Also add a new network adapter. One network adapter shall be in the LAN subnet and the other one in the WAN network. Click Next.
3. Move the vmdk file new VM directory
We will move the preconfigured vmdk file from the temp directory to the VM Acreto gateway.
- Goto Storage from left Navigator pane.
- Click Datastore browser.


- Goto temp folder, select the vmdk file and click Copy.
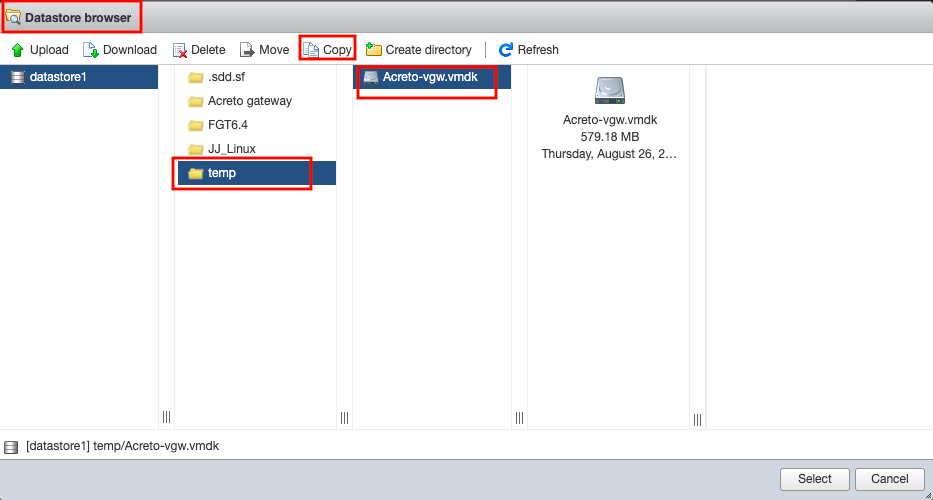

- Copy it in the folder Acreto gateway folder.
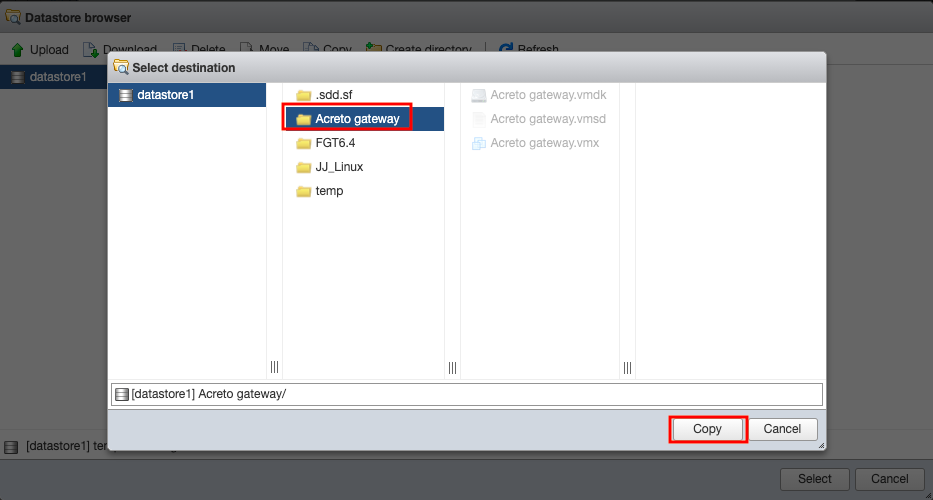

- Close.
4. Add preconfigured vmdk file as a hard disk in the Virtual machine
Next, we will use the configured vmdk file as the hard disk in the VM.
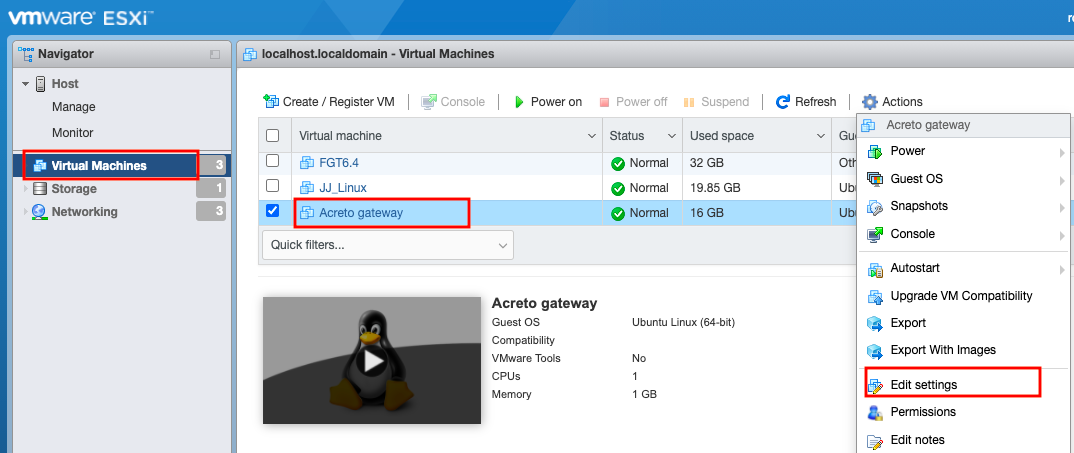
- Select the Virtual Machine from the left Navigator pane.
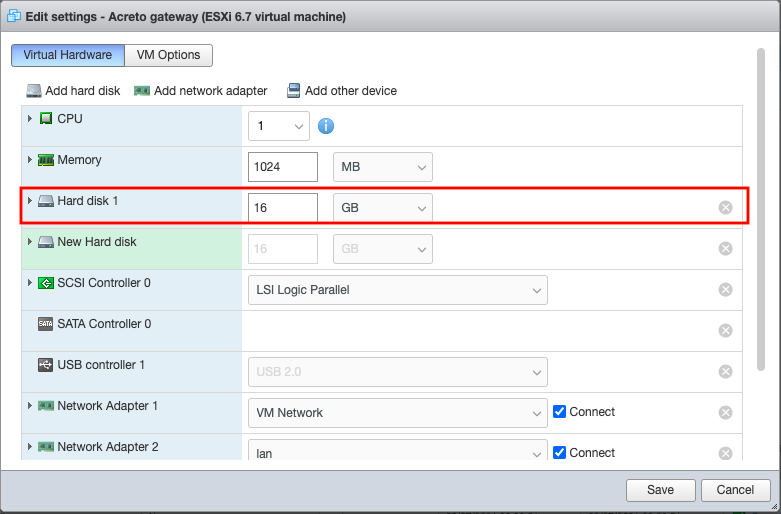
- Select VM Acreto gateway and click Actions » Edit Settings.

- Select Add hard disk » Existing Hard disk.
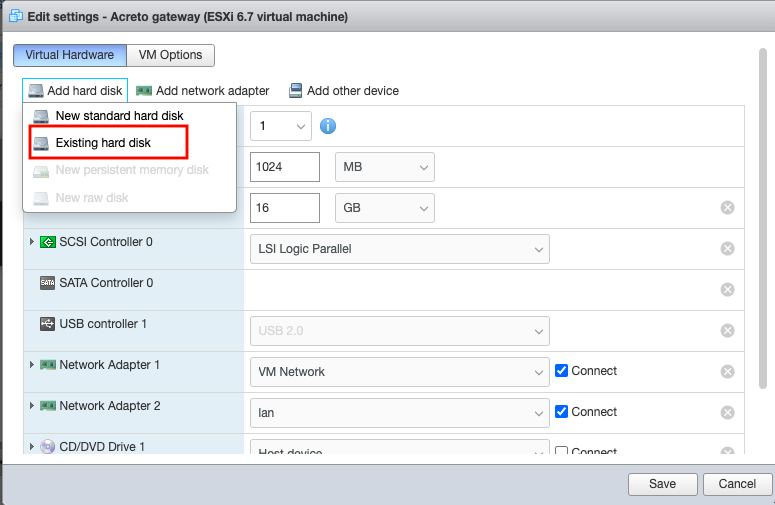

- Select the vmdk file and click Select.


- Select Hard disk 1 and click the x button to delete. Make sure the checkbox Delete files from Datastore is unchecked.

5. Start the VM
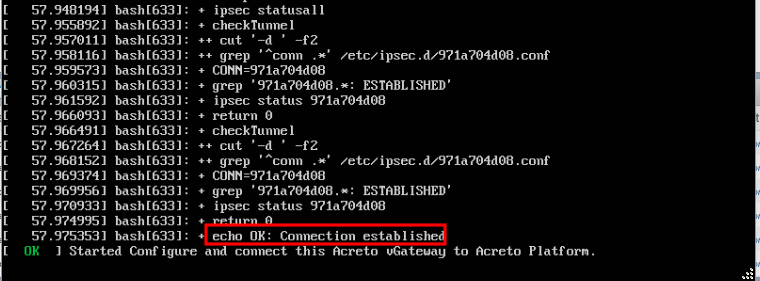
- Start the VM machine. Upon Powering on the vmdk file installs the configuration, the connection should be established automatically.

6. Verify the connection
To confirm the connection is successful and traffic is going through Acreto, follow the steps below
- Test the VPN.
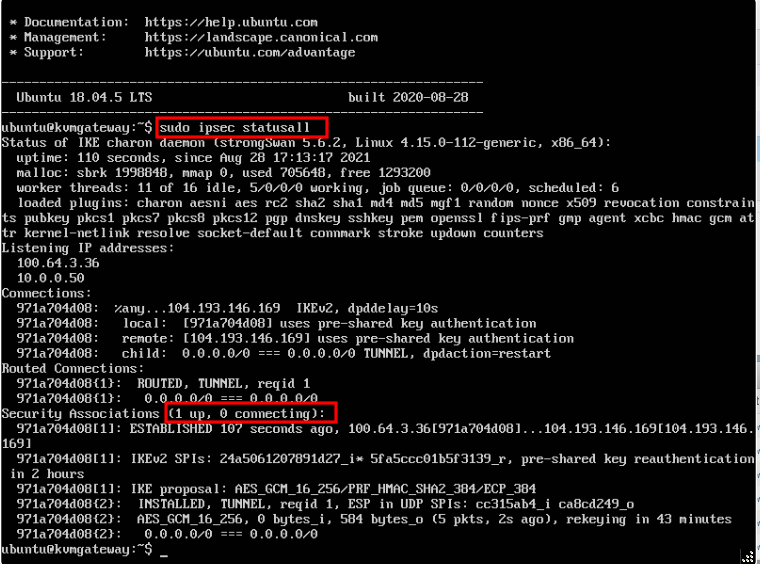
- Check the IPsec status showing the tunnel status. It should show UP.
sudo ipsec statusall
- Check the IPsec status showing the tunnel status. It should show UP.
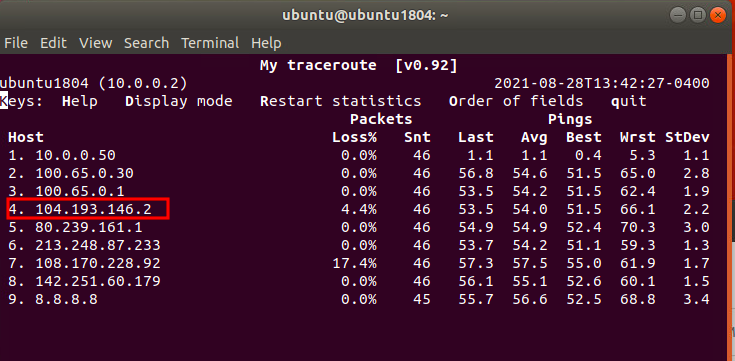
- Perform mtr command to check if the traffic goes through Acreto Ecosystem
mtr 8.8.8.8
Summary
Once the VM is running, the traffic will start flowing through Acreto.
