Pfsense Ipsec with Acreto
Overview
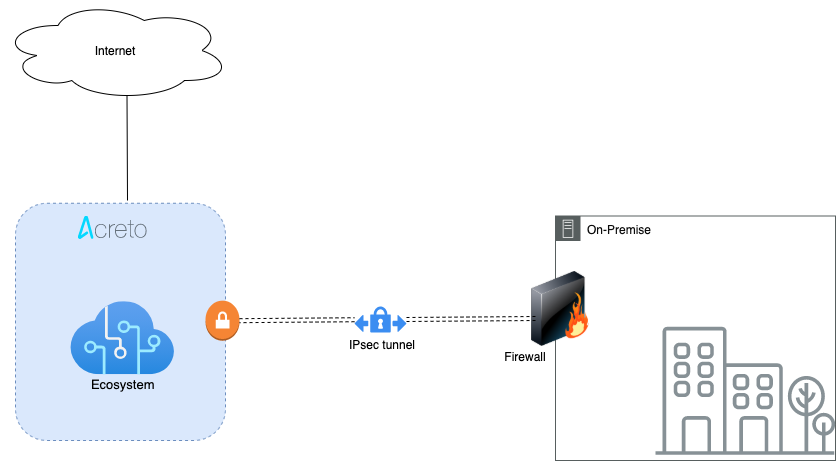
This article will help you connect and secure your pfSense installation with Acreto Ecosystem.
Prerequisites
- pfSense installation.
- Ecosystem set up with proper security policies.
Create Gateway for IPsec
Firstly, you will need to create a new Gateway device in the Acreto platform. Instructions on how to create a new Gateway are available here.
- Name: IPsec connection name must meet the exact requirements as the Strongswan connection name (letters and numbers only).
- Category: IoT
- Type: IPsec
- Allow connection from: Empty (describes the source IP address where the IPsec connection will be permitted).
- Local Networks: any local network addresses that will be routed through this gateway.
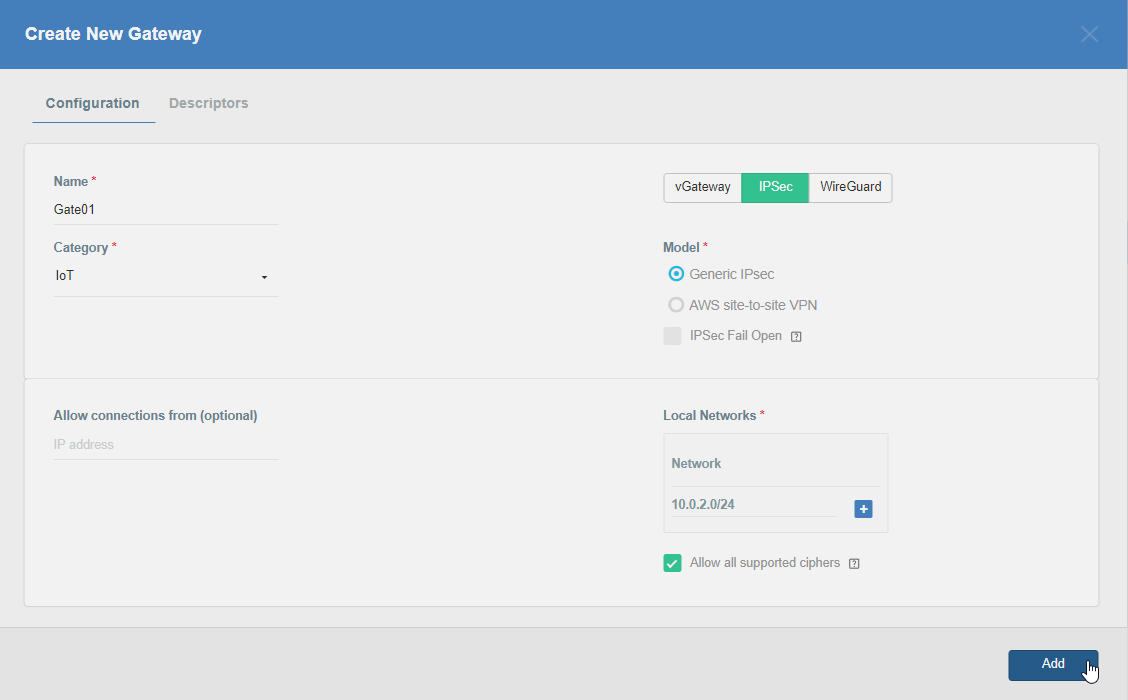
Info
To simplify testing, add the IP addresses of all interfaces connected to your gateway as Local Networks (you can use /32 prefix for public interface). This will allow you to test connectivity from the gateway through Acreto by using Ping, Traceroute, or similar tools.
How-To
Task 1: Read IPsec Gateway Values Required for IPsec Configuration
To proceed with the pfSense configuration, you will need a few values from an existing committed Acreto Gateway:
- Gateway Address
- Pre-Shared Key
- Recommended Ciphers
All of these may be found within the Gateway details panel - view the below animation for further instruction.
Animation how to get required values from Gateway [▶]
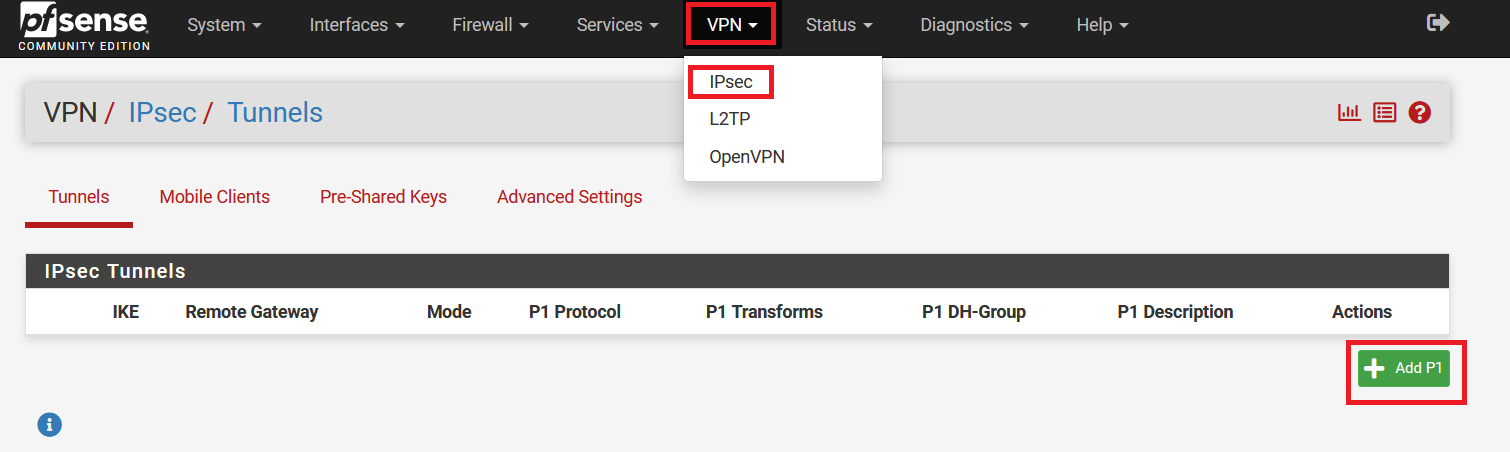
Task 2: Configure IPsec on pfSense
-
Log in to your pfSense panel.
-
Go to VPN > IPsec. Click on Add P1 to configure the Phase 1 settings.
-
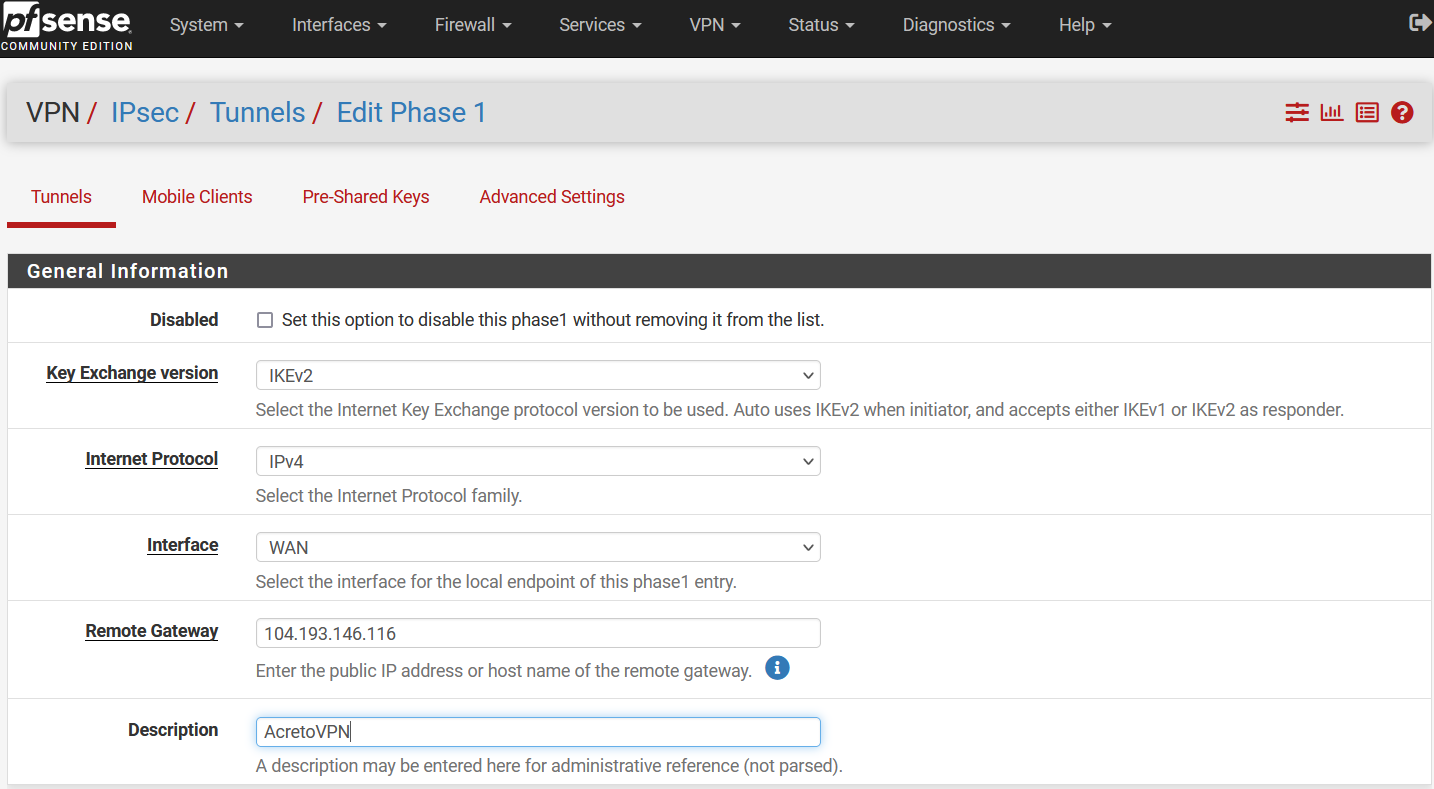
In the following window, configure VPN Phase1 settings as below:
- General Information:
- IKE Exchange Version: IKEV2
- Internet Protocol: IPv4
- Interface: WAN
- Remote Gateway: Acreto Peer IP
- Description: AcretoVPN
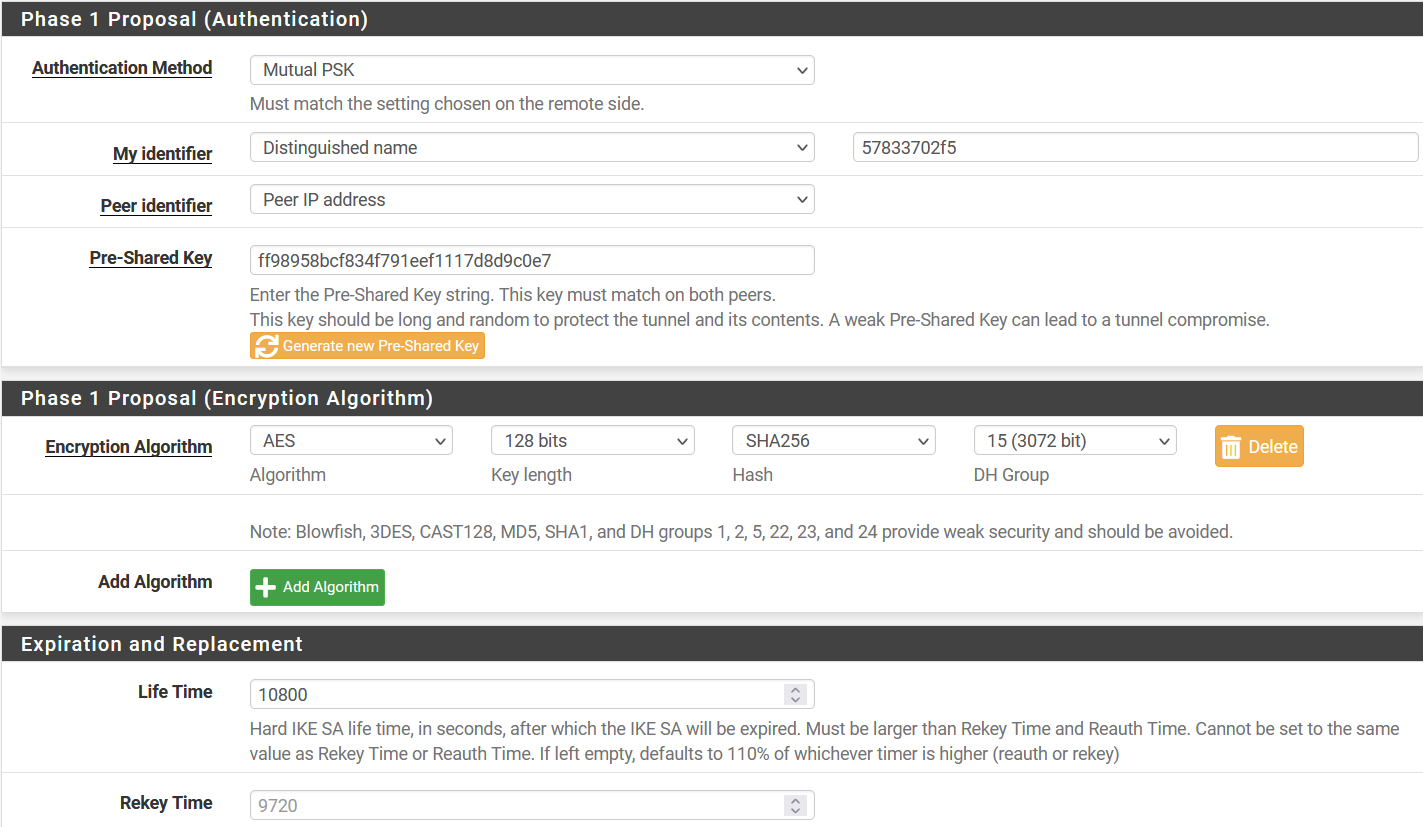
- Phase 1 Proposal (Authentication)
- Authentication Method: Mutual PSK
- My Identifier: select Distinguished Name and use Peer ID in the value field.
- Pre-Shared Key: PSK
- Phase 1 Proposal (Encryption Algorithm)
- Encryption Algorithm: AES 128 SHA256 15(3072)
- Expiration and Replacement
- Lifetime: 10800
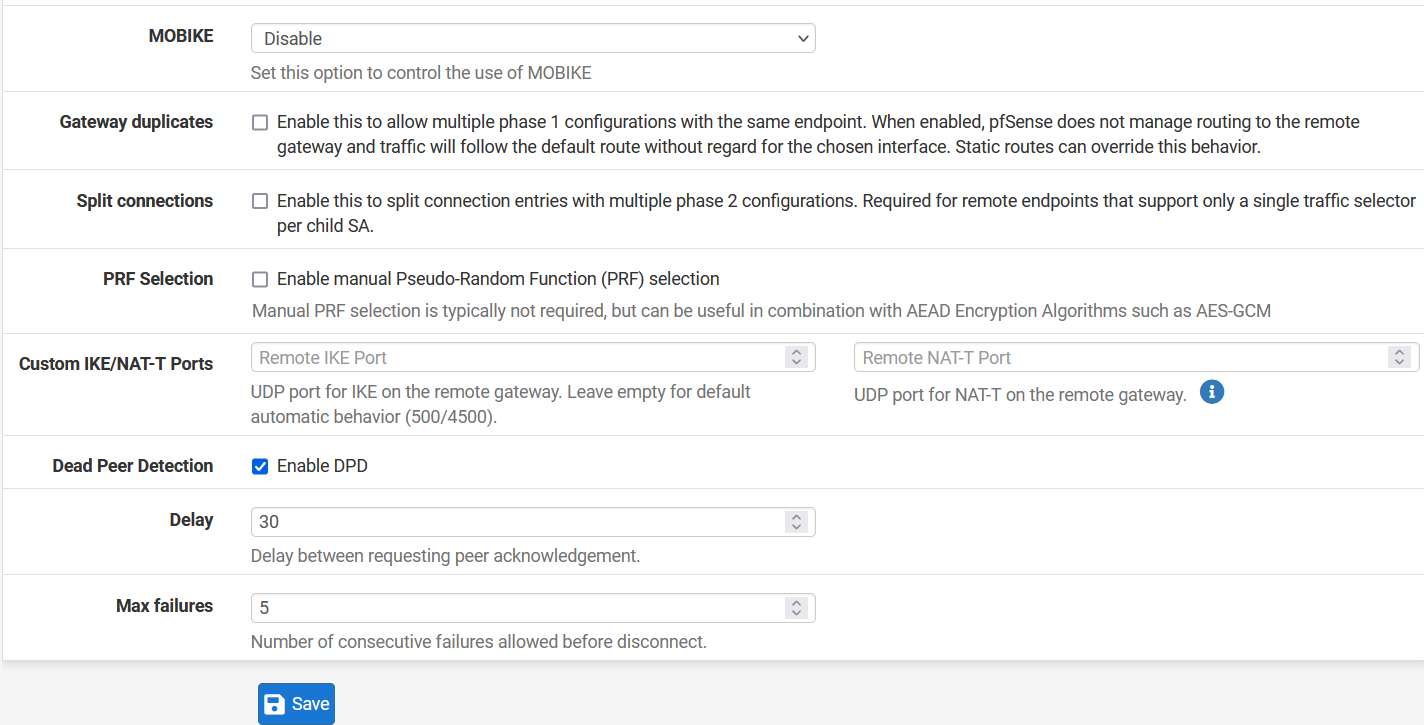
- Advanced Options
- Dead Peer Detection: Enable
- Delay: 30
- Max Failures: 5
- General Information:
-
Click Save to save the configuration.
-
Click on Show Phase 2 Entries and Click on Add P2.
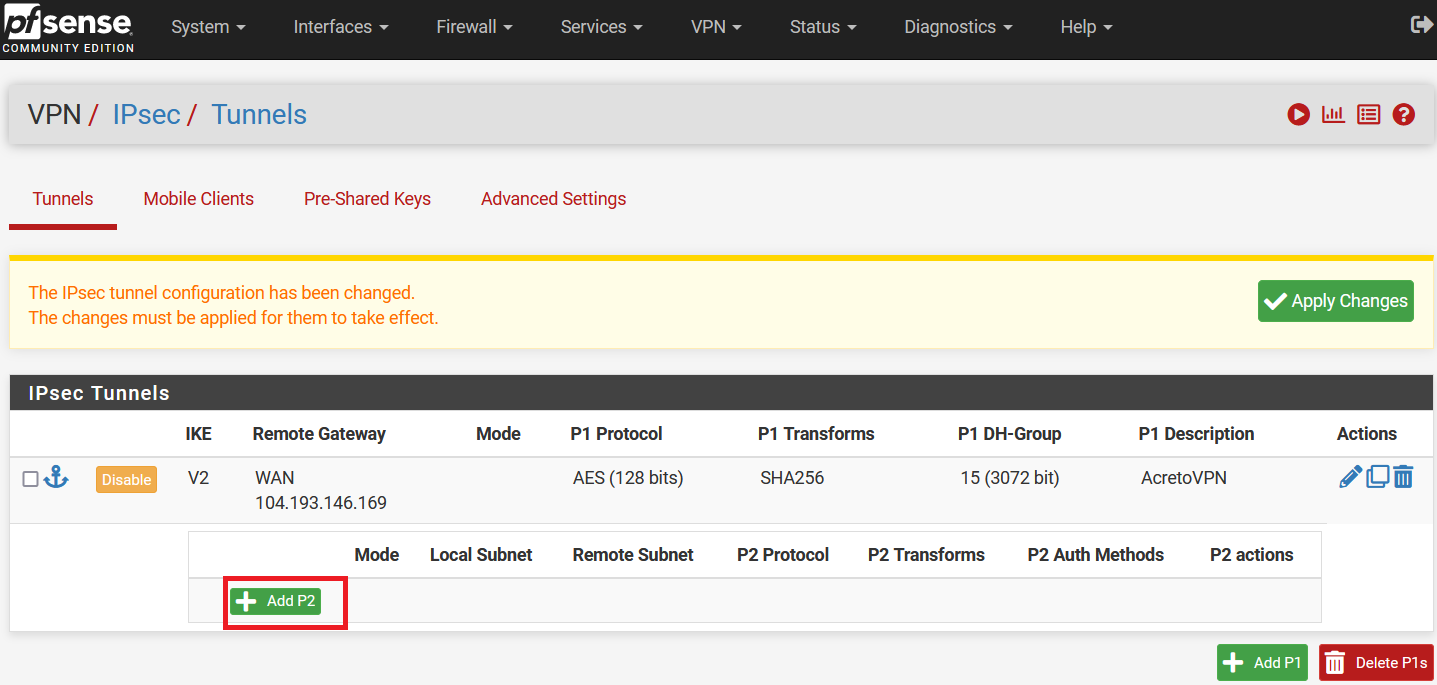
-
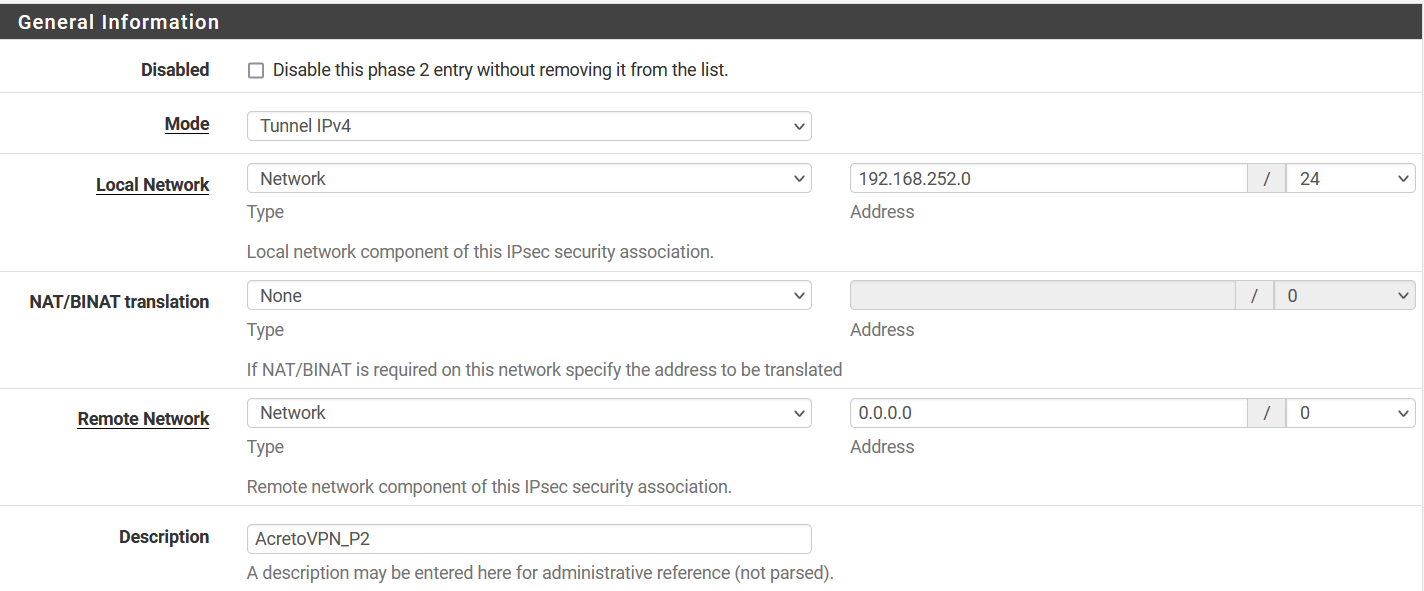
In the next window, configure the Phase 2 setting as below:
- General Information:
- Mode: Tunnel IPv4
- Local Network: Select Network and enter local network address 192.168.252.0/24
- Remote Network: Select Network and enter 0.0.0.0/0
- Description: AcretoVPN_P2
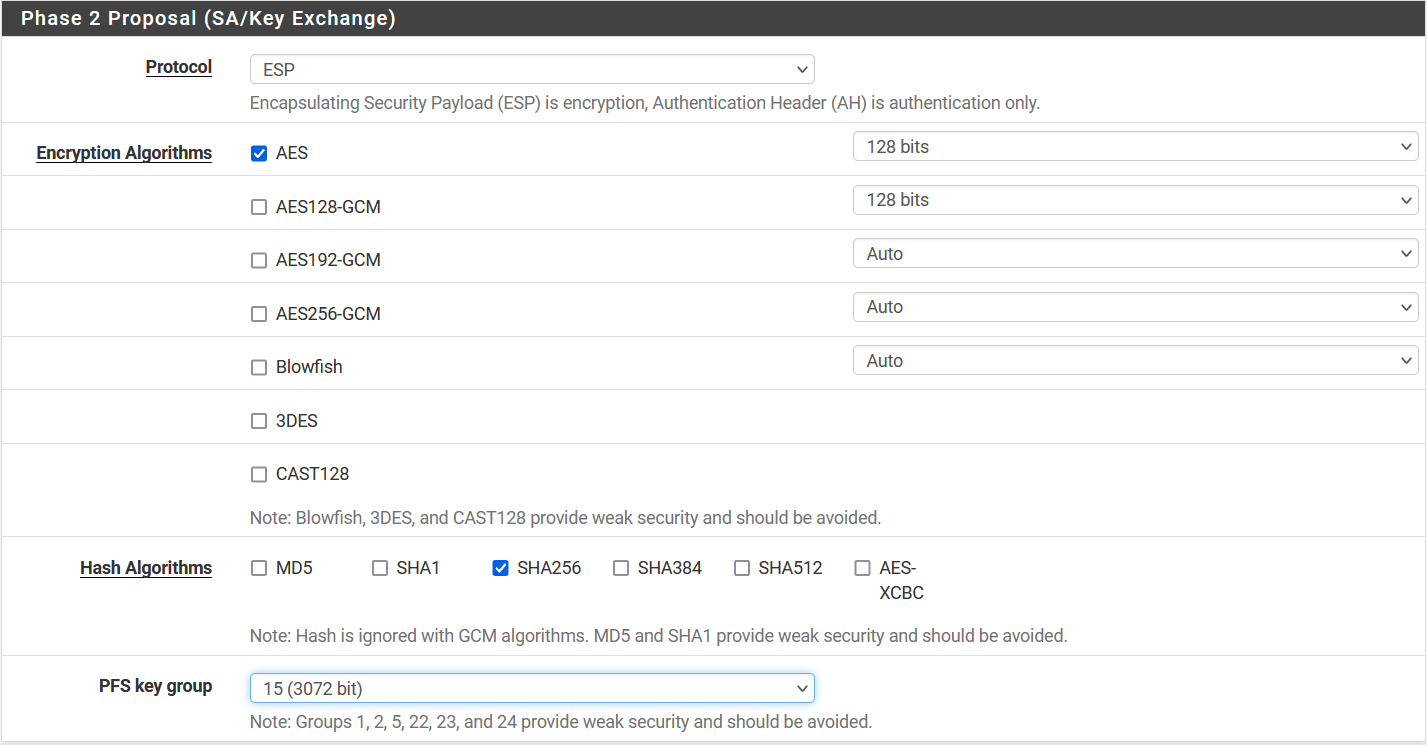
- Phase 2 Proposal (SA/Key Exchange)
- Protocol: ESP
- Encryption Algorithm: AES 128
- Hash Algorithm: SHA256
- PFS key group: 15 (3072)
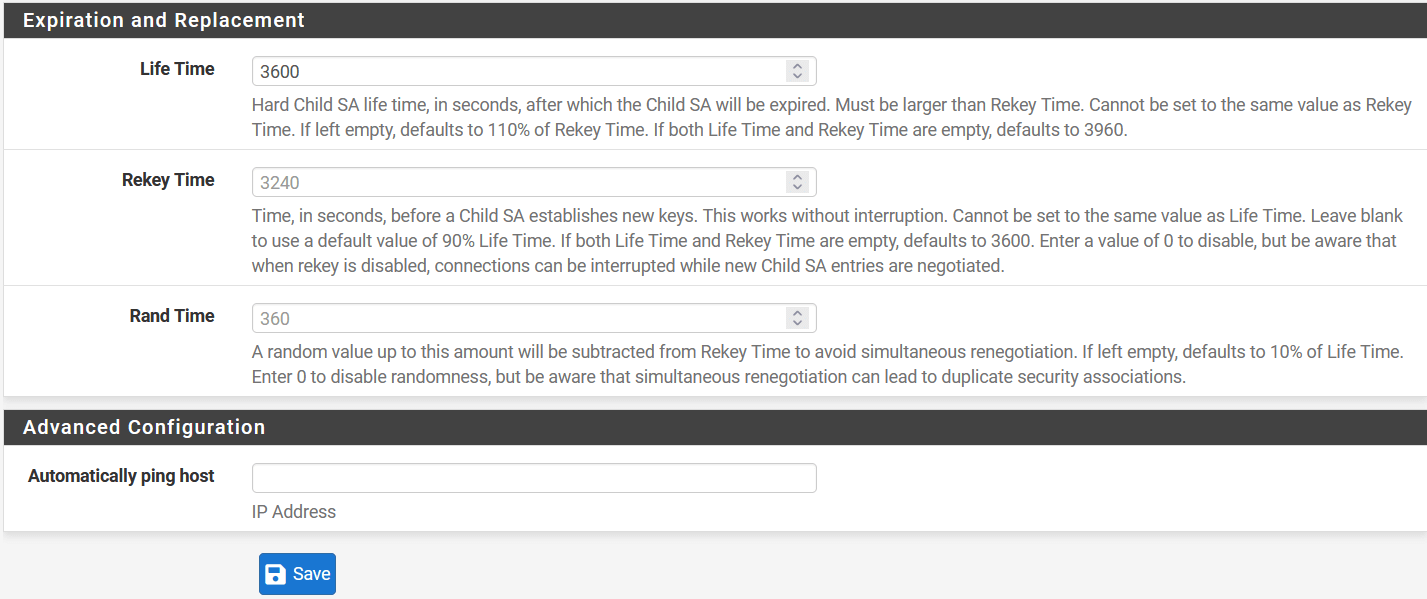
- Expiration and Replacement
- Lifetime: 3600 `
- General Information:
-
Click on Save.
-
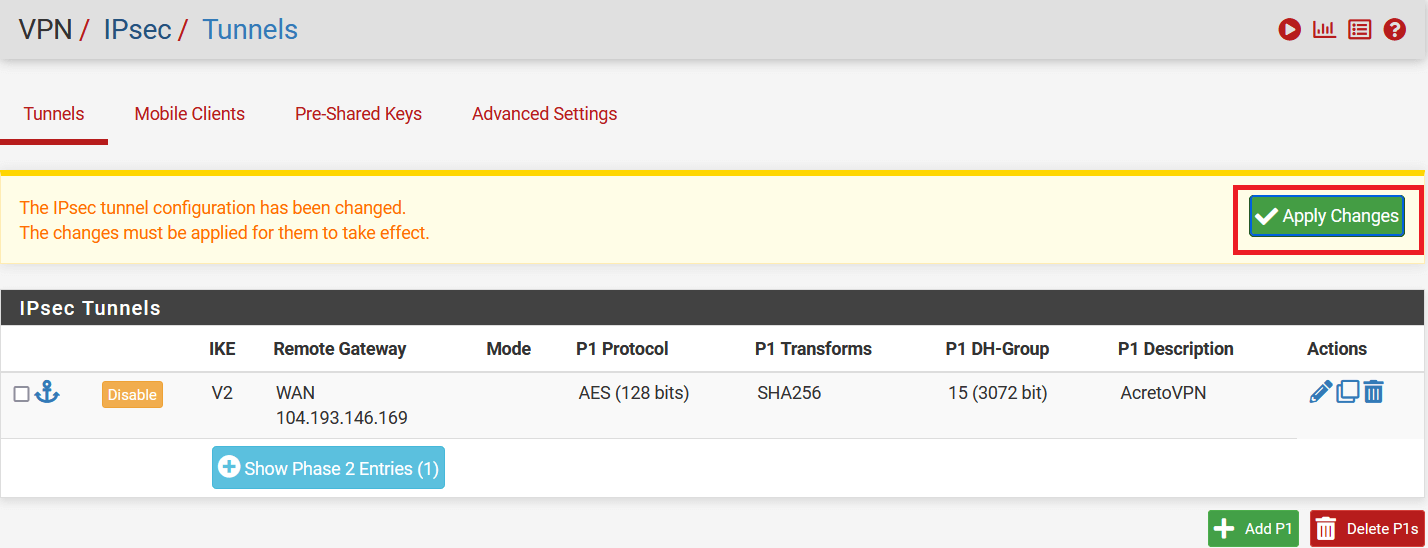
Click on Apply Changes to save the configuration.
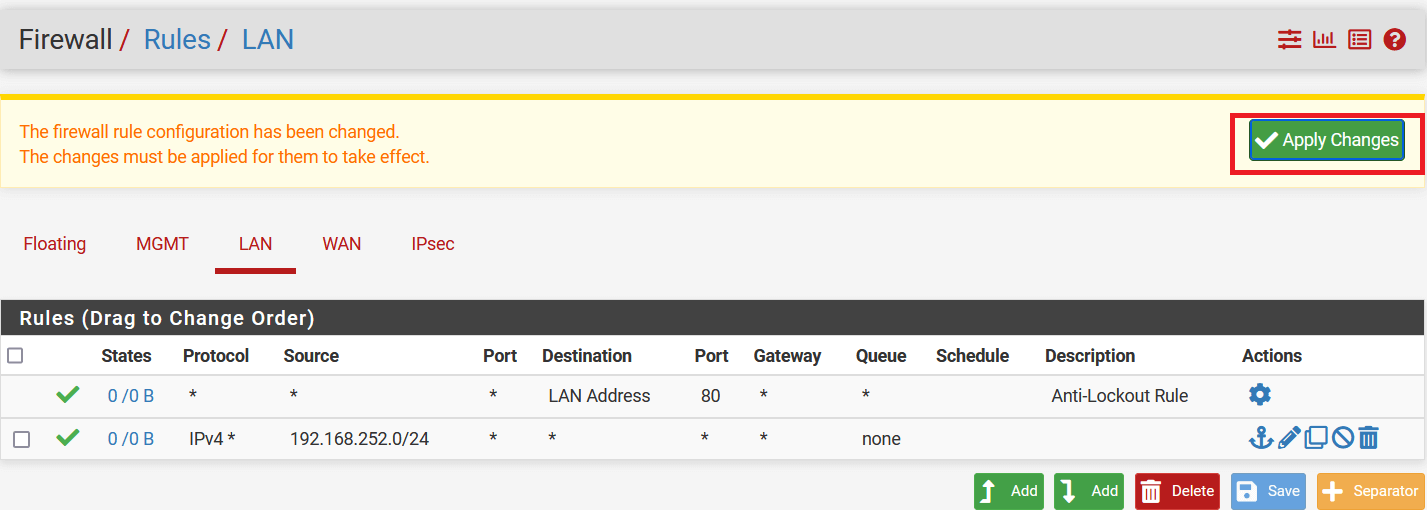
Task 3. Configure Policy to allow traffic from LAN to VPN
-
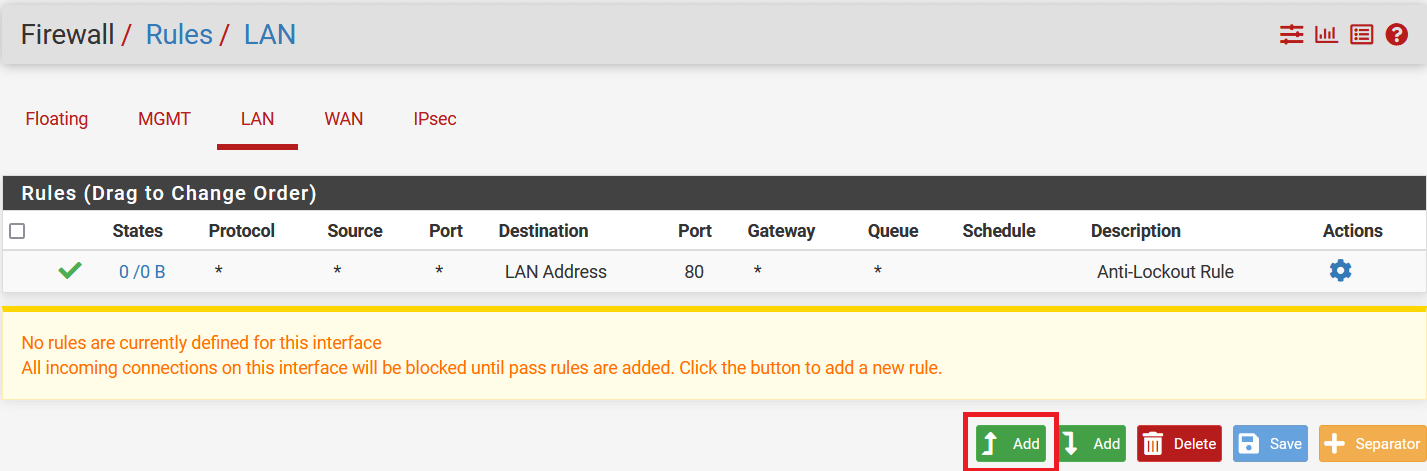
Go to Firewall > Rules and select LAN
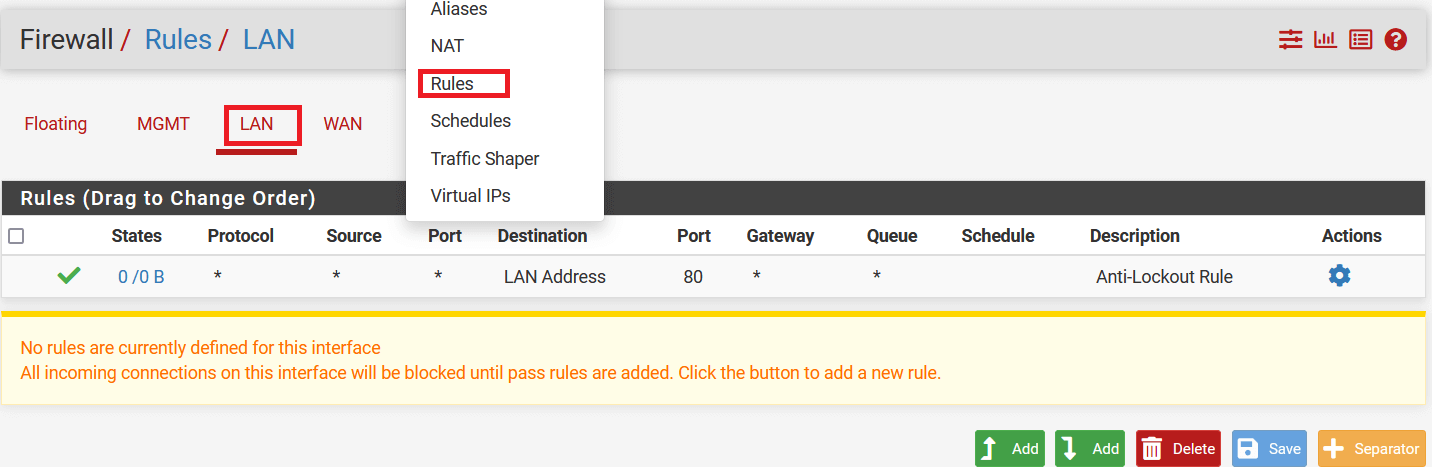
-
Click on Add button to add a new rule.
-
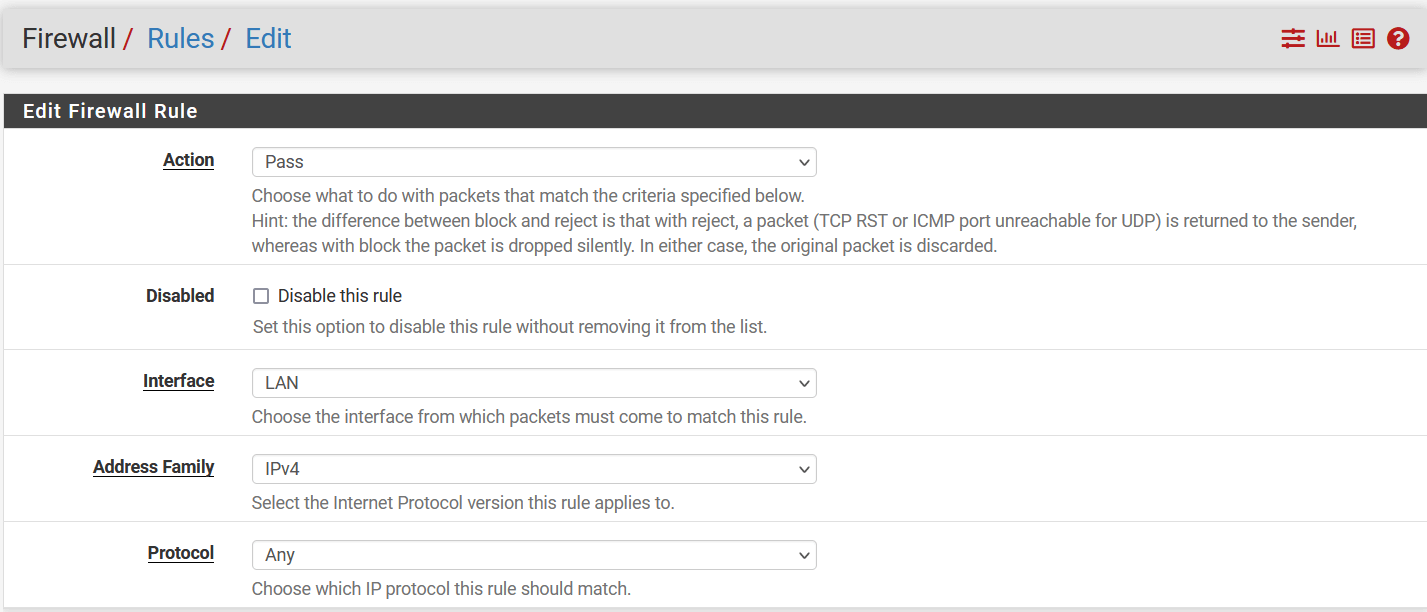
In the next window, configure policy as below:
- Edit Firewall Rules
- Action: Pass
- Interface: LAN
- Address Family: IPv4
- Protocol: Any
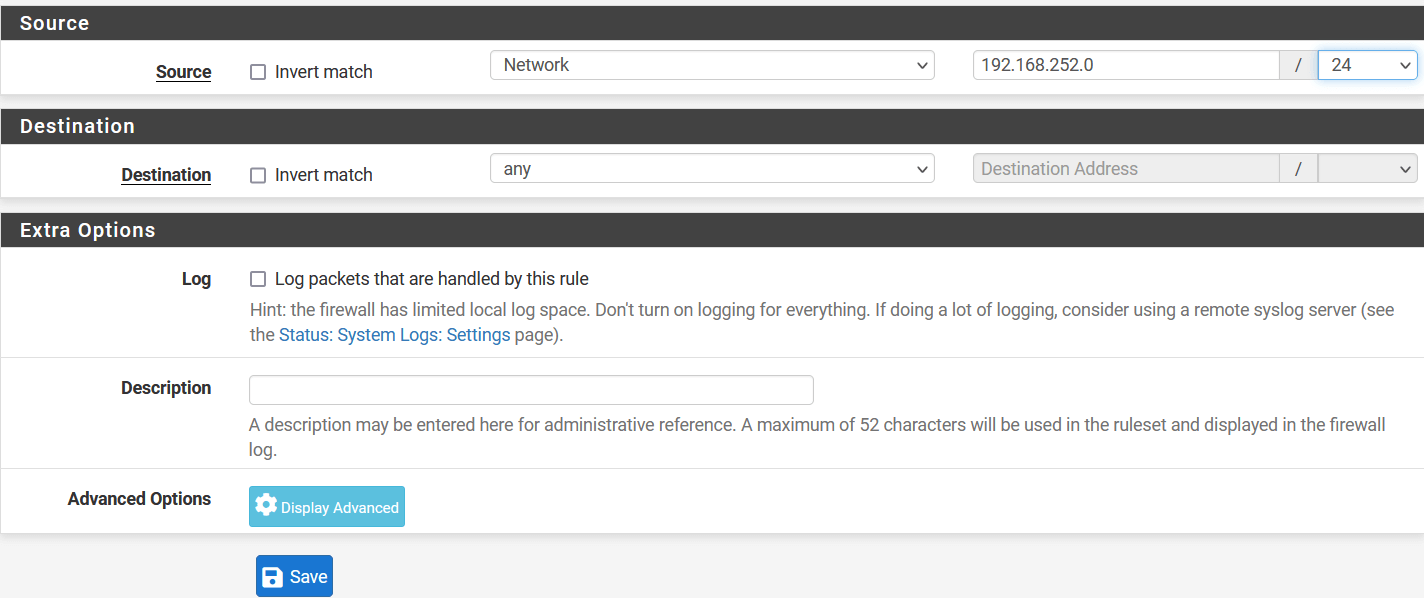
- Source
- Source: Select Network and enter local lan address i.e., 192.168.252.0/24
- Destination
- Destination: Any
- Click on Save
- Click on Apply Changes to save the configuration.
- Edit Firewall Rules
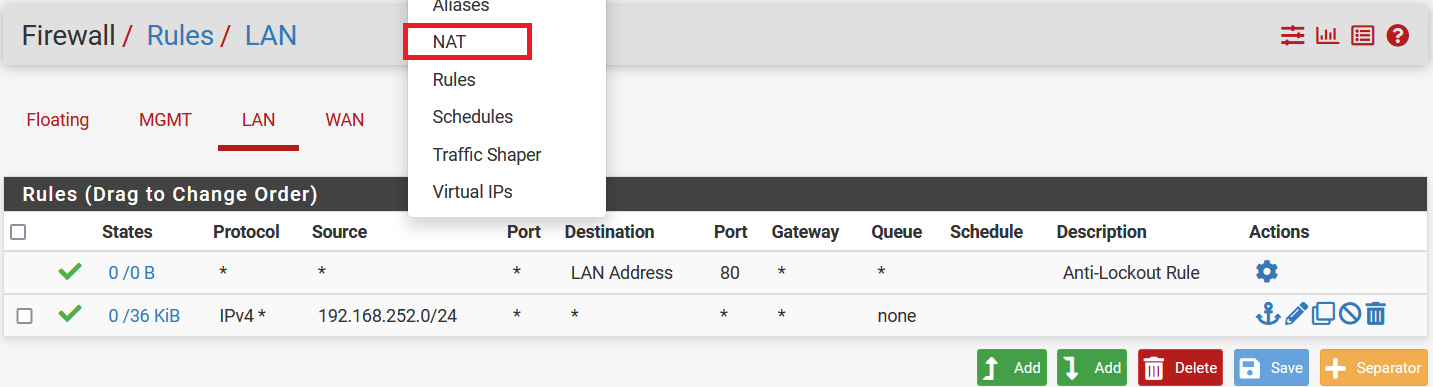
Task 4. Disable NAT for traffic over VPN
-
Go to Firewall > NAT.
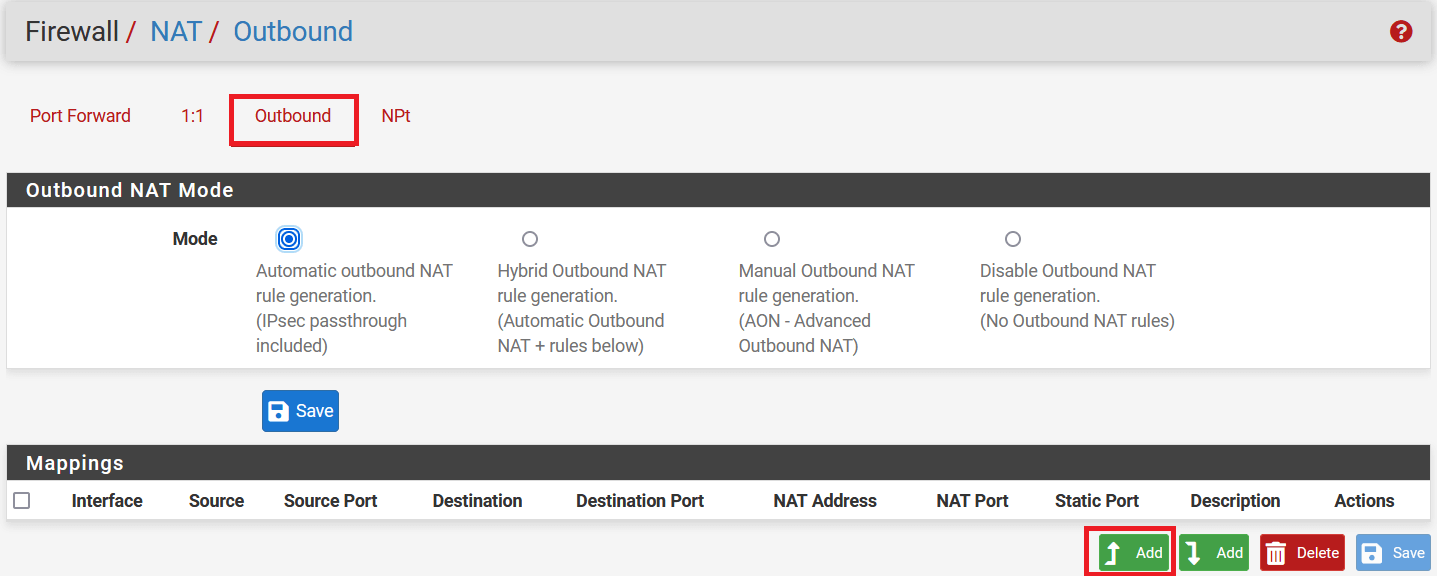
-
Select Outbound, and in the Mapping section click on the Add button.
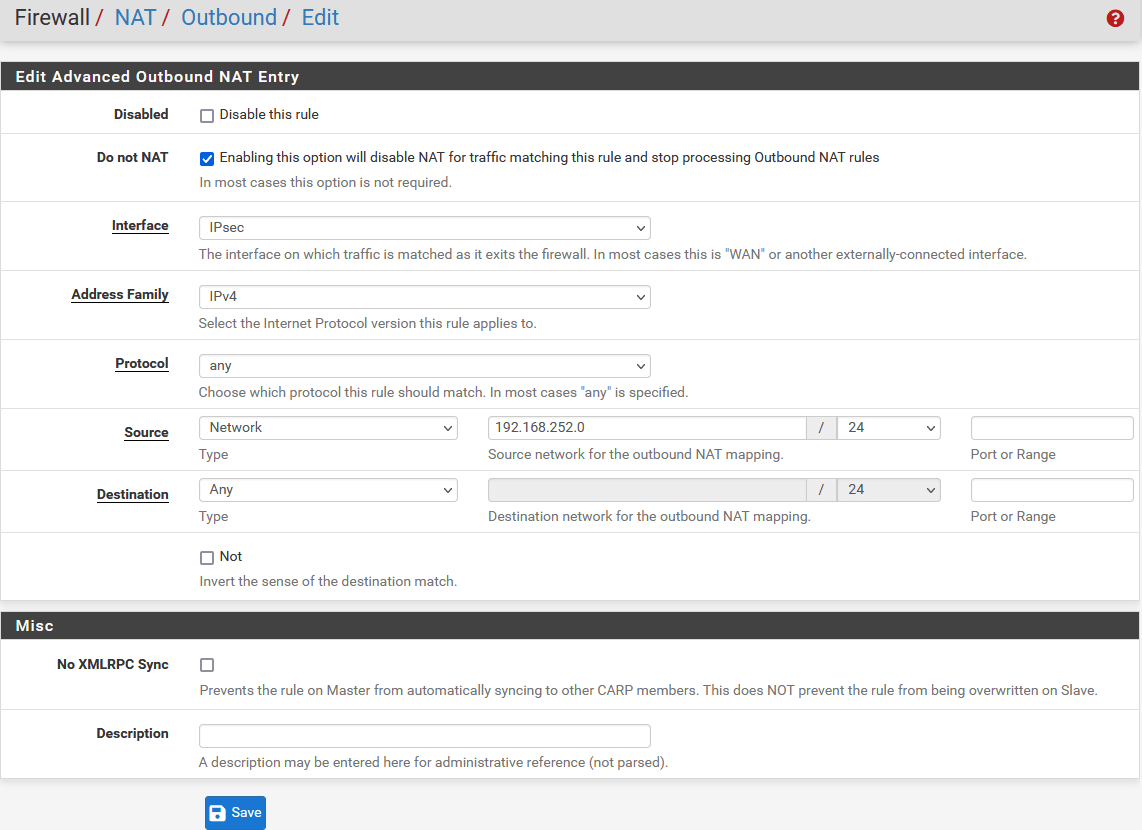
-
In the next window, configure the rule as below:
- Edit Advanced Outbound NAT Entry
- Do not NAT: Enable
- Interface: IPsec
- Address Family: IPv4
- Protocol: Any
- Source: Select Network and enter local lan address i.e., 192.168.252.0/24
- Destination: Any
- Edit Advanced Outbound NAT Entry
-
Click on Save
-
Click on Apply Changes to save the NAT rule.
-
In the same window, select mode Hybrid Outbound NAT rule generation. (Automatic Outbound NAT + rules below) in Outbound NAT Mode.
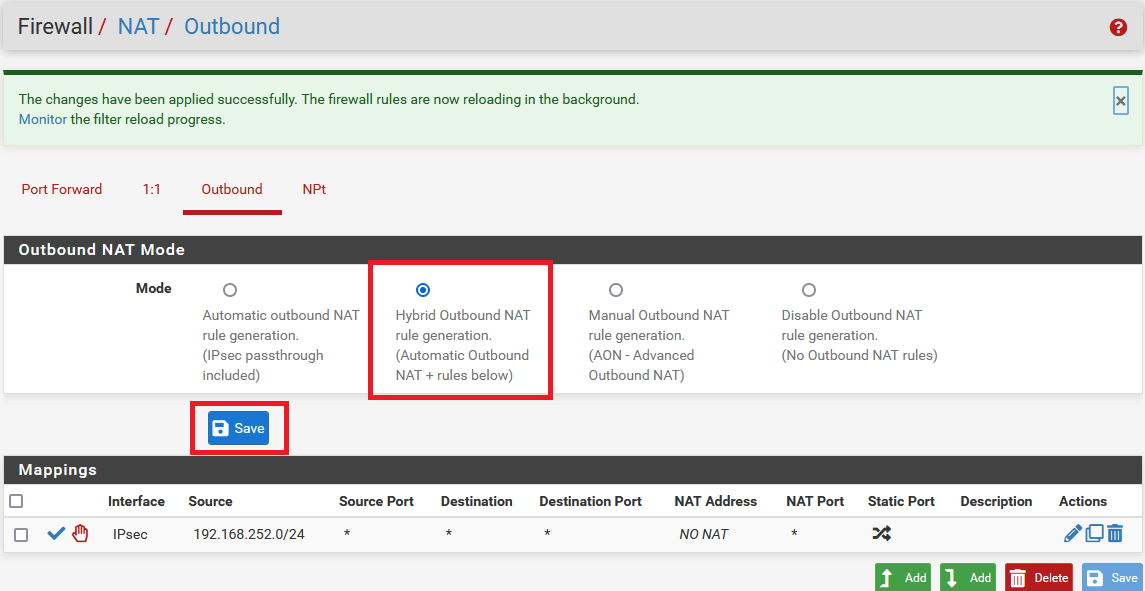
-
Click on Apply Changes to save settings.
Task 5. Verify Tunnel Status
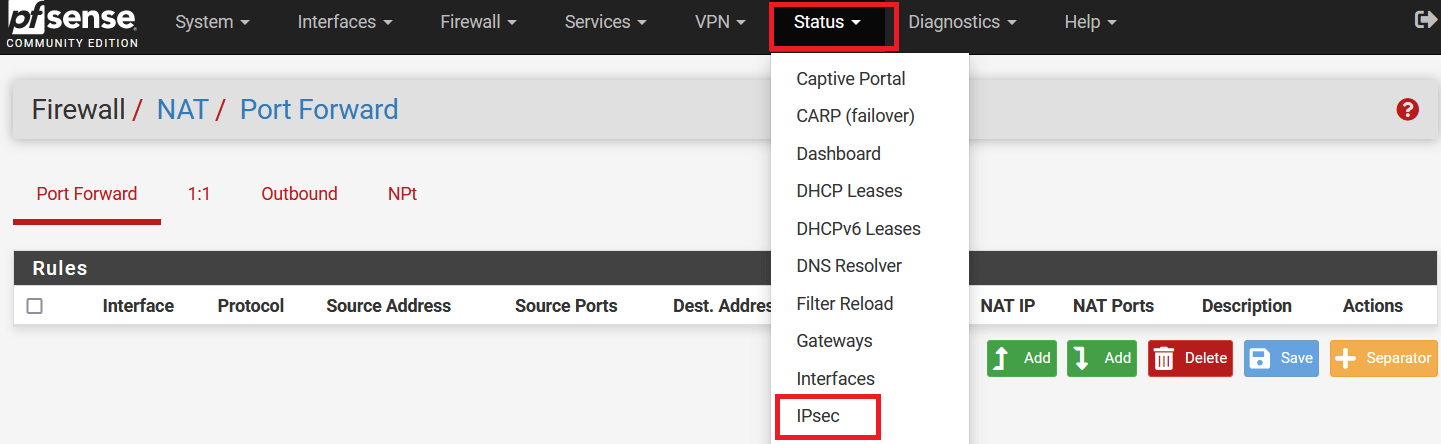
-
Go to Status > IPsec.
-
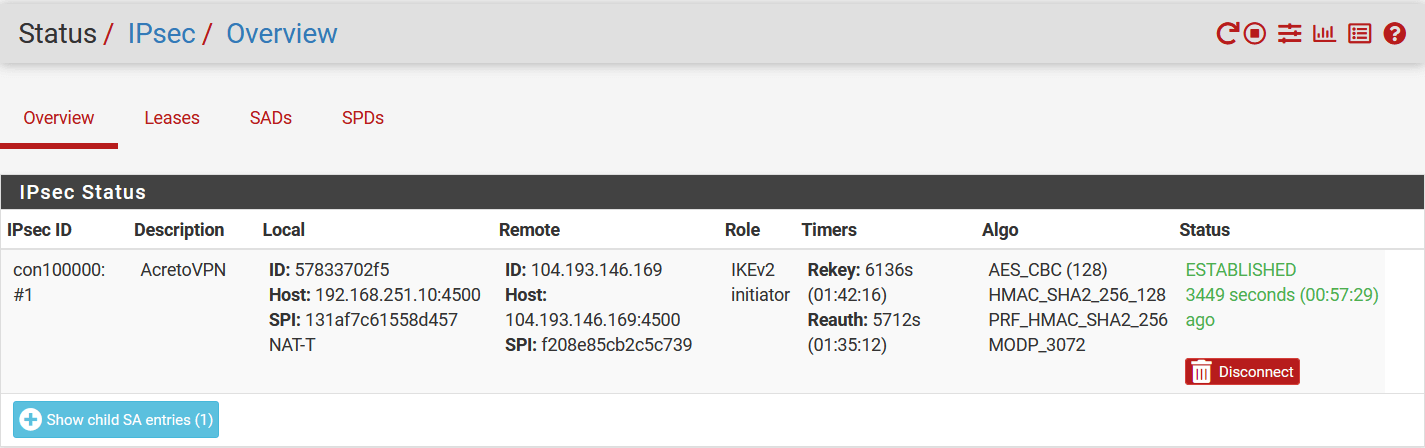
The following window will show the status of the VPN as below. Click on Connect VPN if the tunnel is down.
Task 6. Check the connectivity using the LAN interface
-
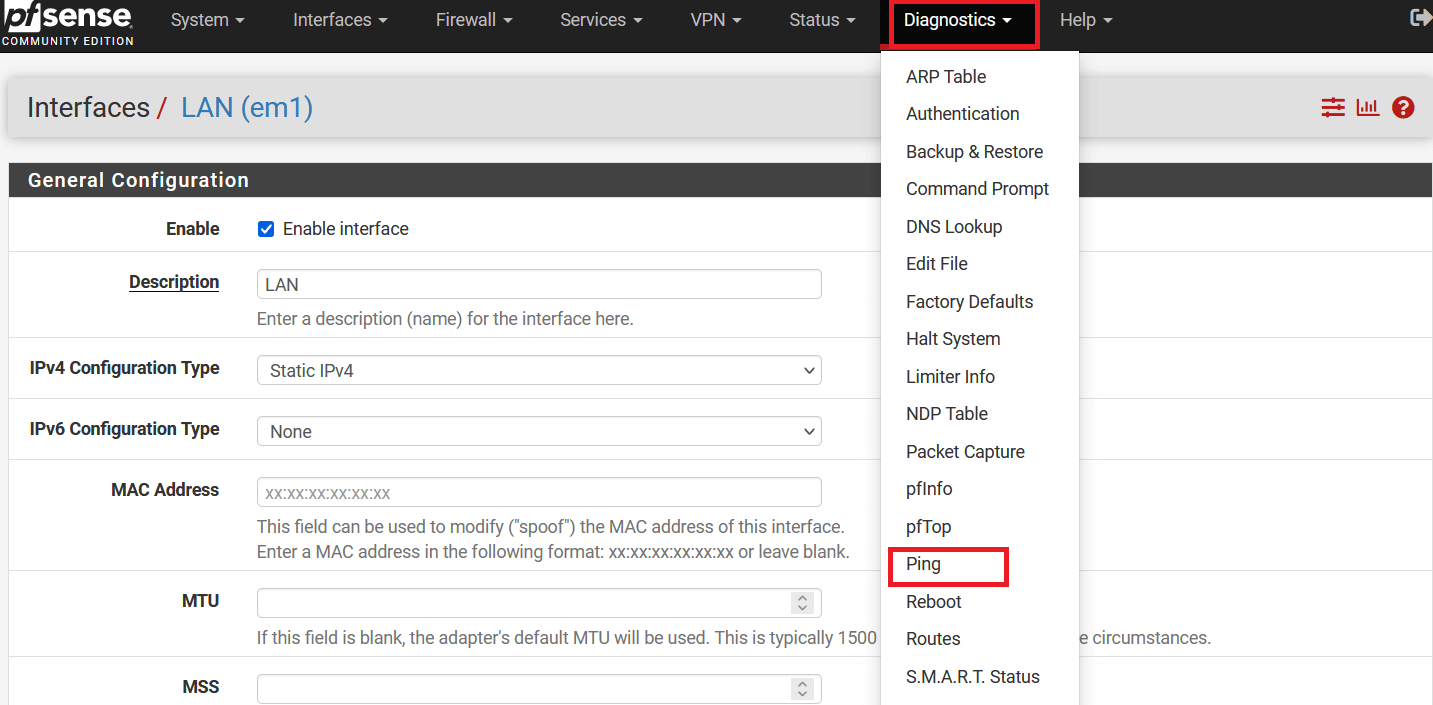
Go to Diagnostics » Ping.
-
In the next windows, check ping as below:
- Hostname: 8.8.8.8
- Source address: LAN
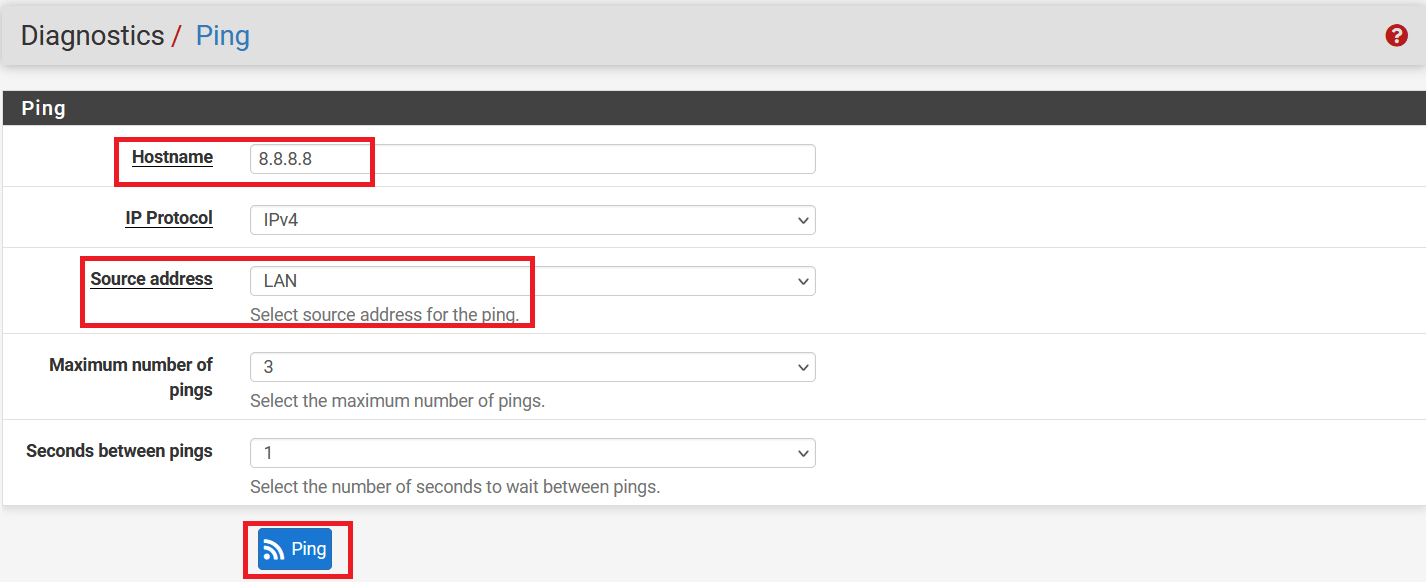
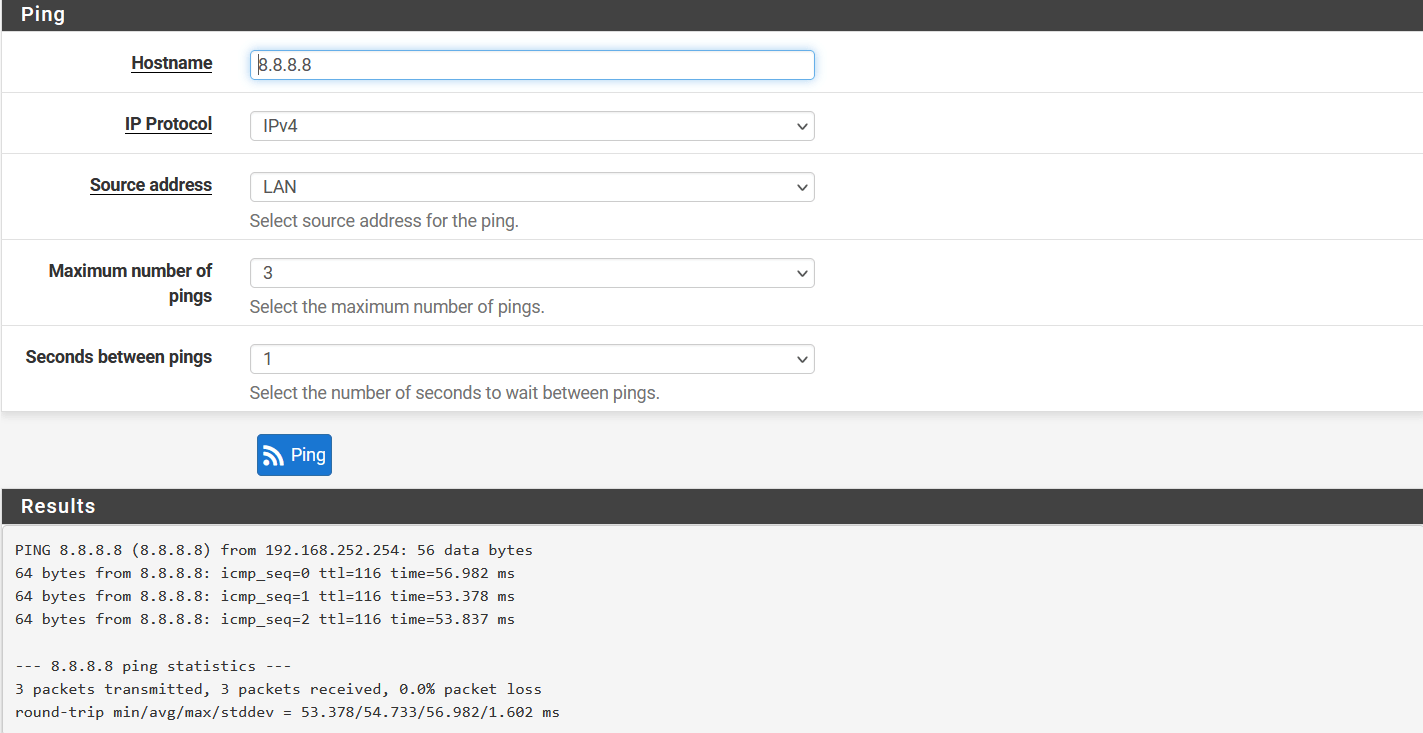
-
Ping should be successful, and logs on the Wedge dashboard should show the same record.
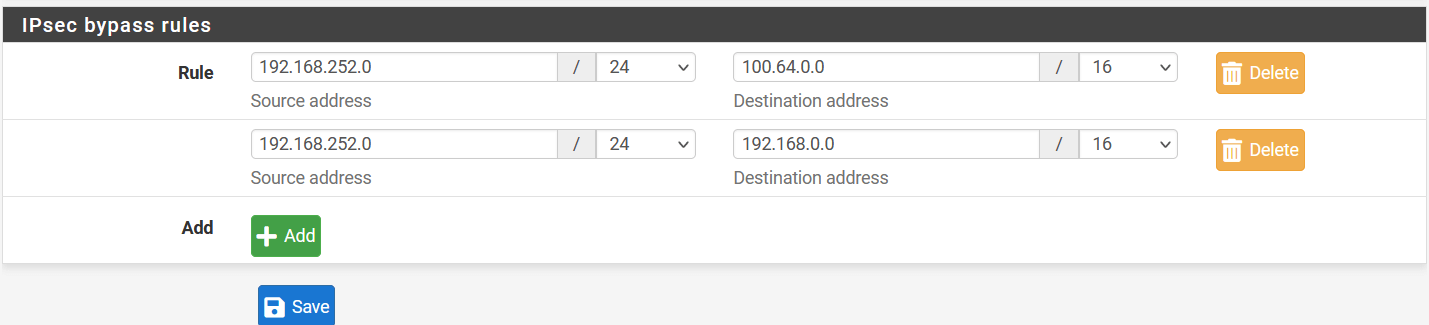
Task 7. Optional: Configure the local source and destination to bypass from IPsec
-
Go to VPN > IPsec and click on Advanced Setting.
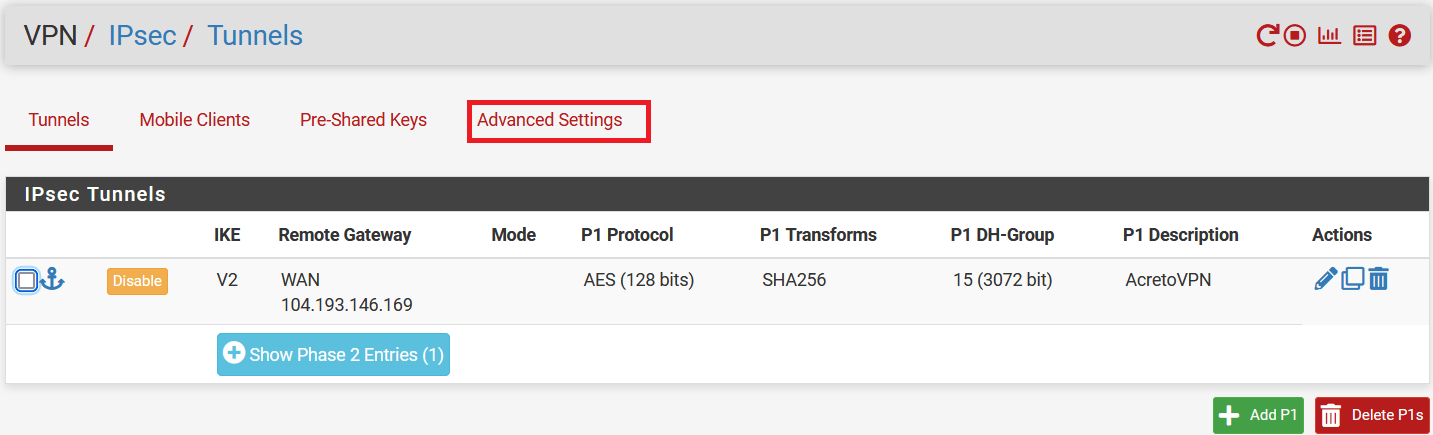
-
In IPsec bypass rules, enter the source and destinations of your local traffic, which doesn’t need to go through Acreto VPN.
Summary
Once the VPN connection is successfully established, all the internet traffic will be routed through the Acreto.