Sonicwall 7.0 IPsec Configuration
Overview
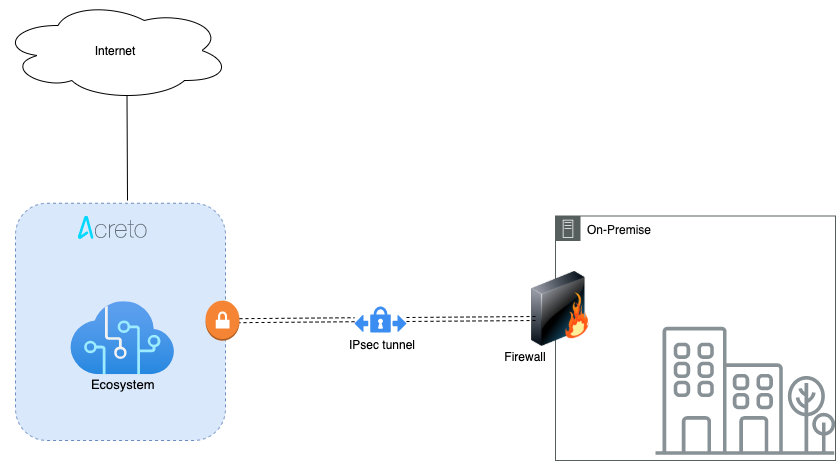
In this article, you will learn how to connect your Sonicwall to the Acreto Ecosystem. To make it possible and secure, we will use the IPSec VPN connection.

Prerequisites
- Sonicwall 7.0 installation
- Ecosystem set up with proper security policies
Create Gateway for IPsec
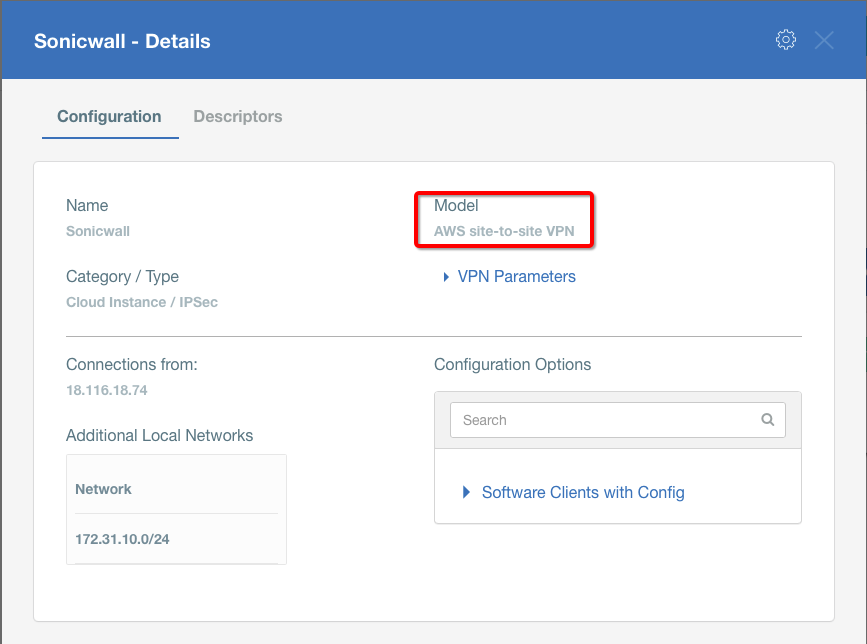
Create a new Gateway device in the Acreto platform. Instructions on how to create a new Gateway are available here.
- Type: IPsec
- Category: Data Center
- Model: AWS site-to-site VPN
- Connections from: Public IP
- Local network: local_network
- Save and Commit the changes
Info
To simplify testing, add the IP addresses of all interfaces connected to your gateway as Local Networks (use /32 prefix for public interface). This allows testing connectivity from the gateway through Acreto by using Ping, Traceroute, or similar tools.
How-To
Task 1: Read IPsec Gateway Values Required for IPsec Configuration
To proceed with the Sonicwall configuration, you will need a few values from an existing committed Acreto Gateway:
- Gateway Address
- Pre-Shared Key
- Recommended Ciphers
All the details may be found within the Gateway details panel - please check the video below for further instructions.
Task 2: Configure IPsec VPN on Sonicwall
To configure the IPsec VPN using tunnel interface, proceed with the following steps:
-
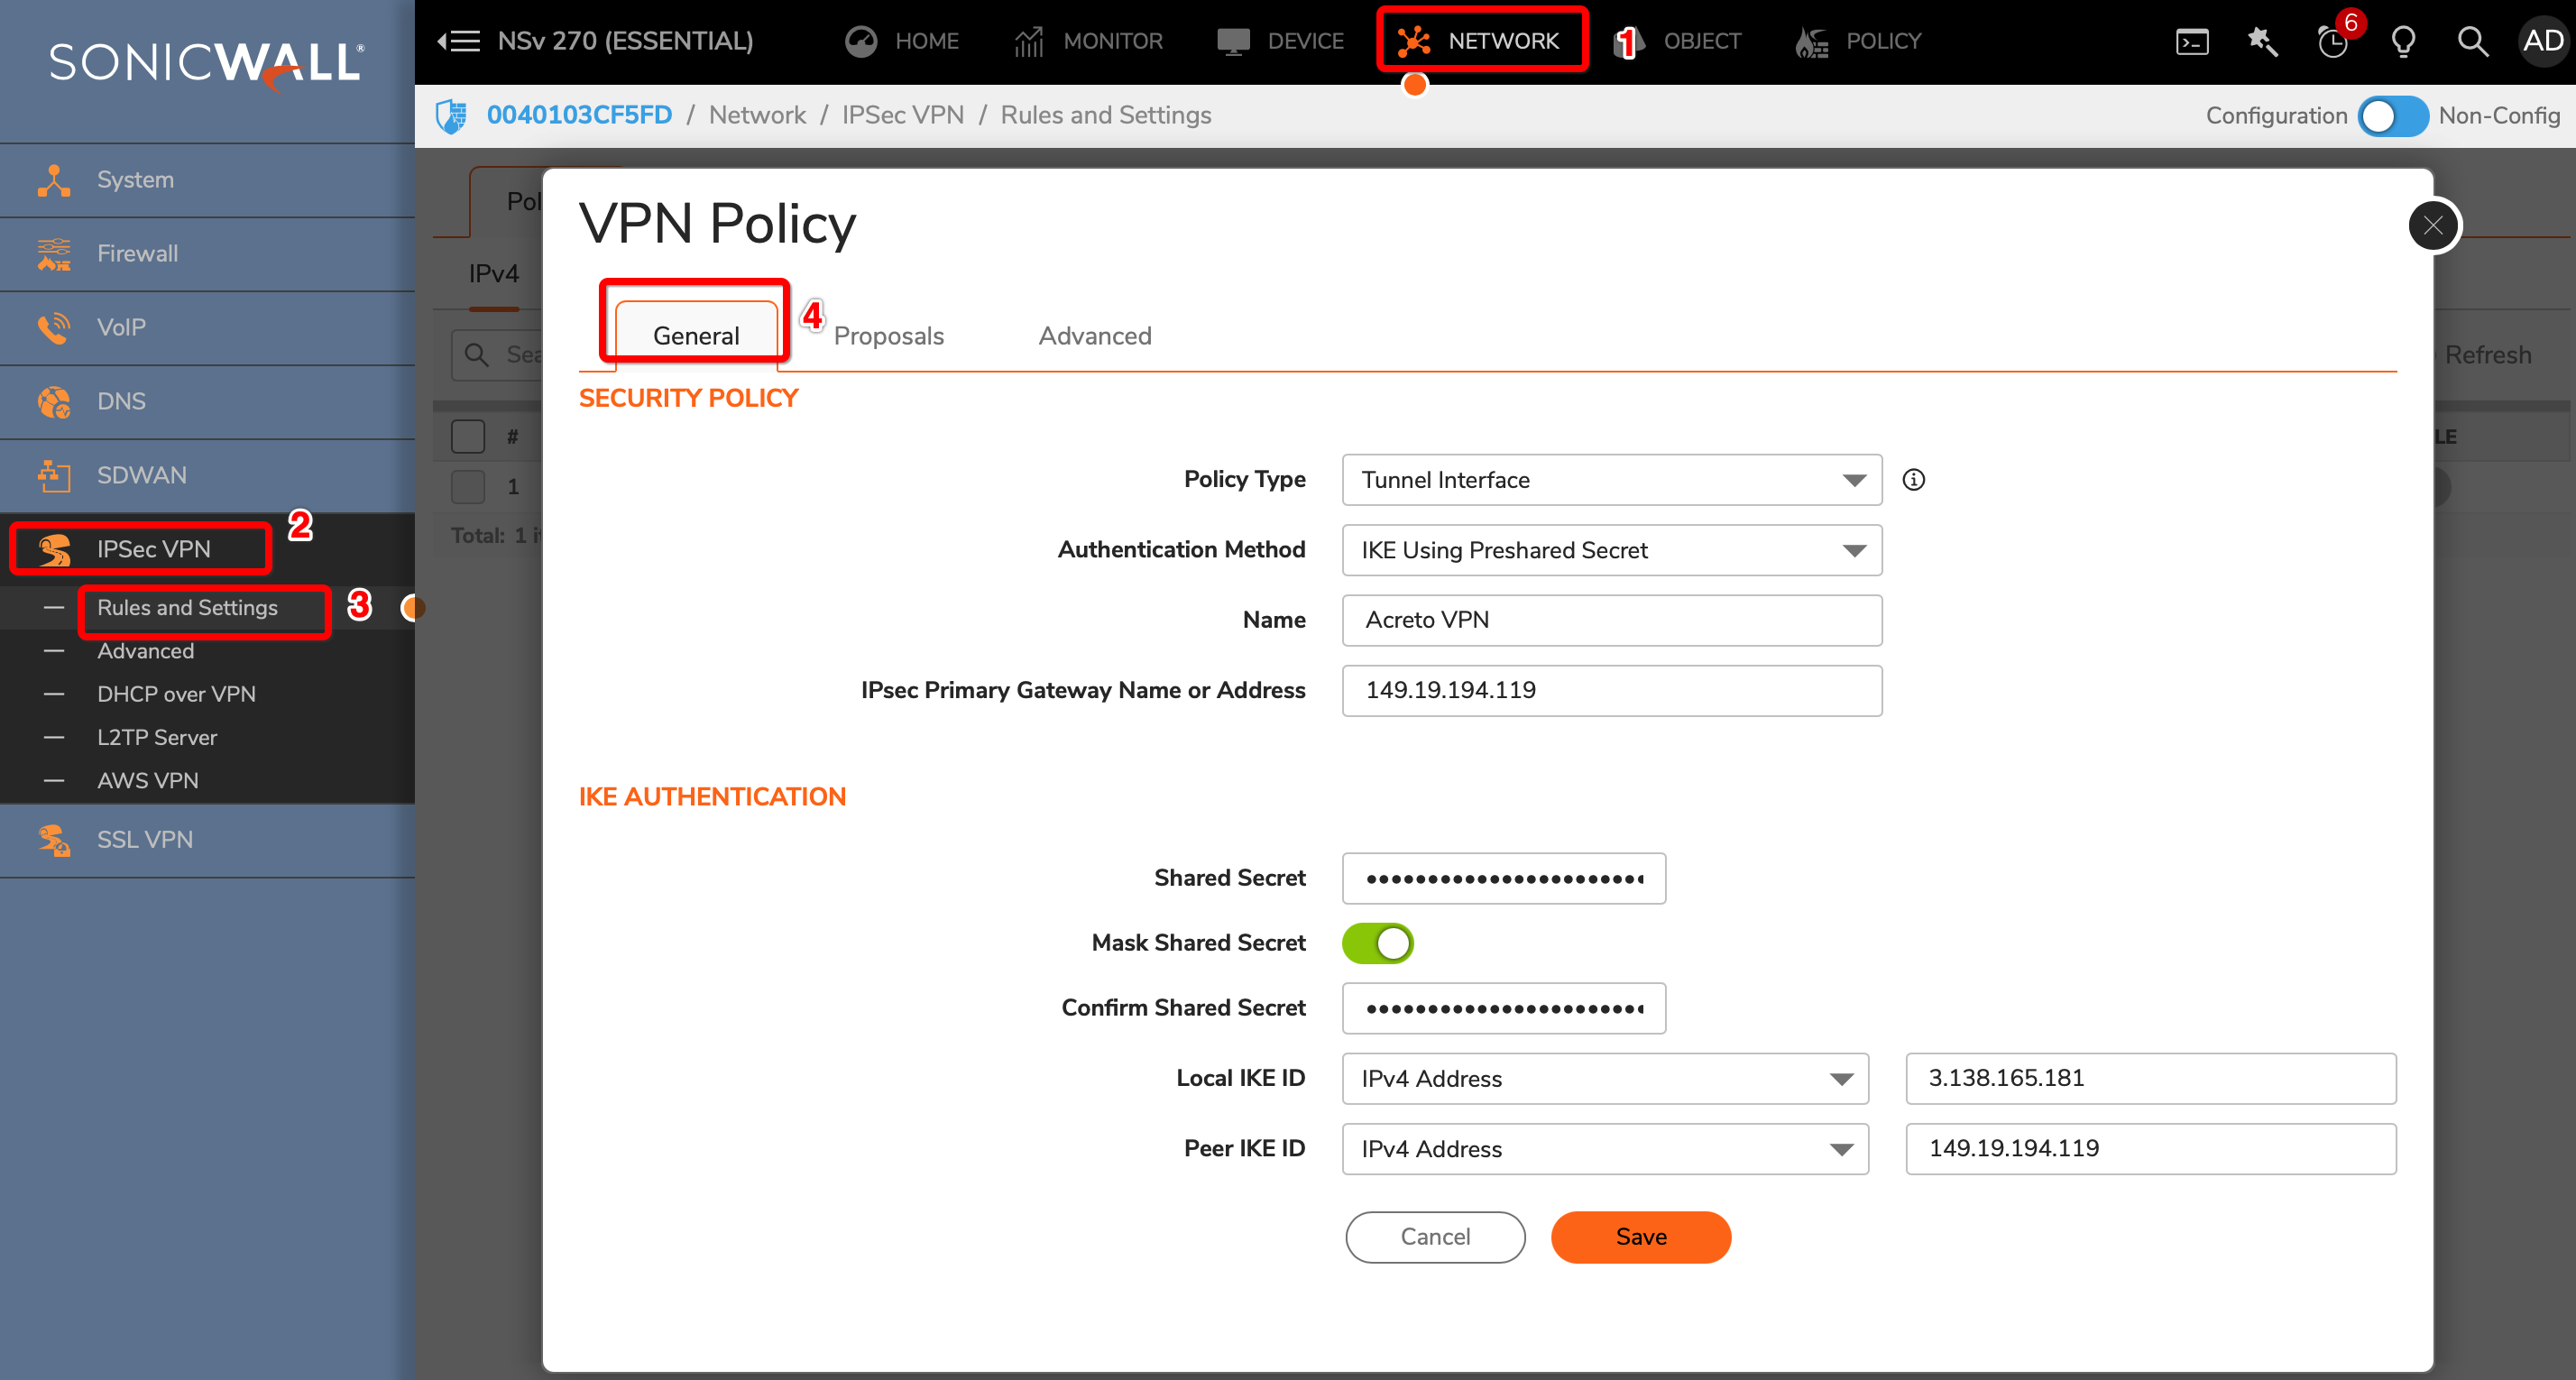
Goto NETWORK » IPsec VPN » Rules and Settings.
-
Click the ADD button.
-
Under the General tab, enter the following values:
- Security Policy
- Policy Type: Tunnel Interface
- Authentication Method: IKE using Preshared Secret
- Name: Acreto
- IPsec Primary Gateway Name or Address: <Wedge_Tunnel_IP>
- IKE Authentication
- Security Policy
-
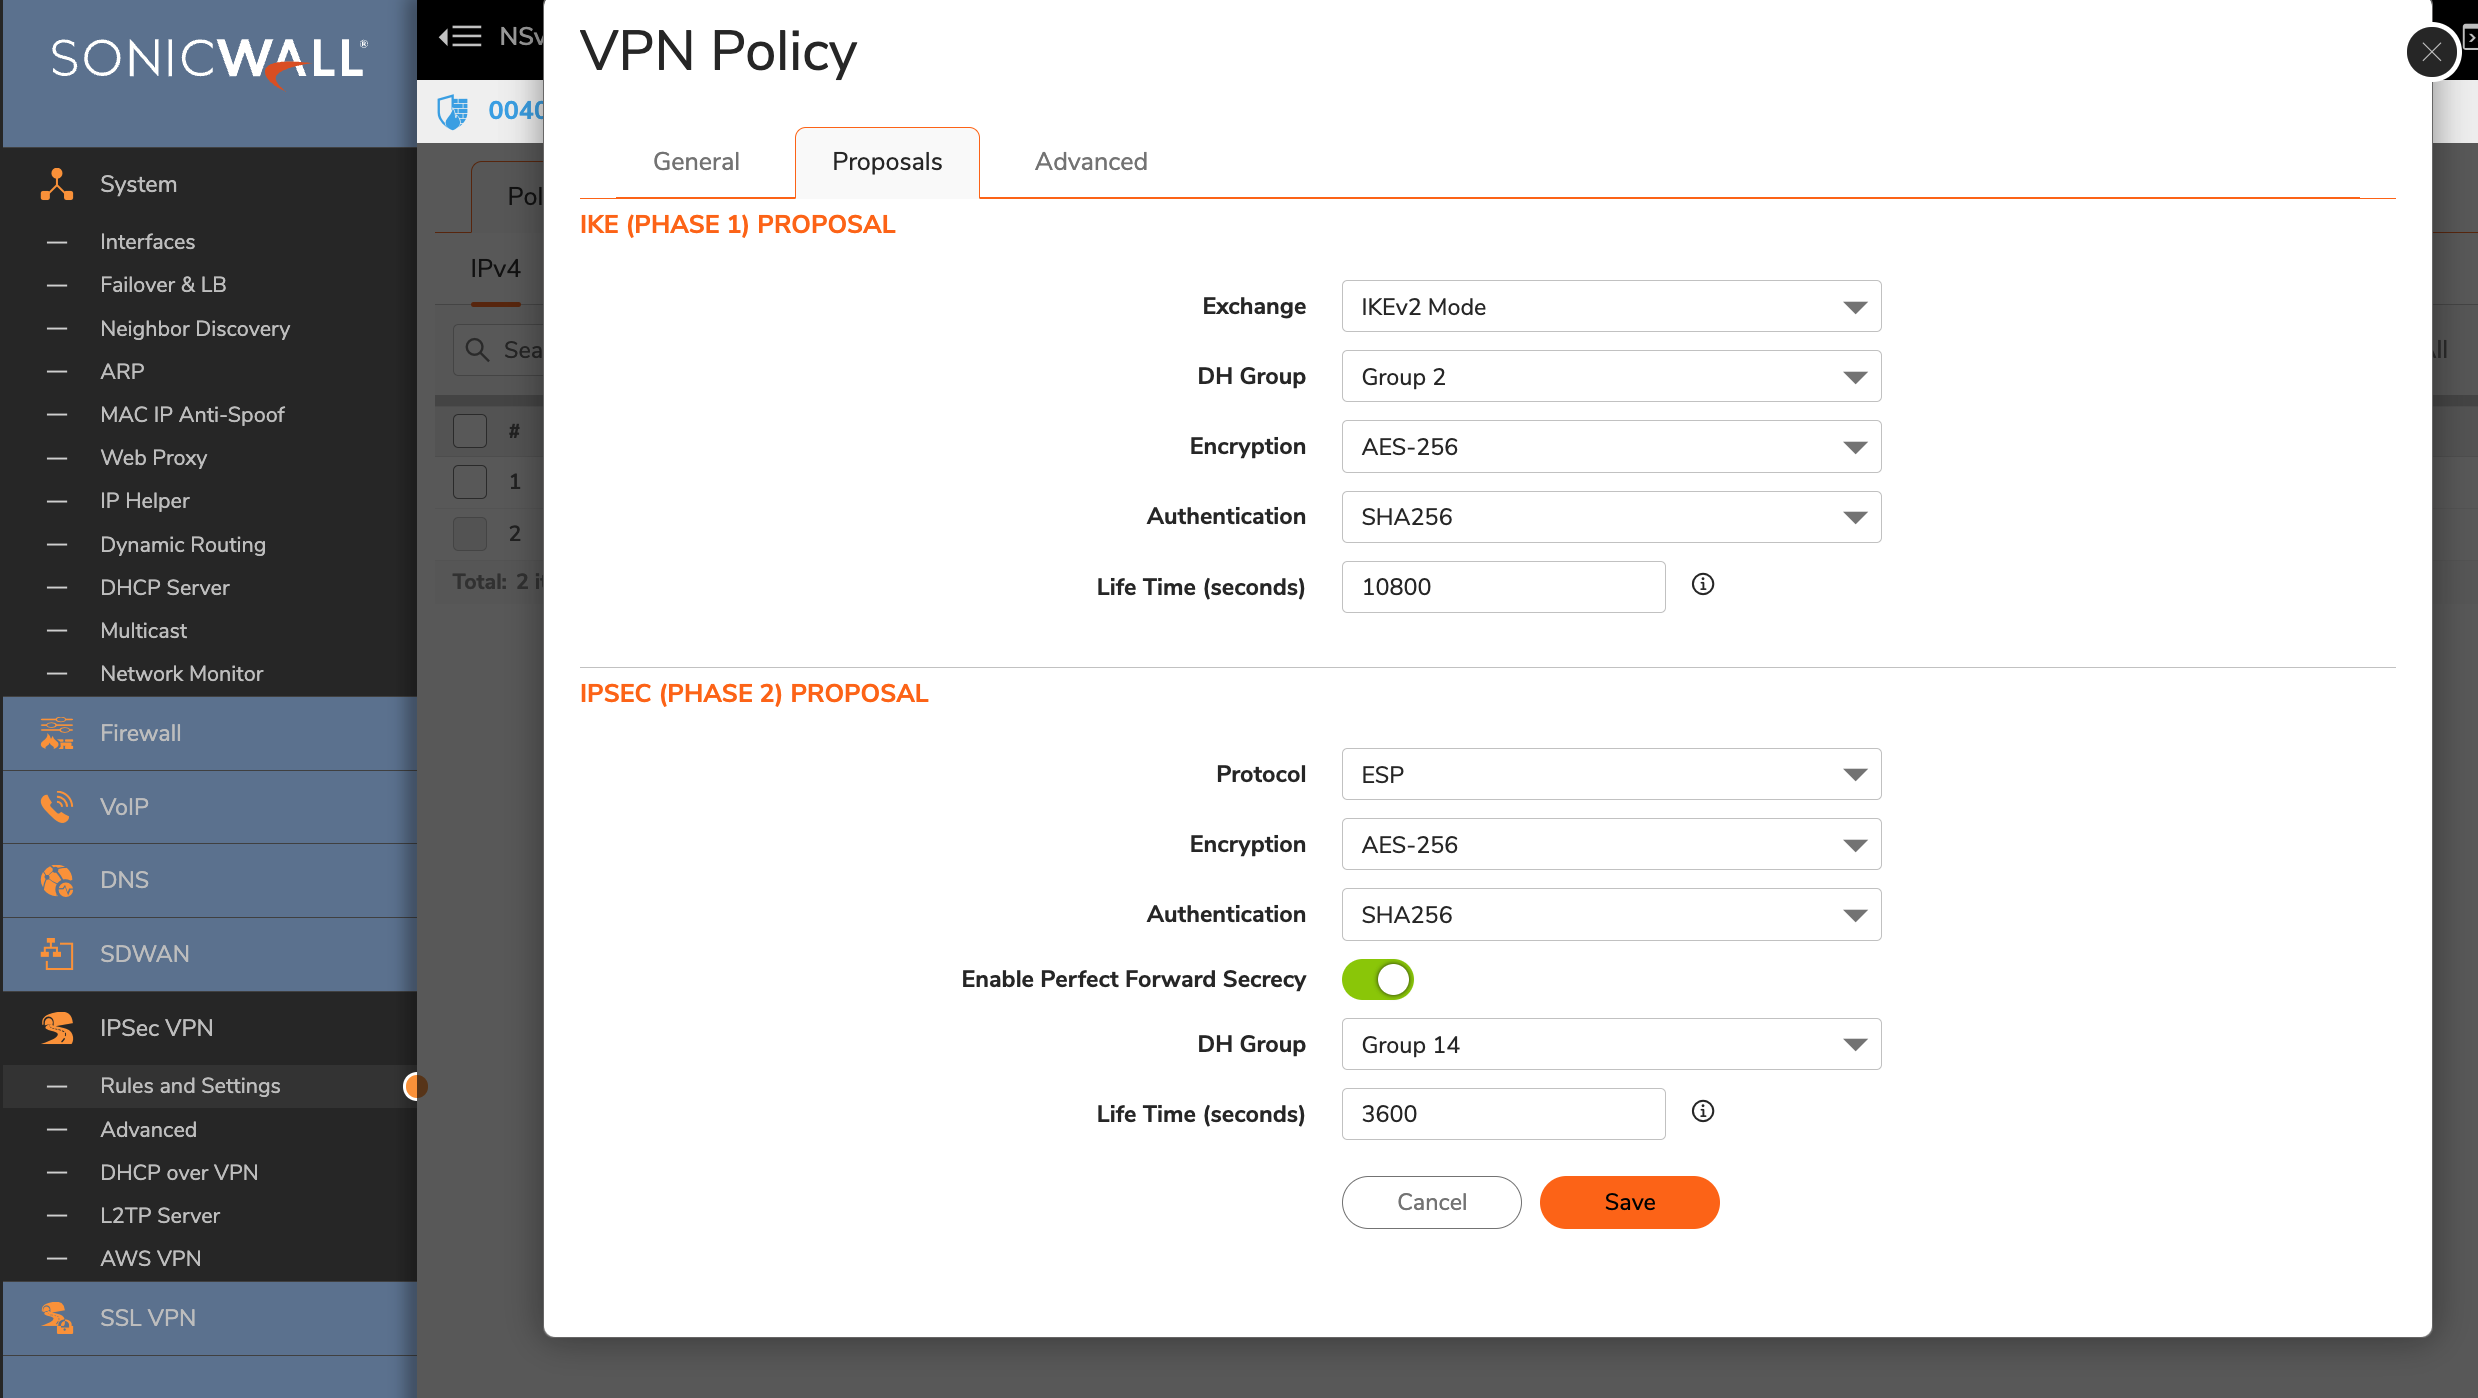
Goto Proposals
-
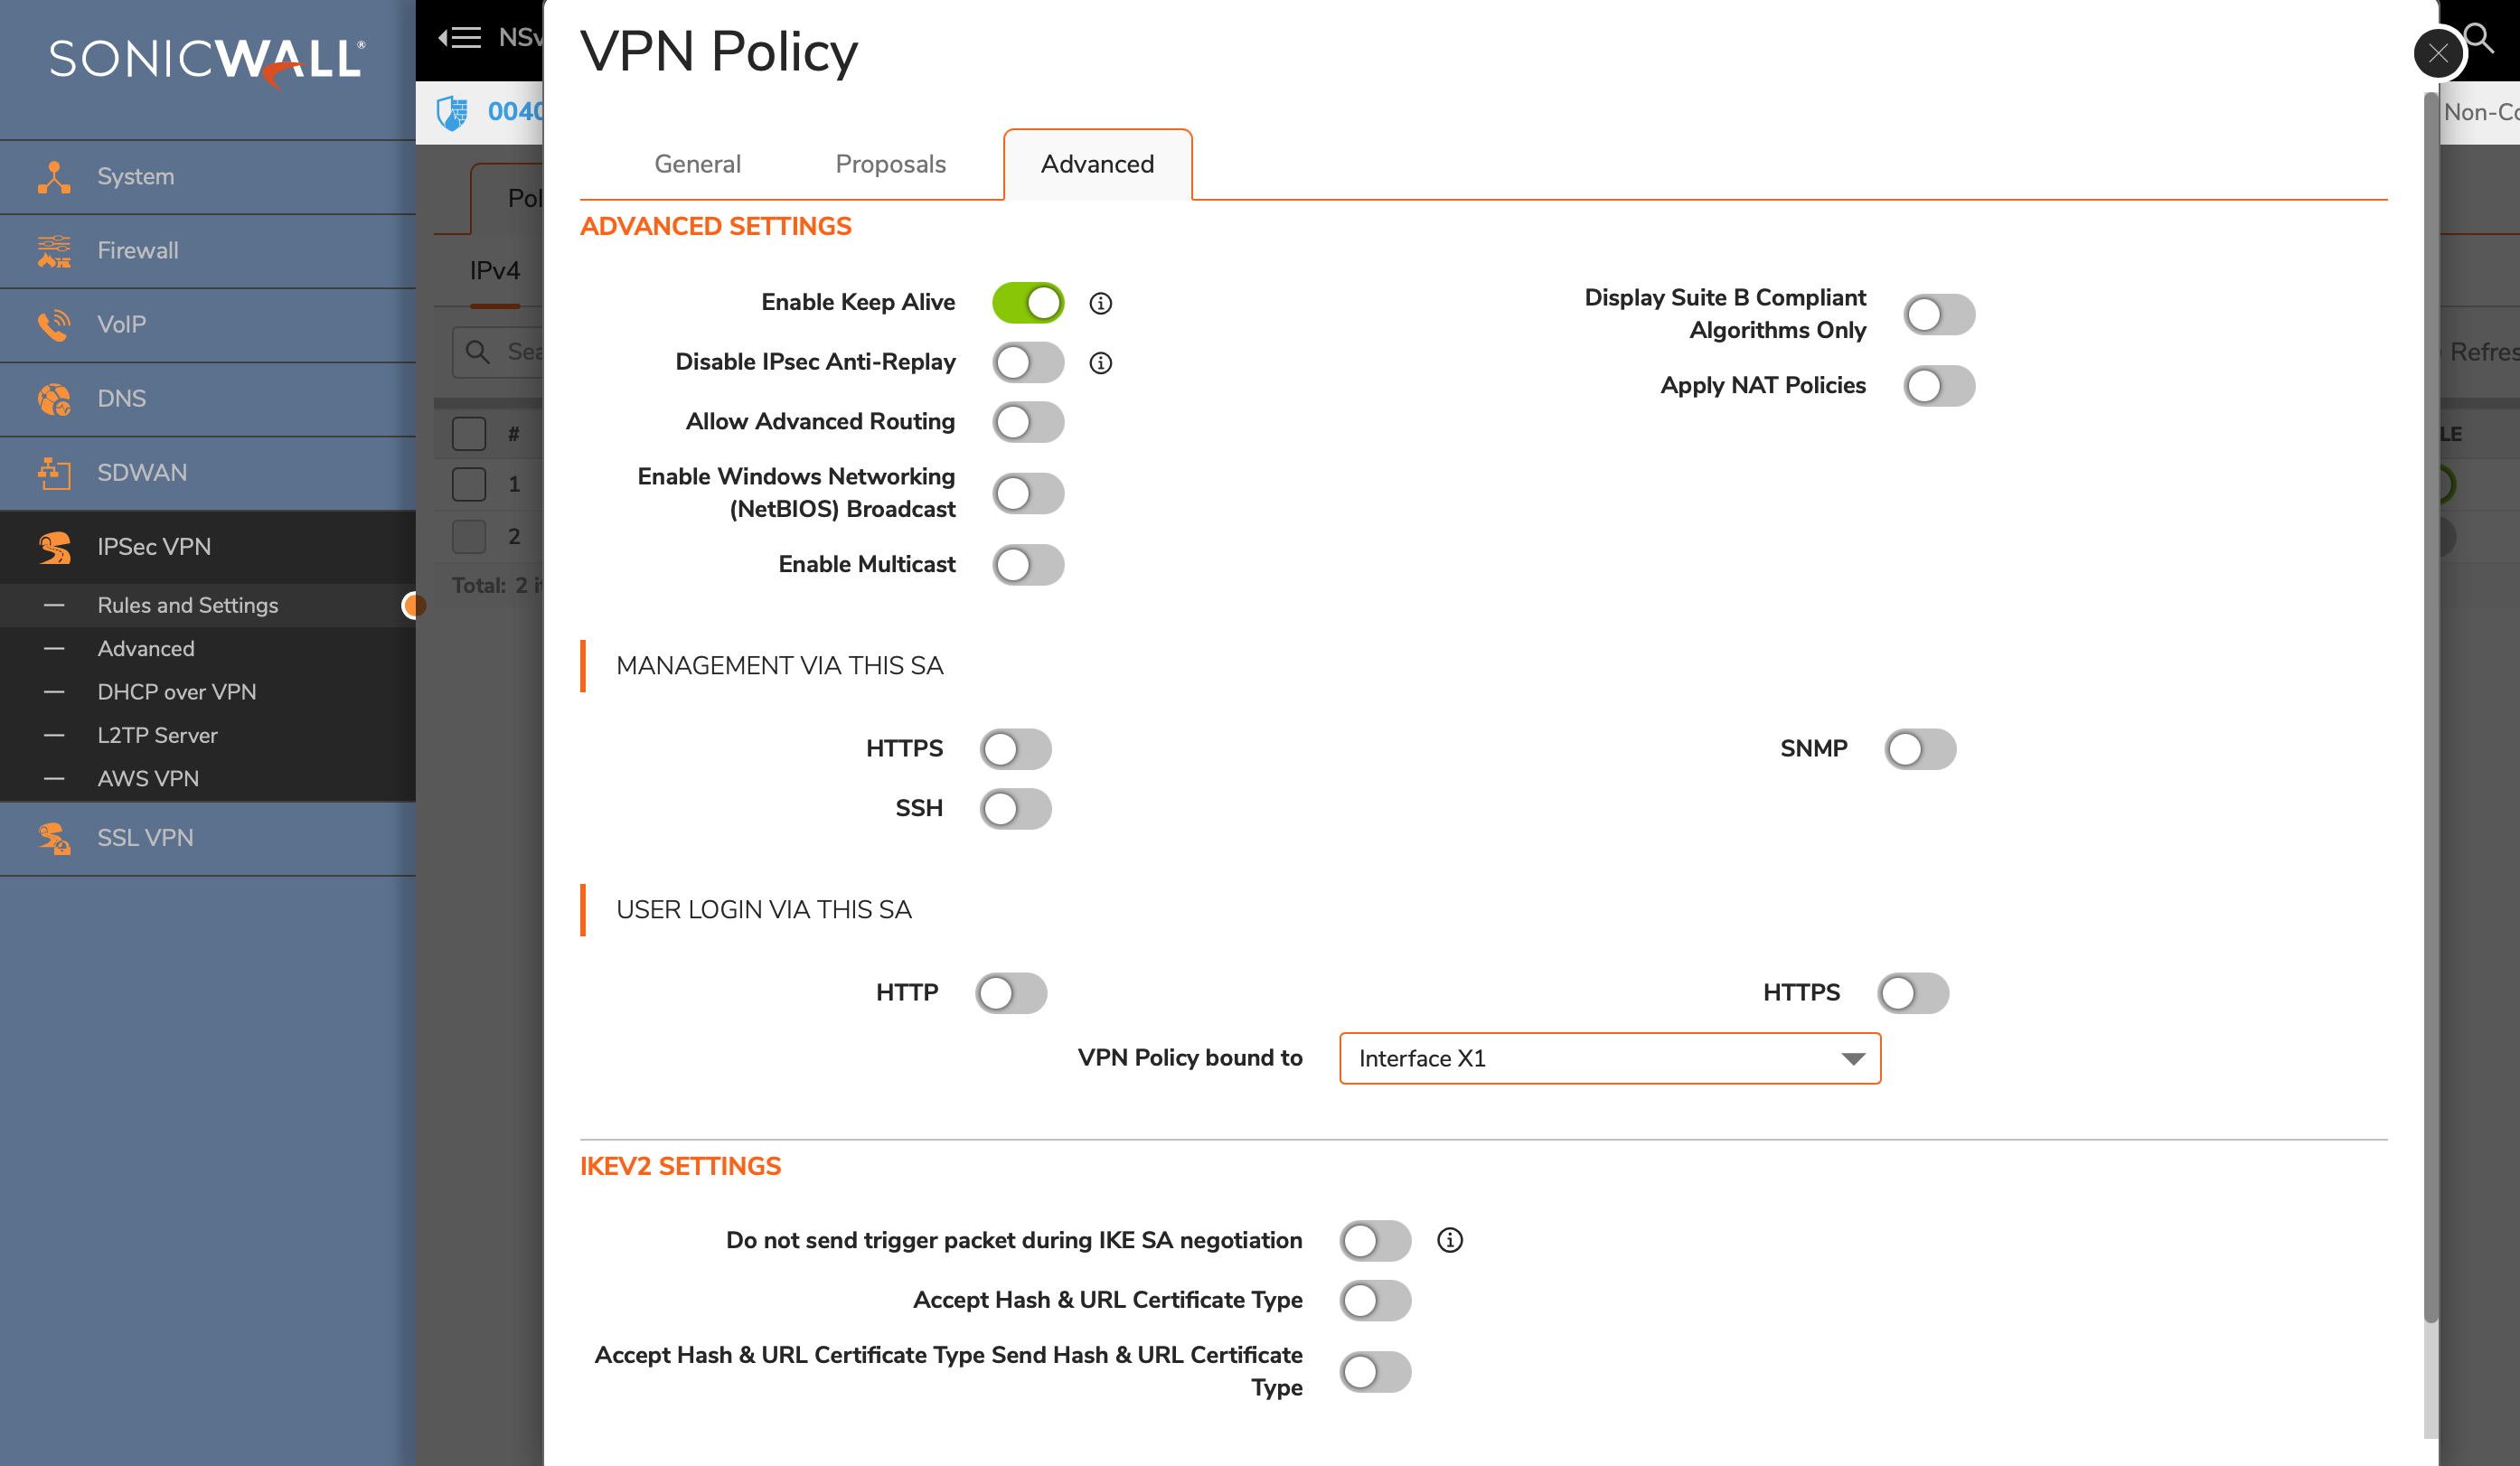
Advanced Settings
-
Click the OK button.
Task 3: Create a new tunnel interface
Next, we will create the tunnel interface that will be used to route the traffic.
-
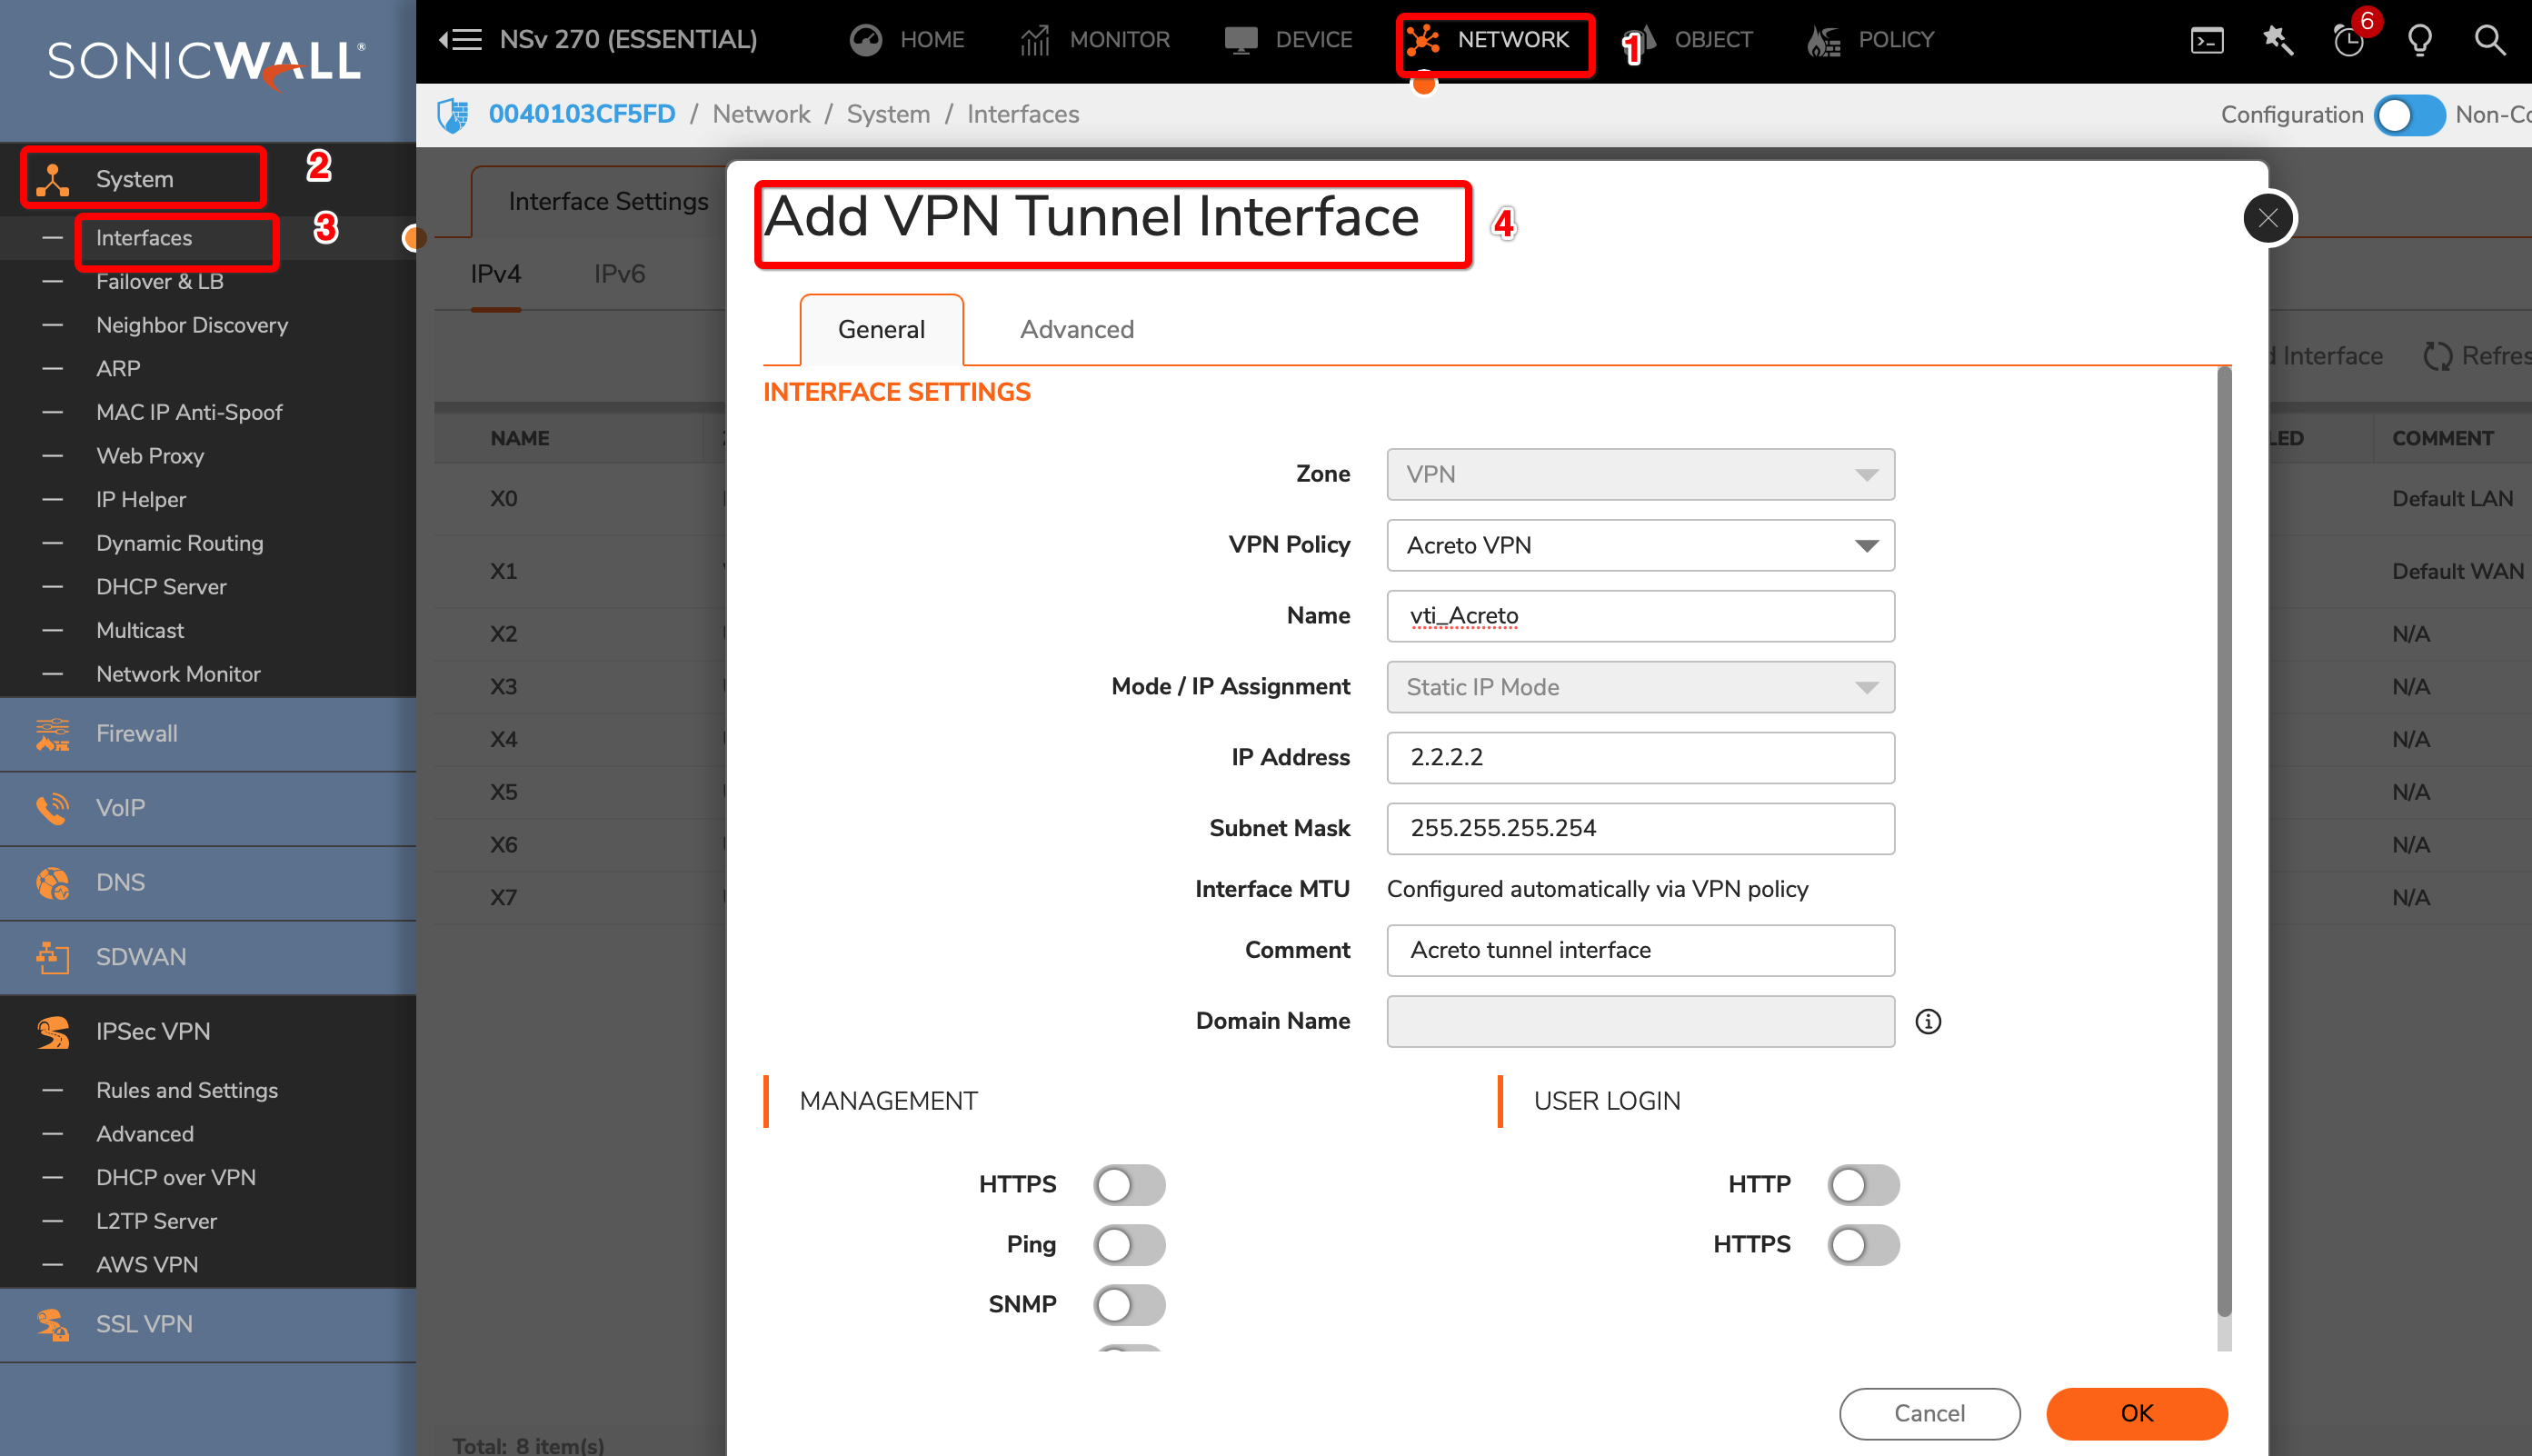
Goto NETWORK » System » Interfaces.
-
Click the Add Interface button and select VPN Tunnel Interface
-
Create a new interface with the following values:
- VPN Policy: Acreto
- Name: vti_Acreto
- IP Address: <any random IP as 2.2.2.2>
- Subnet Mask: 255.255.255.254
-
Click the OK button.
Task 4: Configure Routing
To allow the traffic from the LAN subnet to route through the tunnel interface, perform the following steps:
-
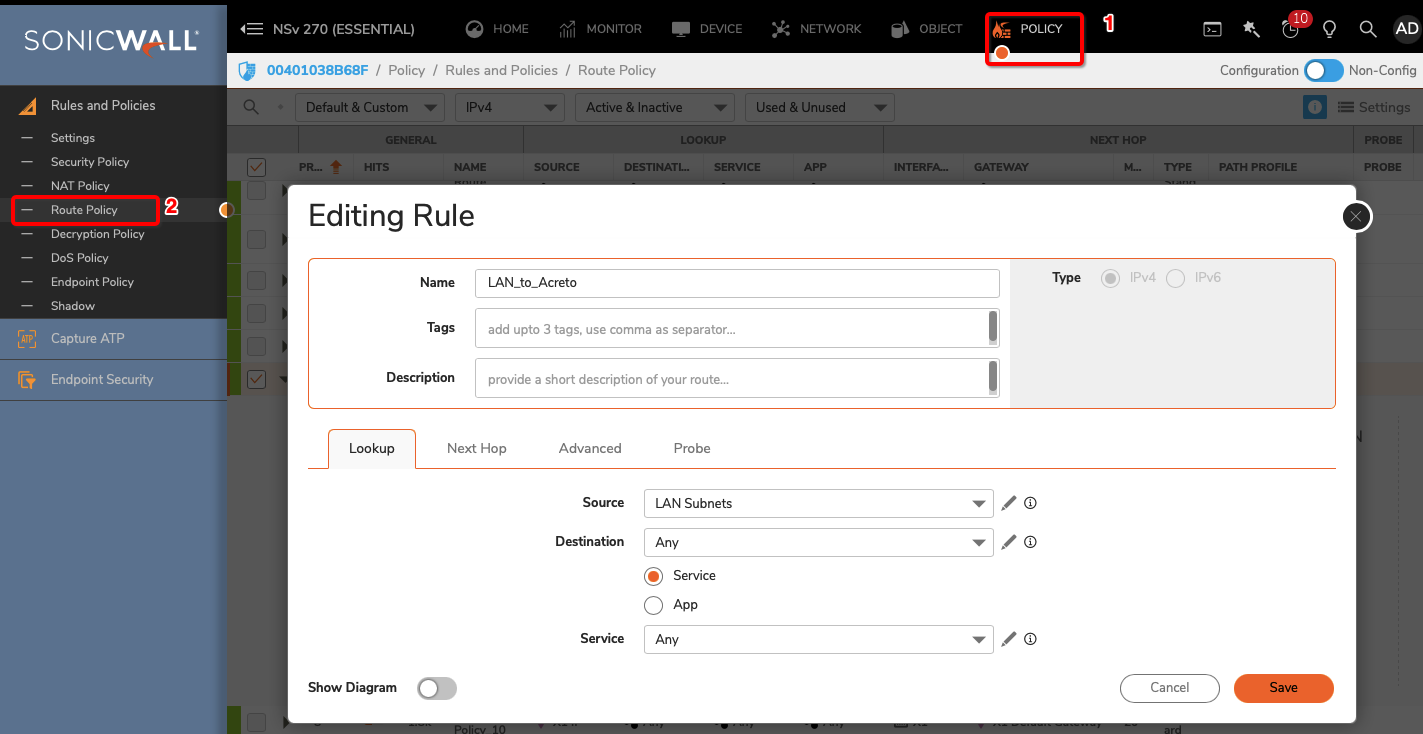
Goto POLICY » Rules and Policies » Route Policy
-
Create a new rule with the following values under General tab:
- Name: Lan_to_Acreto
- Source: <lan_subnets>
- Destination: Any
- Select Service radio button
- Service: Any
-
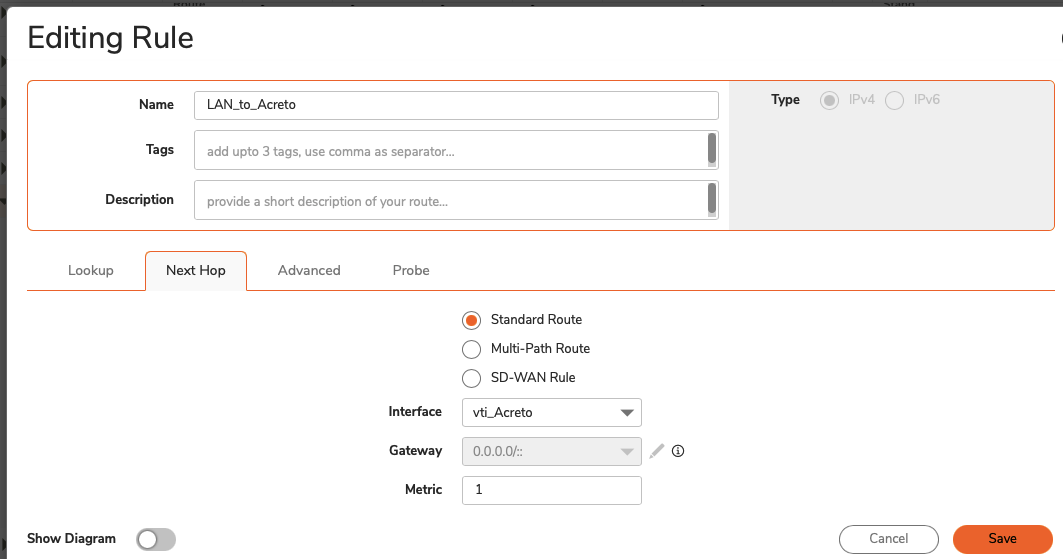
Click Next Hop tab and give the following values :
- Select Standard Route radio button
- Interface: <tunnel_interface>
- Click the SAVE button
Task 5: Configure Security Policy
Verify existing or create a new access rule to allow the desired traffic
-
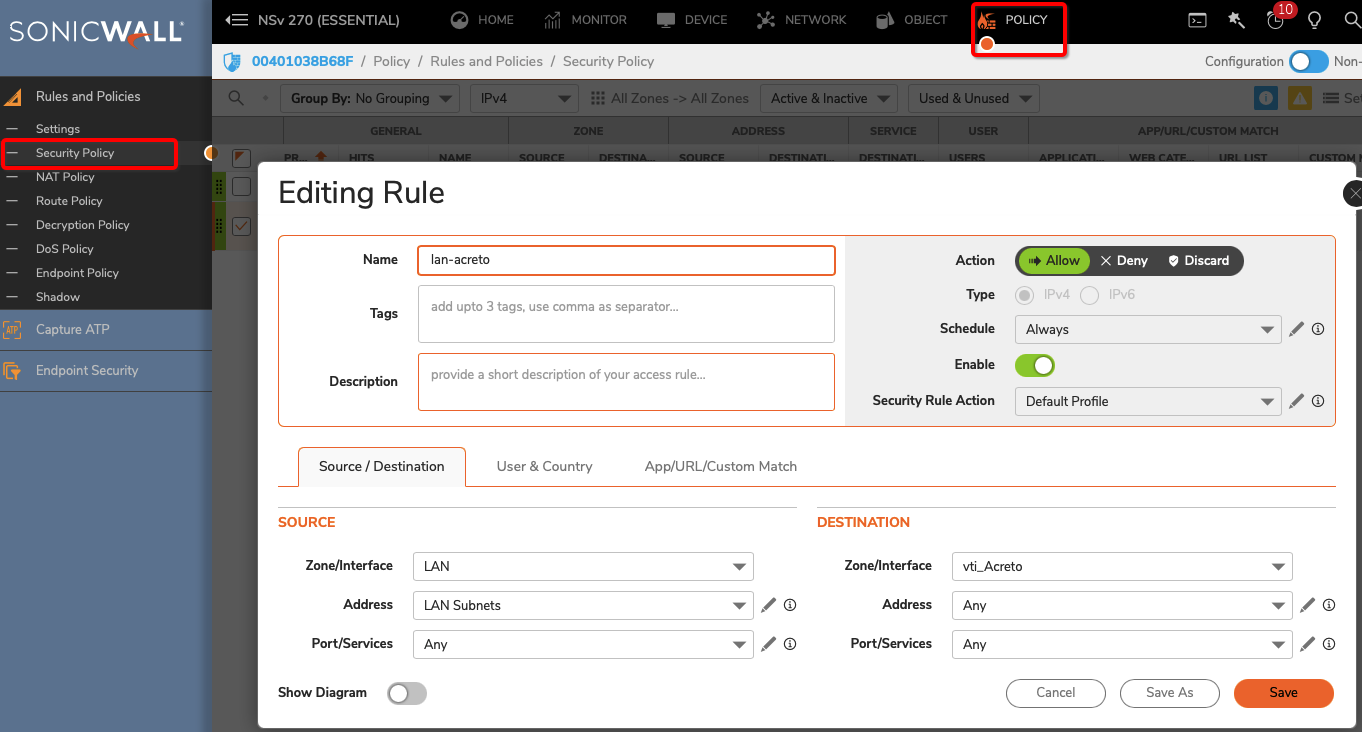
Goto POLICY » Rules and Policies » Security Policy
-
Click the Add button
-
Under General, provide the following values:
- Name: To_Acreto
- Action: Allow
- From: <Lan_interface>
- To: <tunnel_interface>
- Source Port: Any
- Service: Any
- Source: <lan_subnet>
- Destination: Any
- Click the OK button
Task 6: Verify the connection
Once the tunnel connection is successfully established, its status will change to UP.
-
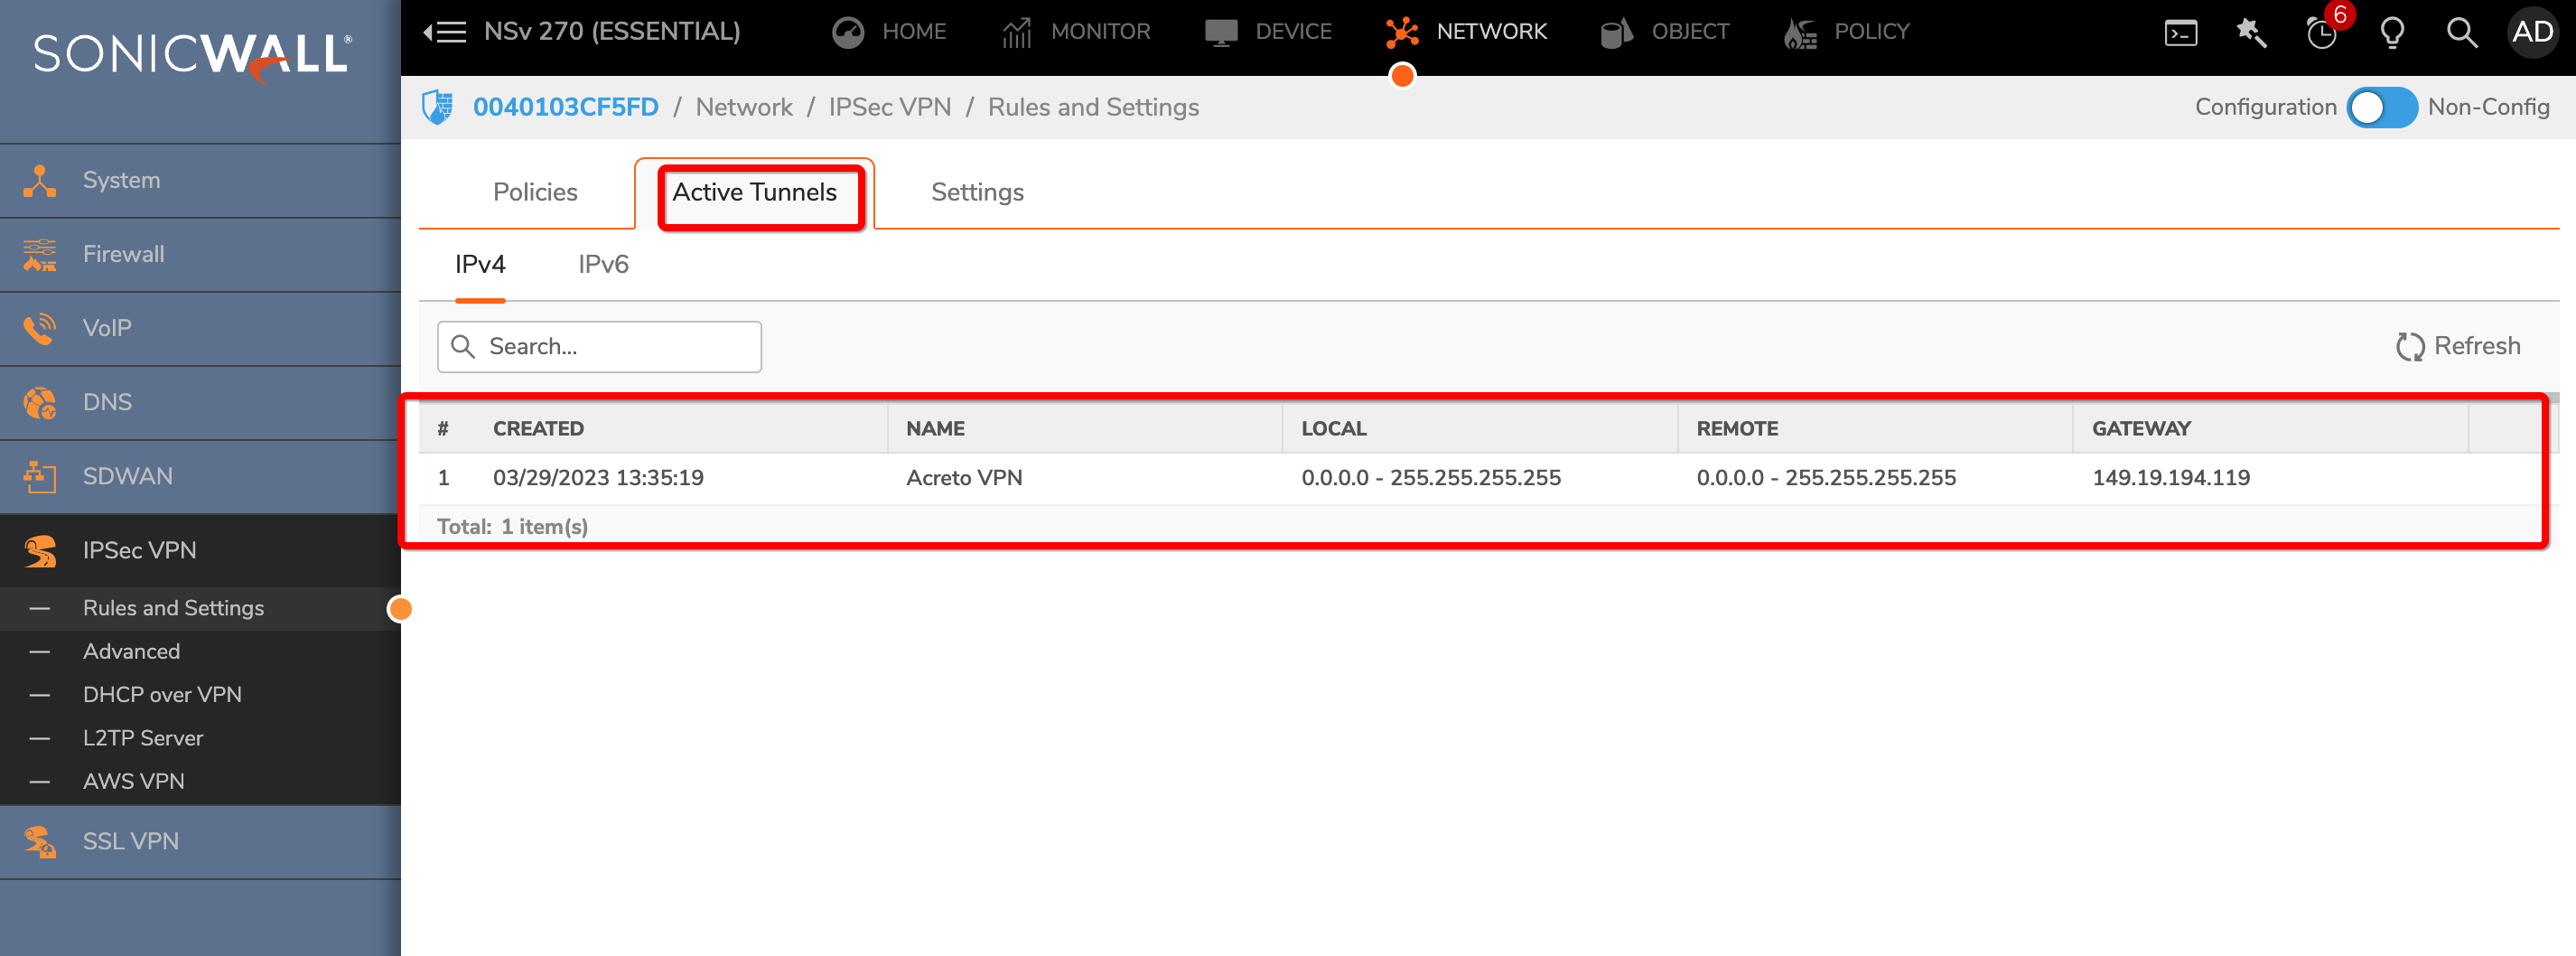
To verify the status on Sonicwall, navigate to goto NETWORK » IPsec VPN » Rules and Settings » Active Tunnels tab.
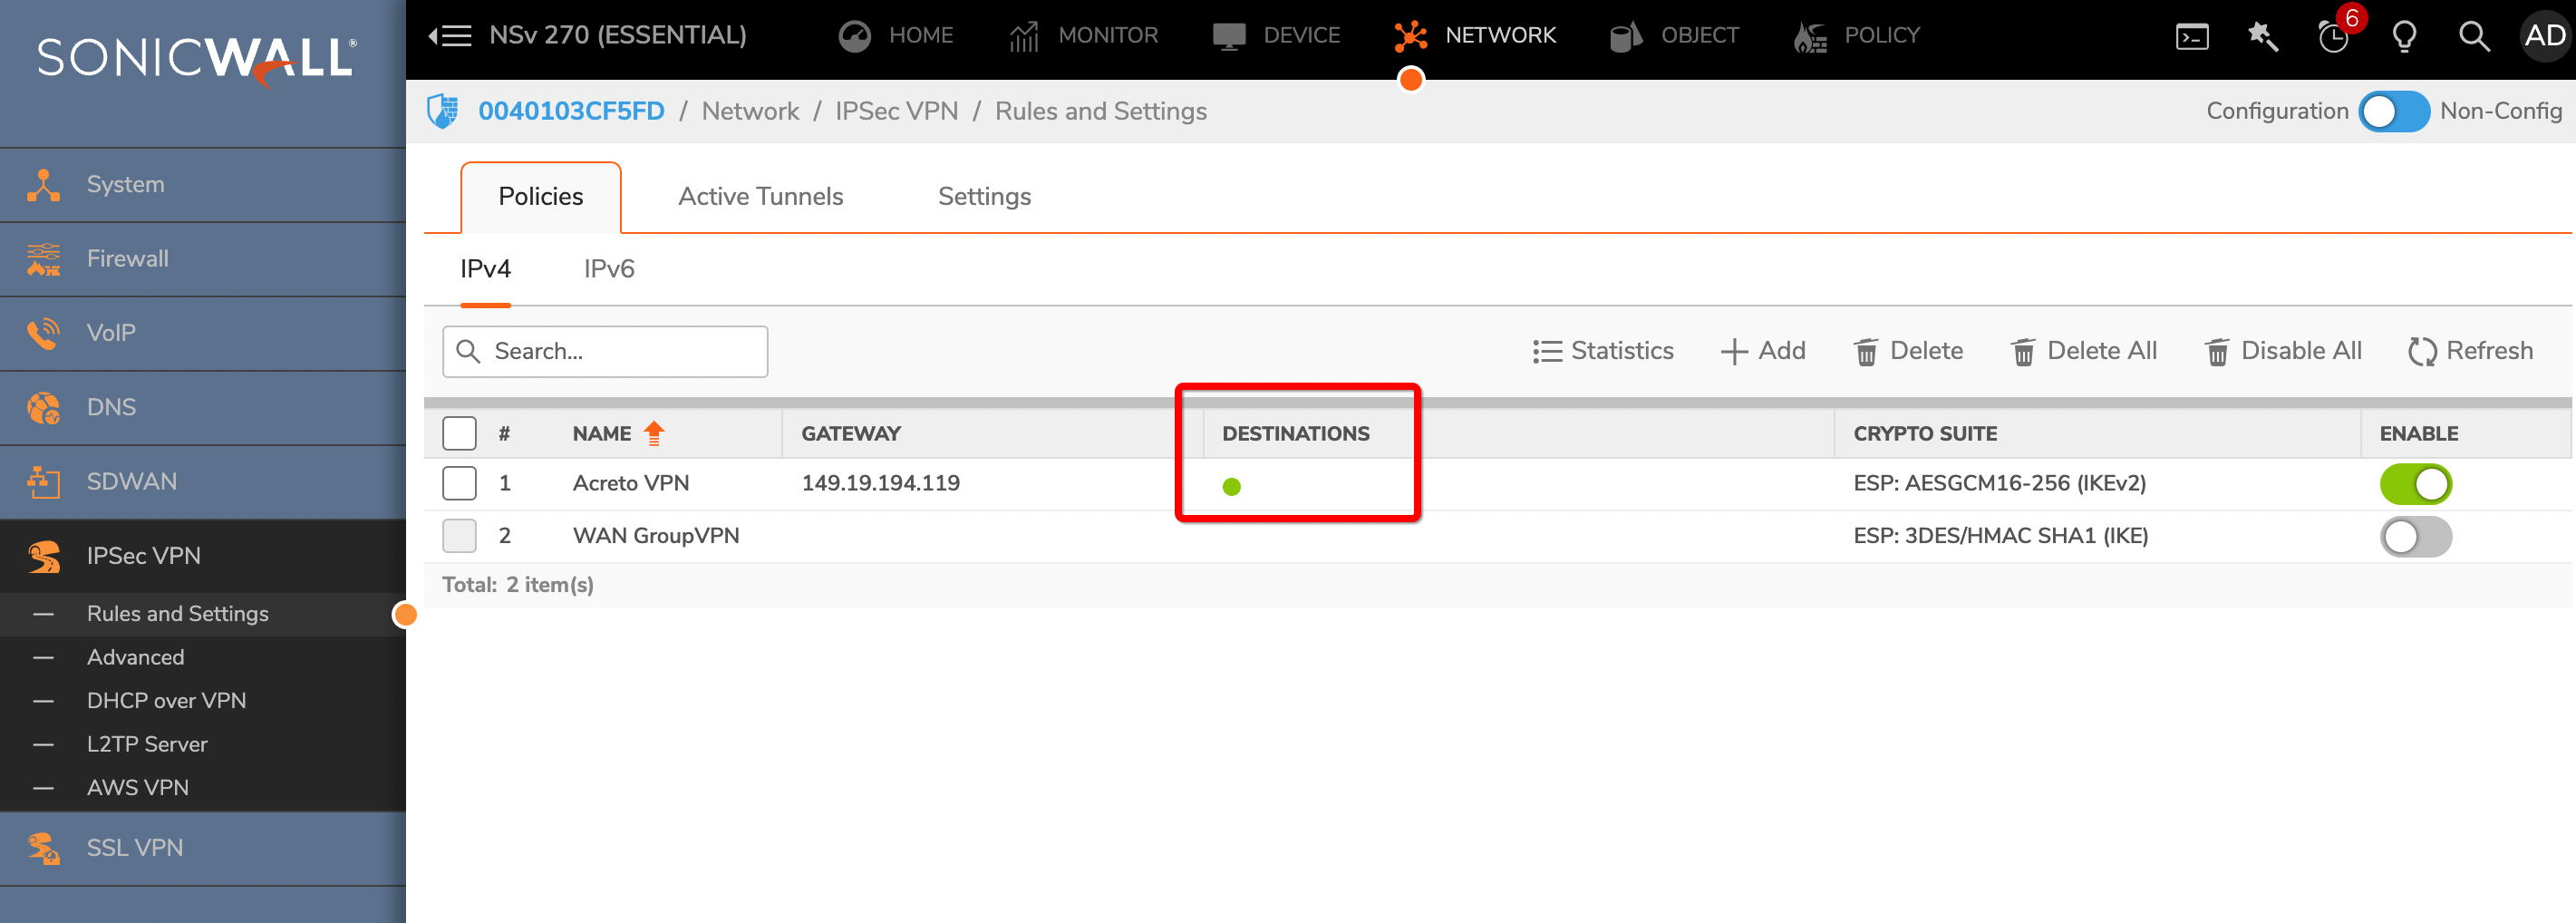
- The status of the VPN policy should be Green.
- Currently Active VPN Tunnels
The active VPN tunnel will be shown in the list.
-
Execute
tracert 1.1.1.1(ortraceroute 1.1.1.1) on internal server check the route to external host1.1.1.1. It should show Acreto’s IP in the path.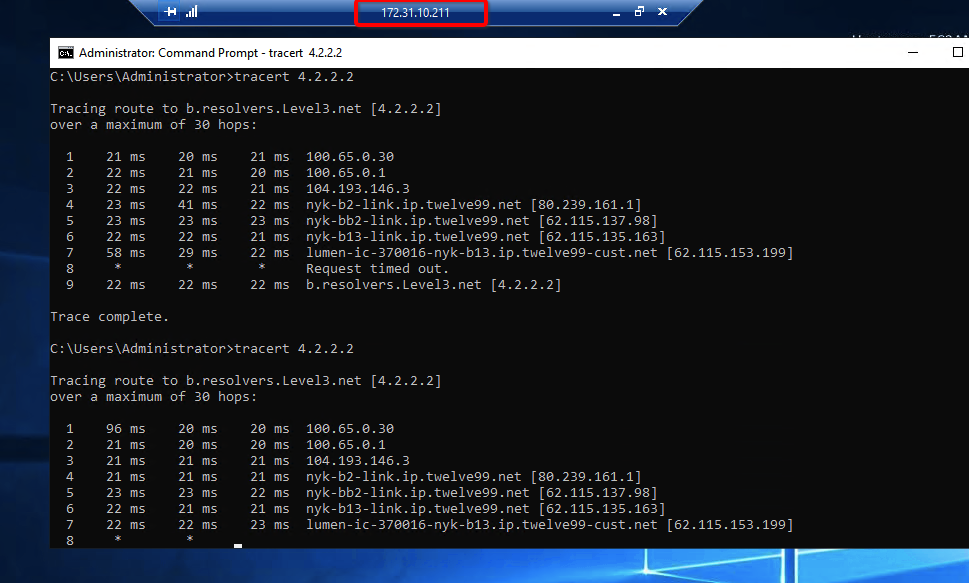

Summary
Once the VPN connection is successfully established, all the internal traffic to the internet will be routed through Acreto.
